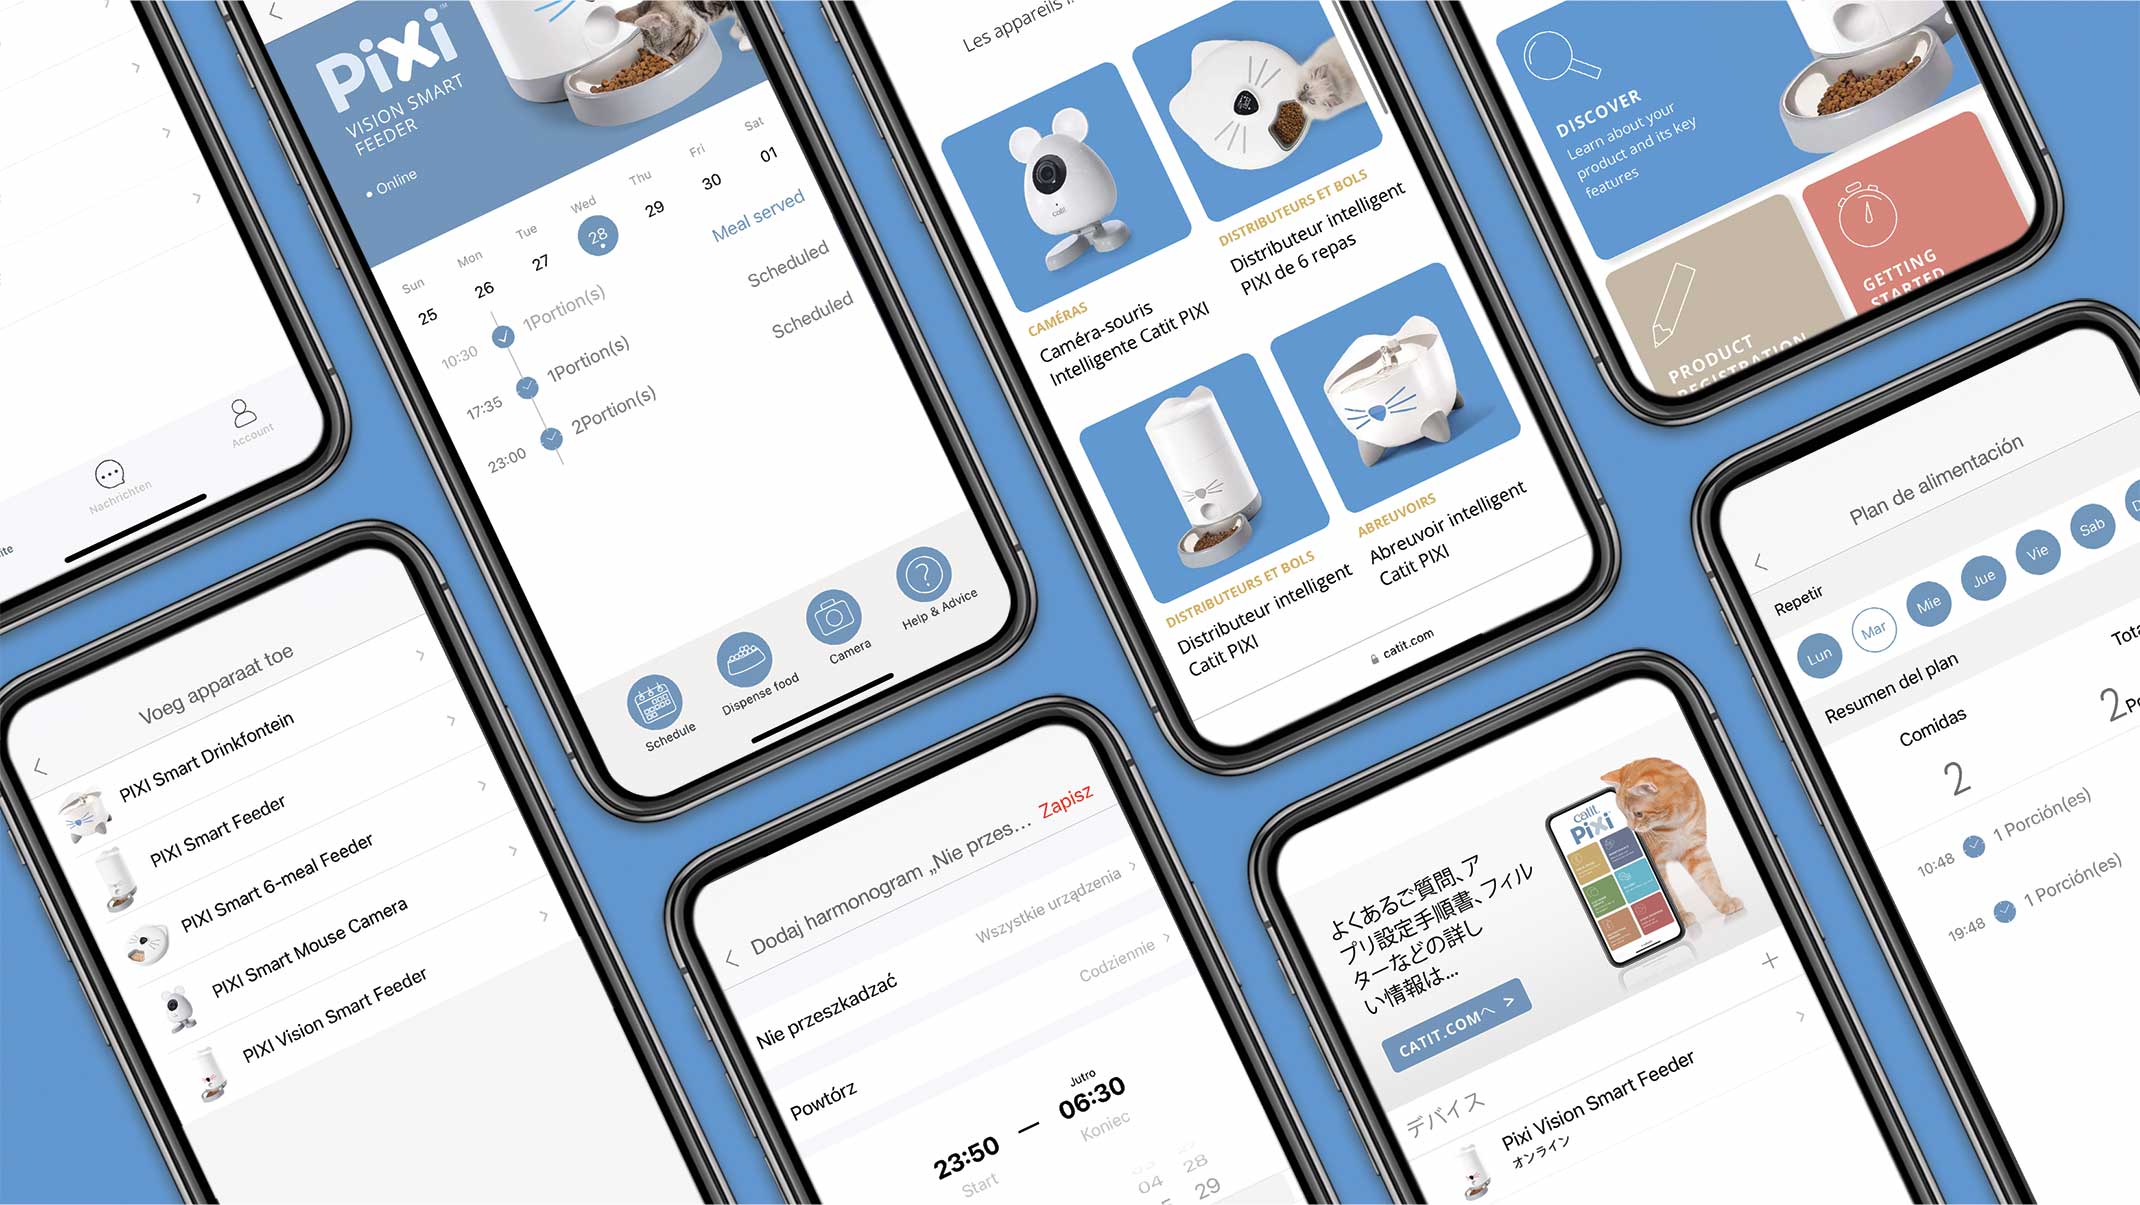
Step 5 of 5 – app walkthrough – discover all awesome functions
If you have additional questions about your Catit PIXI Vision Smart Feeder, please check our help and advice page.
Please note that the app features below can only be accessed once you set up your Catit PIXI Vision Smart Feeder and paired it with the app as shown in our Setting up your PIXI Vision Smart Feeder blog.
Continue reading to learn about each of the app’s features, or use one of the quick-links below to jump ahead:
- 5.1 MicroSD card
- 5.2 Feeding plan
- 5.3 Feeder Home Screen
- 5.4 Adjust or delete meals
- 5.5 Dispense food instantly
- 5.6 Feeding sound/message
- 5.7 Audio & Video settings
- 5.8 Recording settings
- 5.9 Motion detection settings
- 5.10 Whisker color & intensity
- 5.11 Do not disturb schedule
- 5.12 Share your device
- 5.13 Manage your shared devices
- 5.14 Camera
5.1 MicroSD card
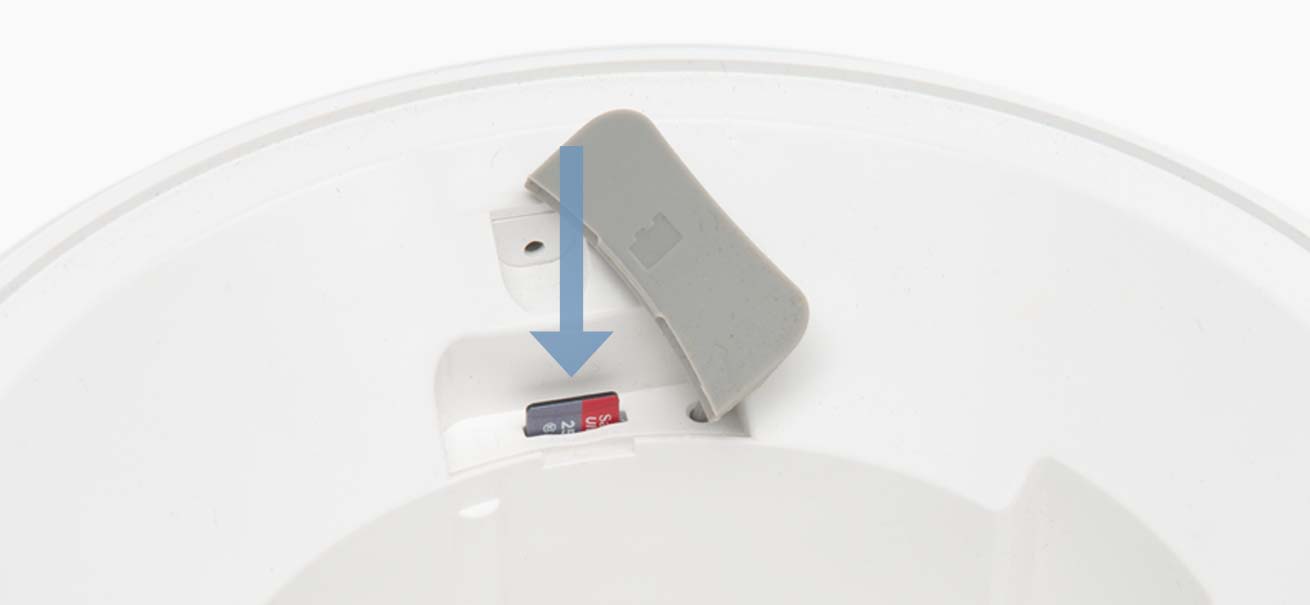
Your feeder’s live features will work just fine without the use of a MicroSD card, but if you would like to have your feeder make automatic, motion-activated recordings, you need to insert a MicroSD card (max. 256 GB) into the feeder’s card slot.
Insert a MicroSD card (max. 256GB storage – not included) in the slot in the feeder base before placing the reservoir on top.
After insertion, open the recording settings by tapping the gear at the top right of the screen in the PIXI app, then selecting recording settings, and look for the message ‘MicroSD card status – normal’.
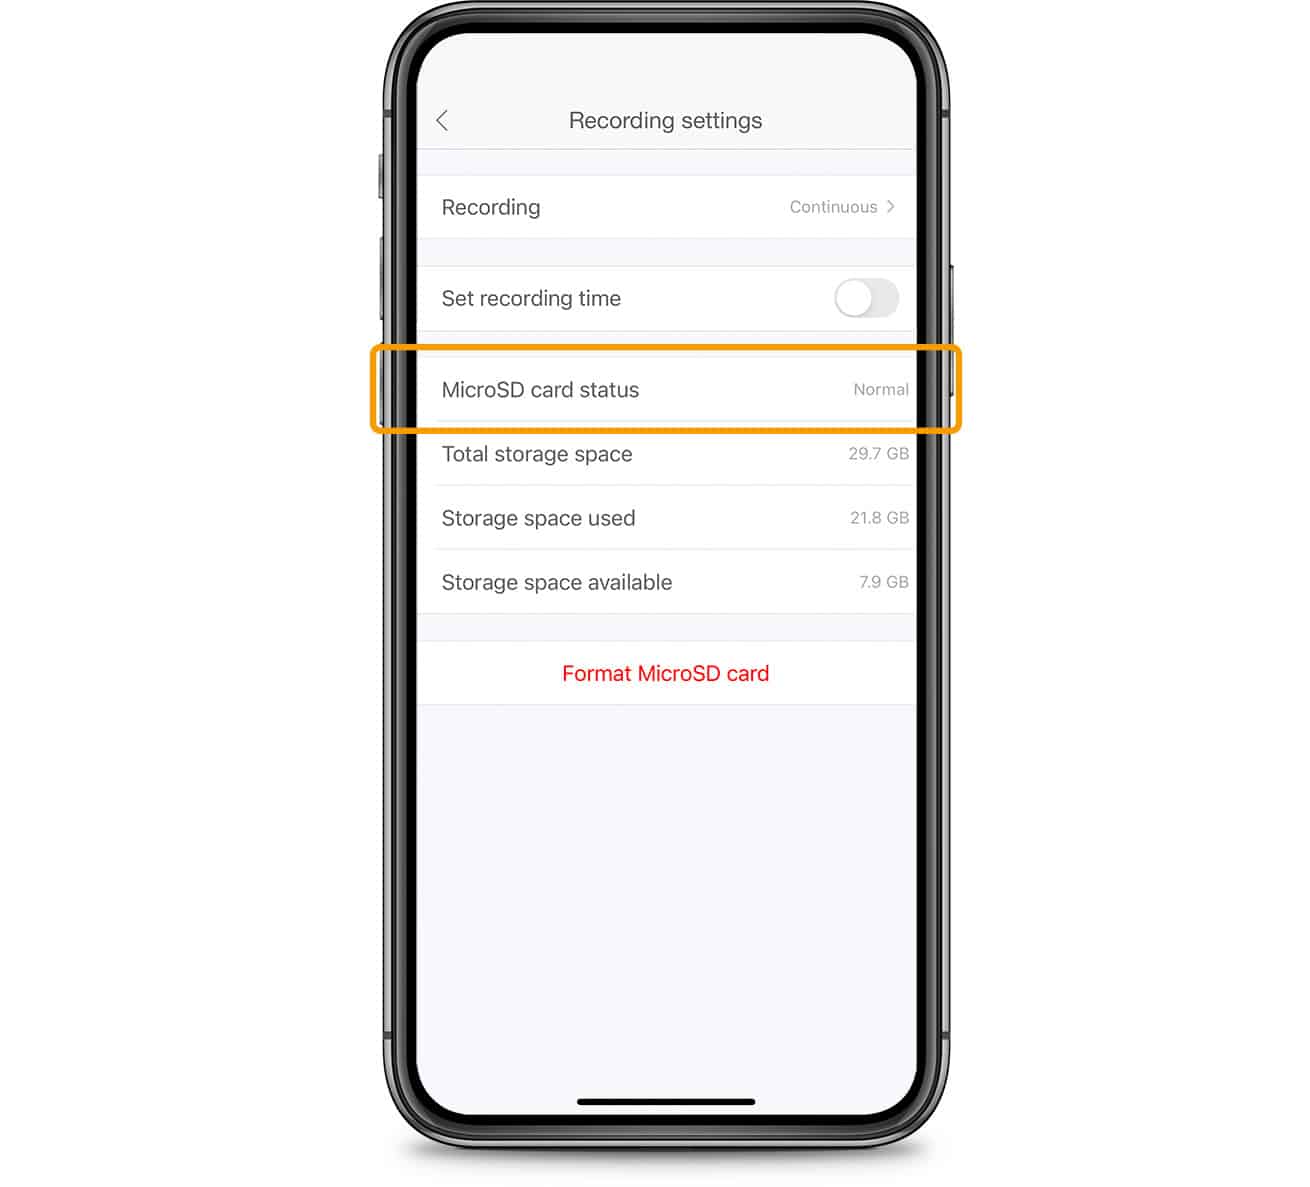
If the MicroSD card is not found, or an error message appears, tap ‘Format MicroSD card’ at the bottom of your screen. Formatting may remove all data from the SD card, so ensure the card is empty or does not have important data on it before proceeding.
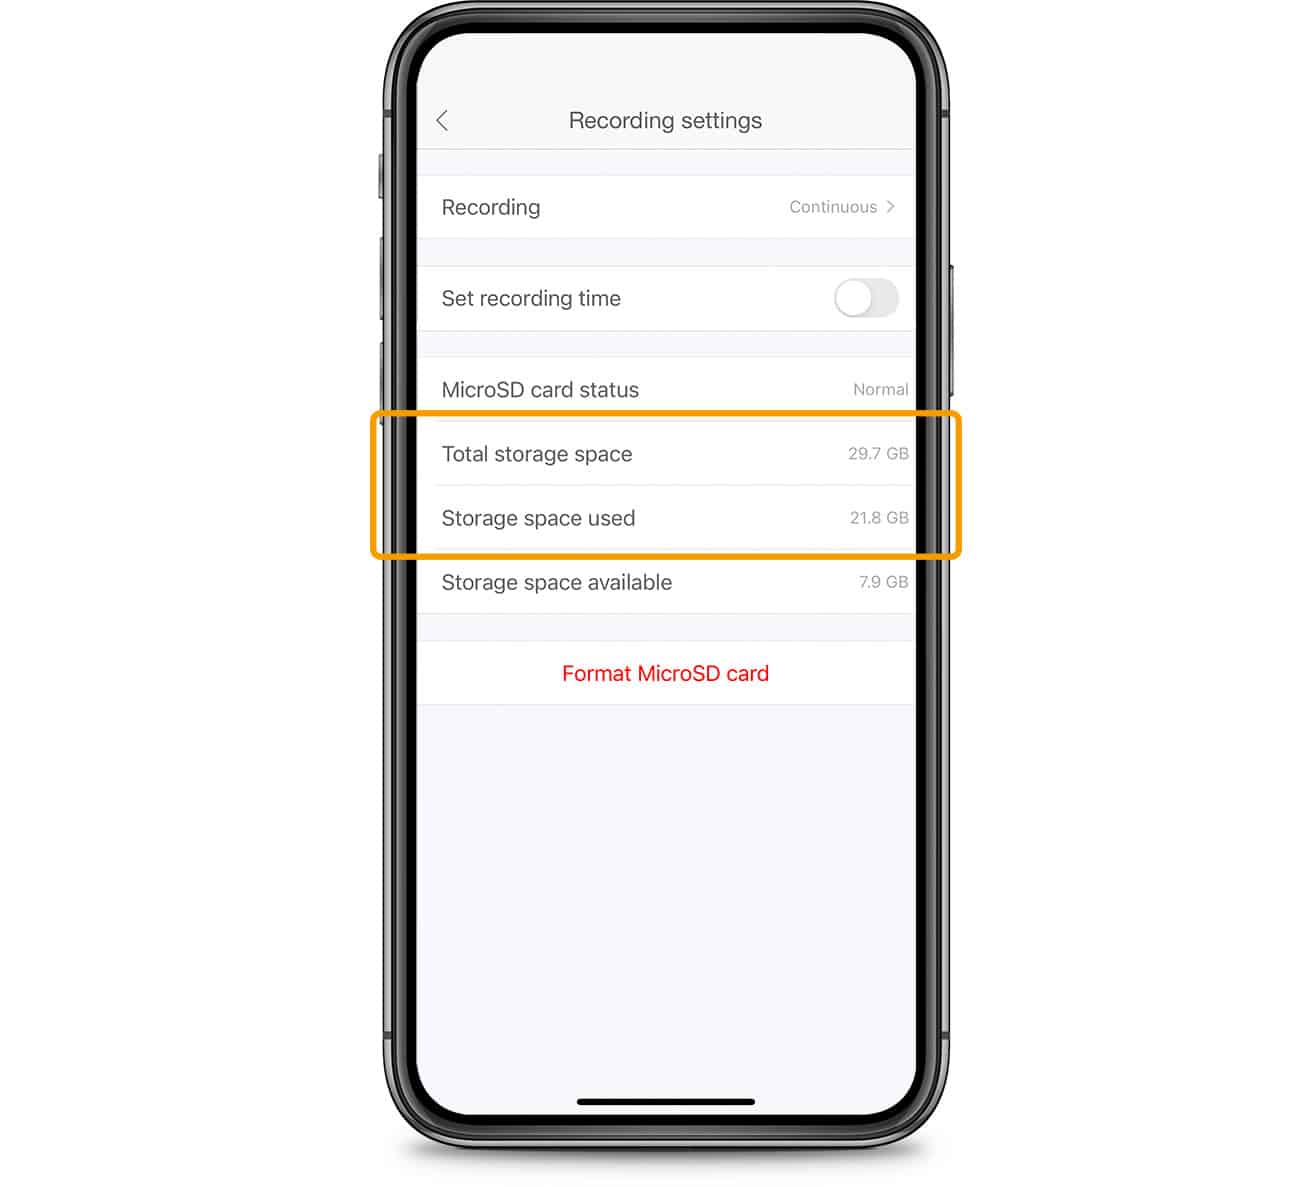
The ‘Recording Settings’ menu also displays how much space is left on your MicroSD card out of the total storage space.
5.2 Set your cat’s feeding plan
Open the Catit PIXI app and select your feeder. Next, tap ‘schedule’. Here, you can create a feeding schedule by adding individual meals. To do so, tap ‘add meal’.
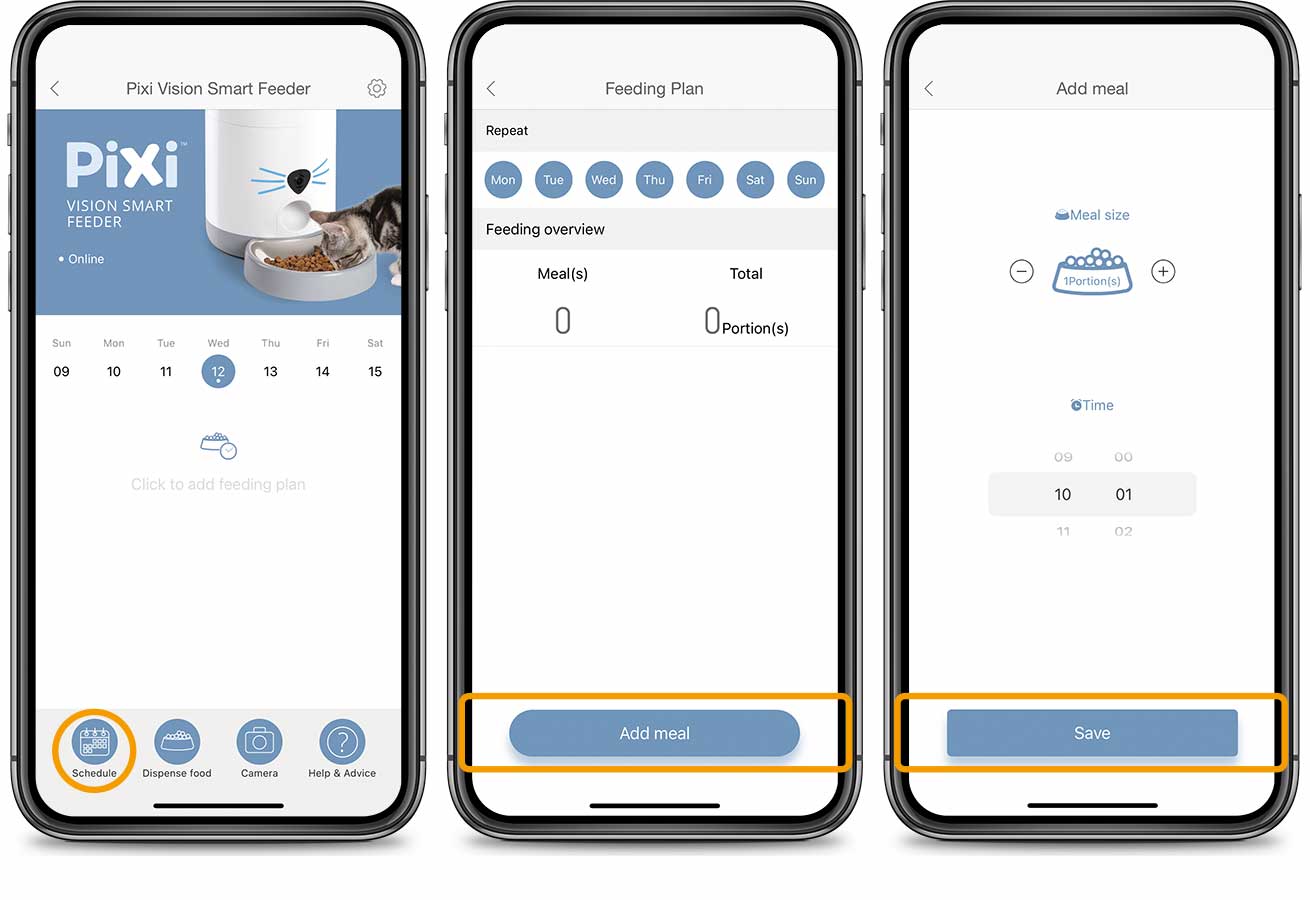
You can set a different meal size for each meal. Select how many portions the meal you are scheduling has to consist of. Next, set a time and save.
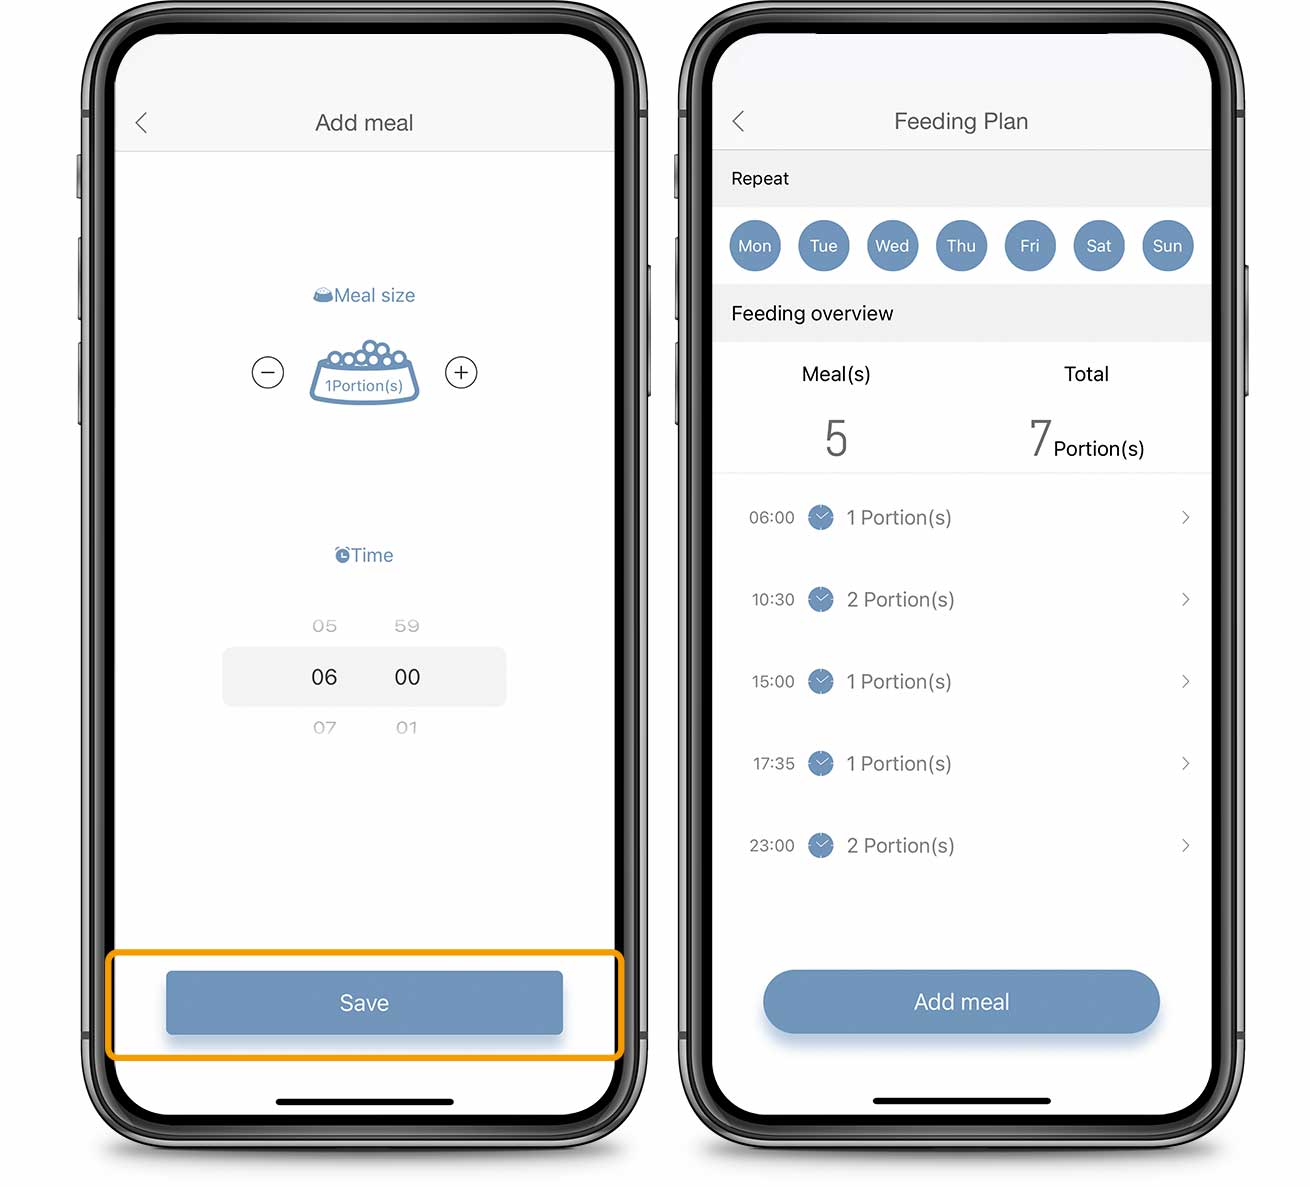
Not sure how many portions your cat would have to eat in 1 day? Have a look at this helpful article on creating a feeding plan, and make sure you have your cat food packaging at hand.
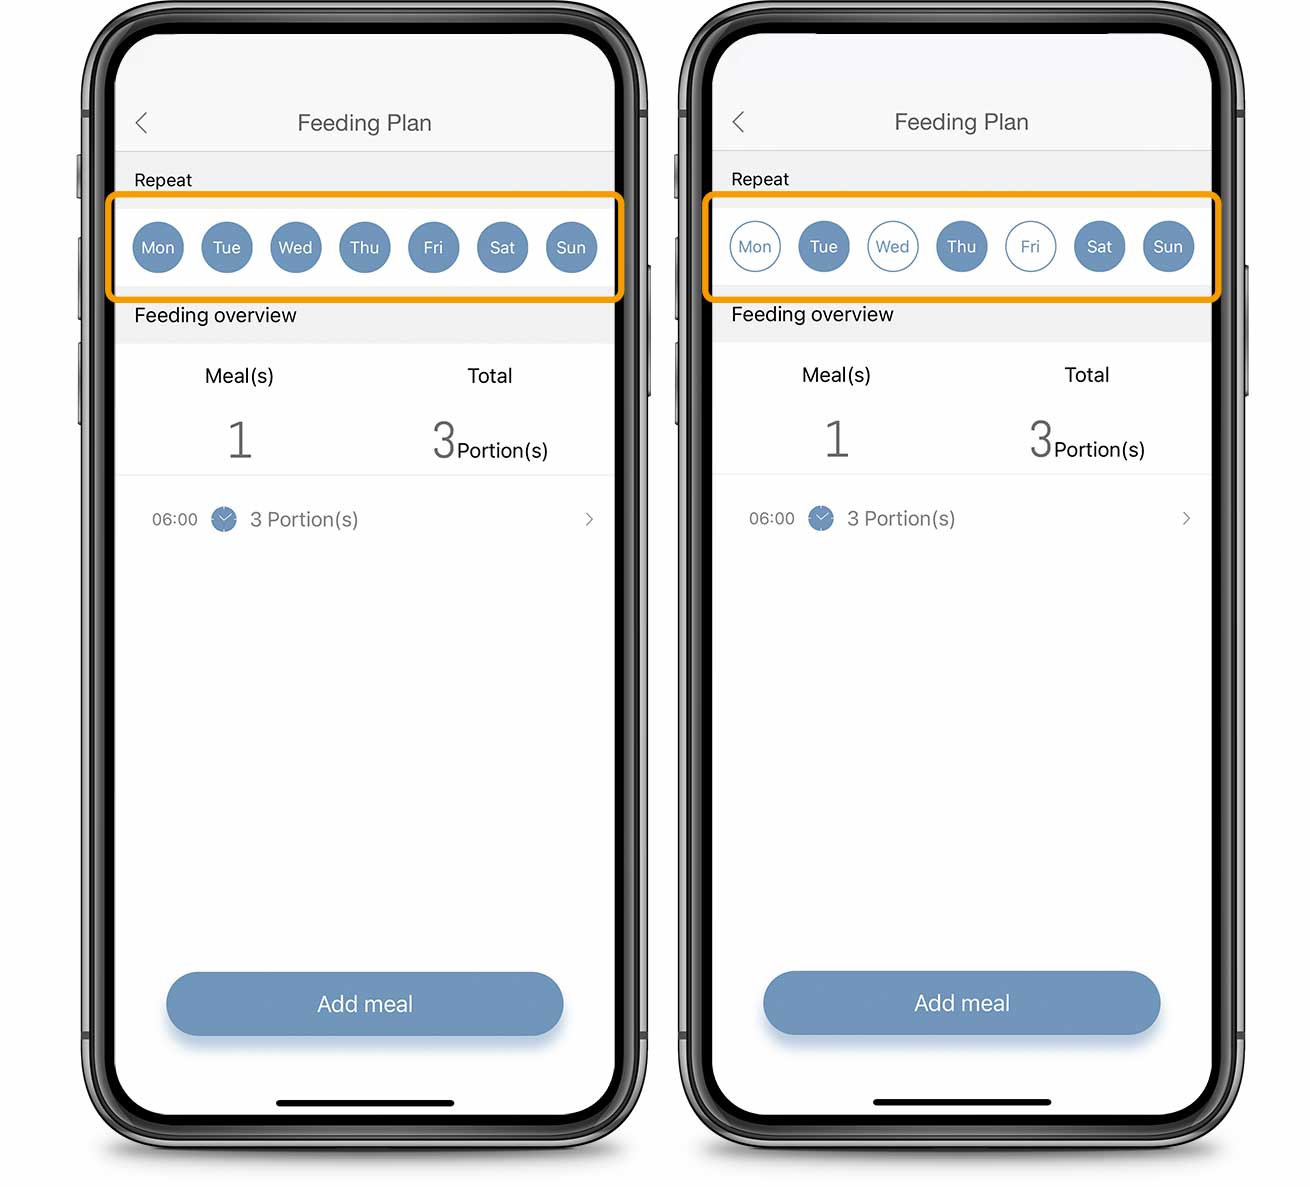
By default, the 24h feeding plan you just set will be repeated each day, indefinitely. To skip a certain day of the week, deselect it at the top by tapping it. You can’t set a different schedule for different days.
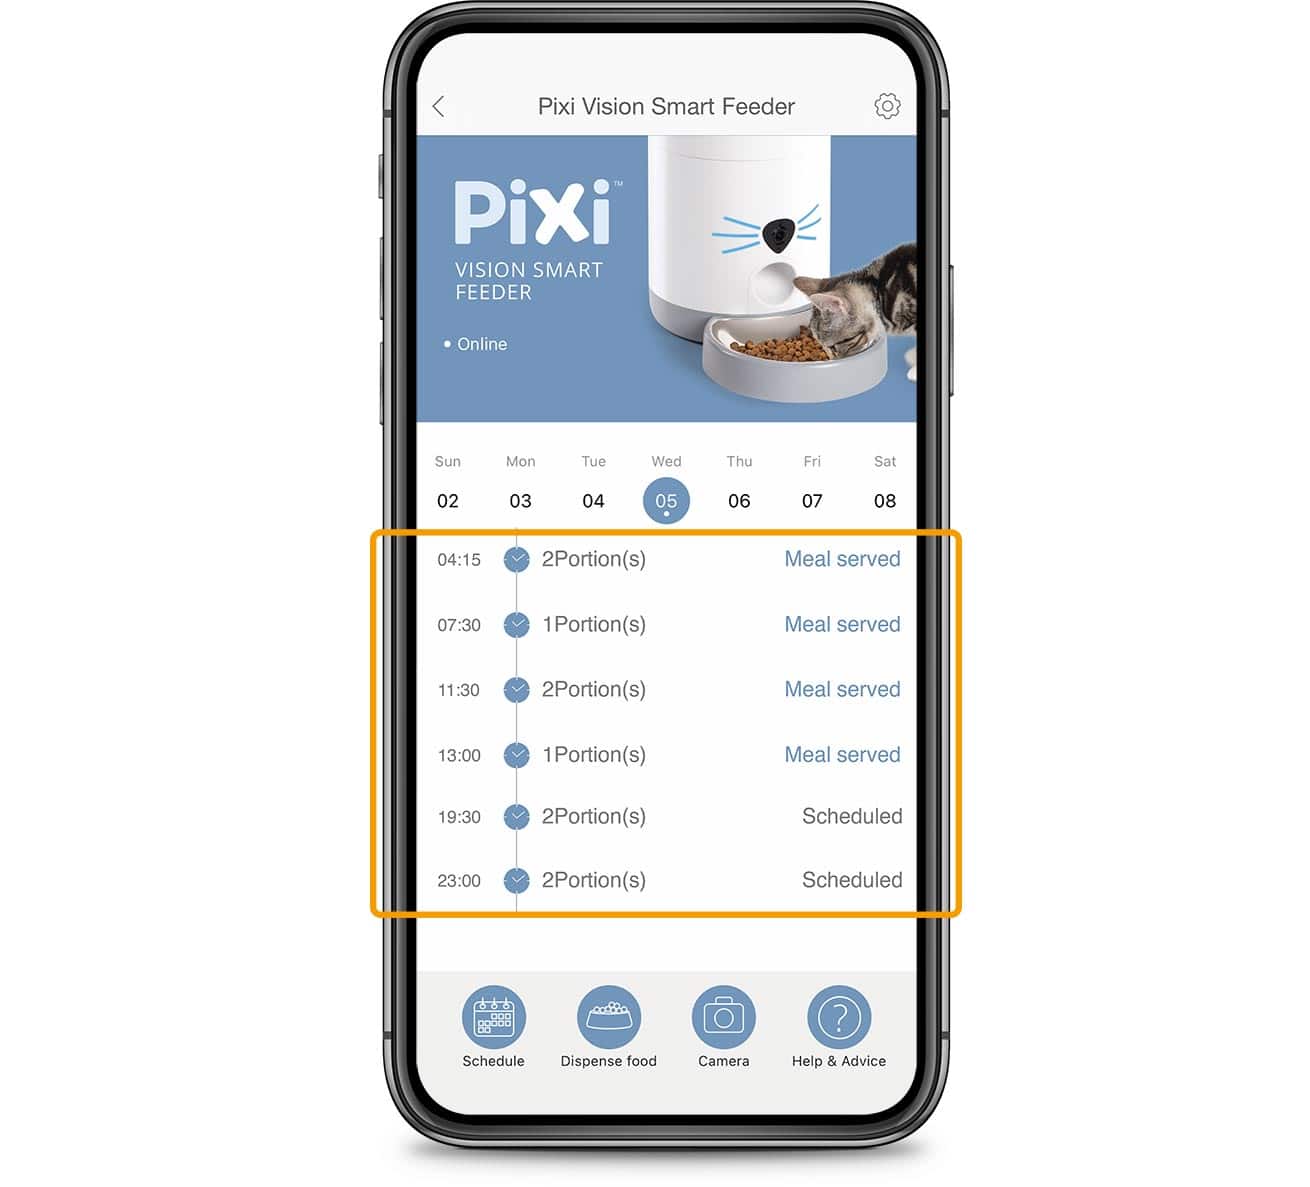
5.3 Feeder Home Screen
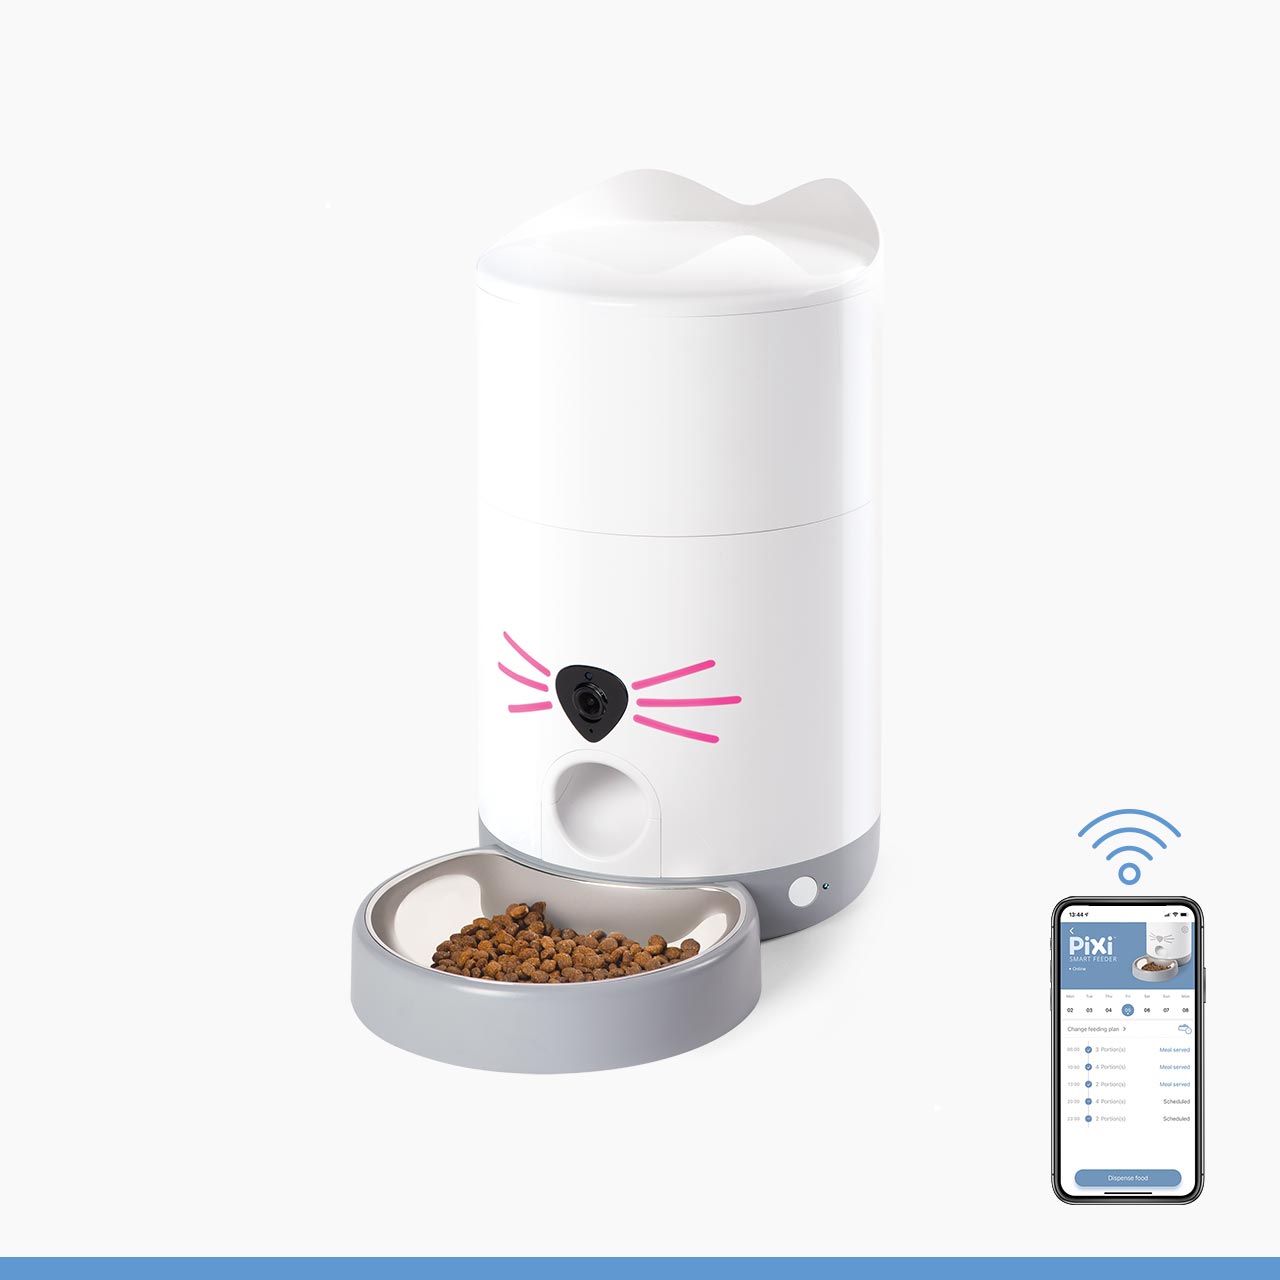
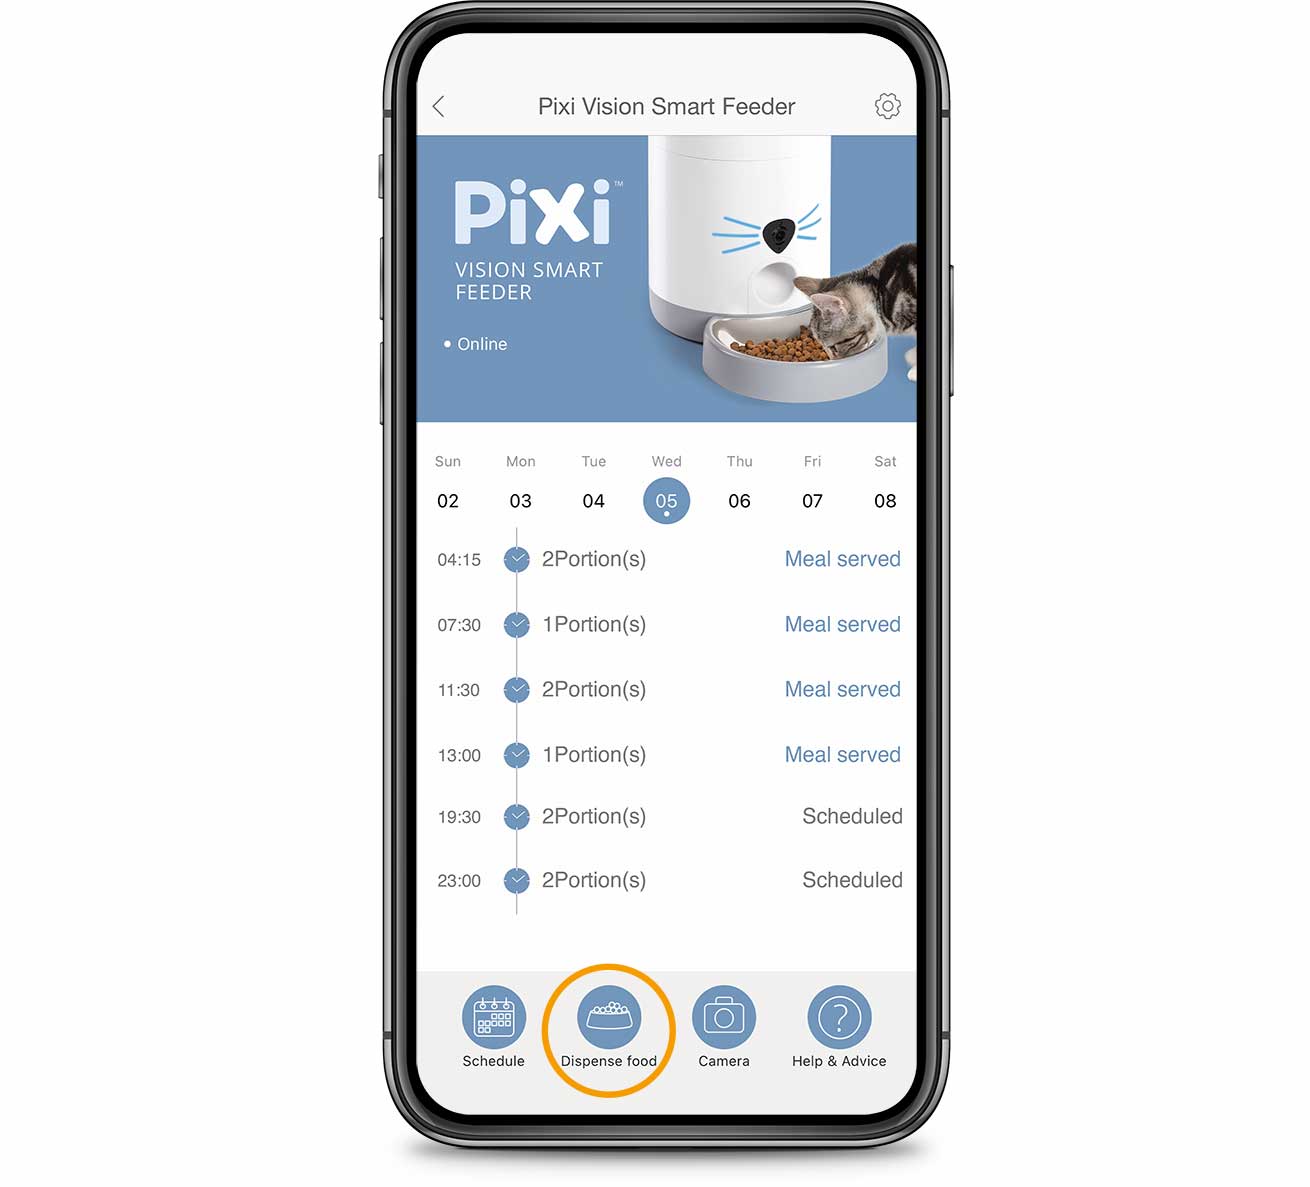
This screen shows an overview of all upcoming meals as well as all served meals. The app indicates which meals have been served.
5.4 Adjust or delete meals
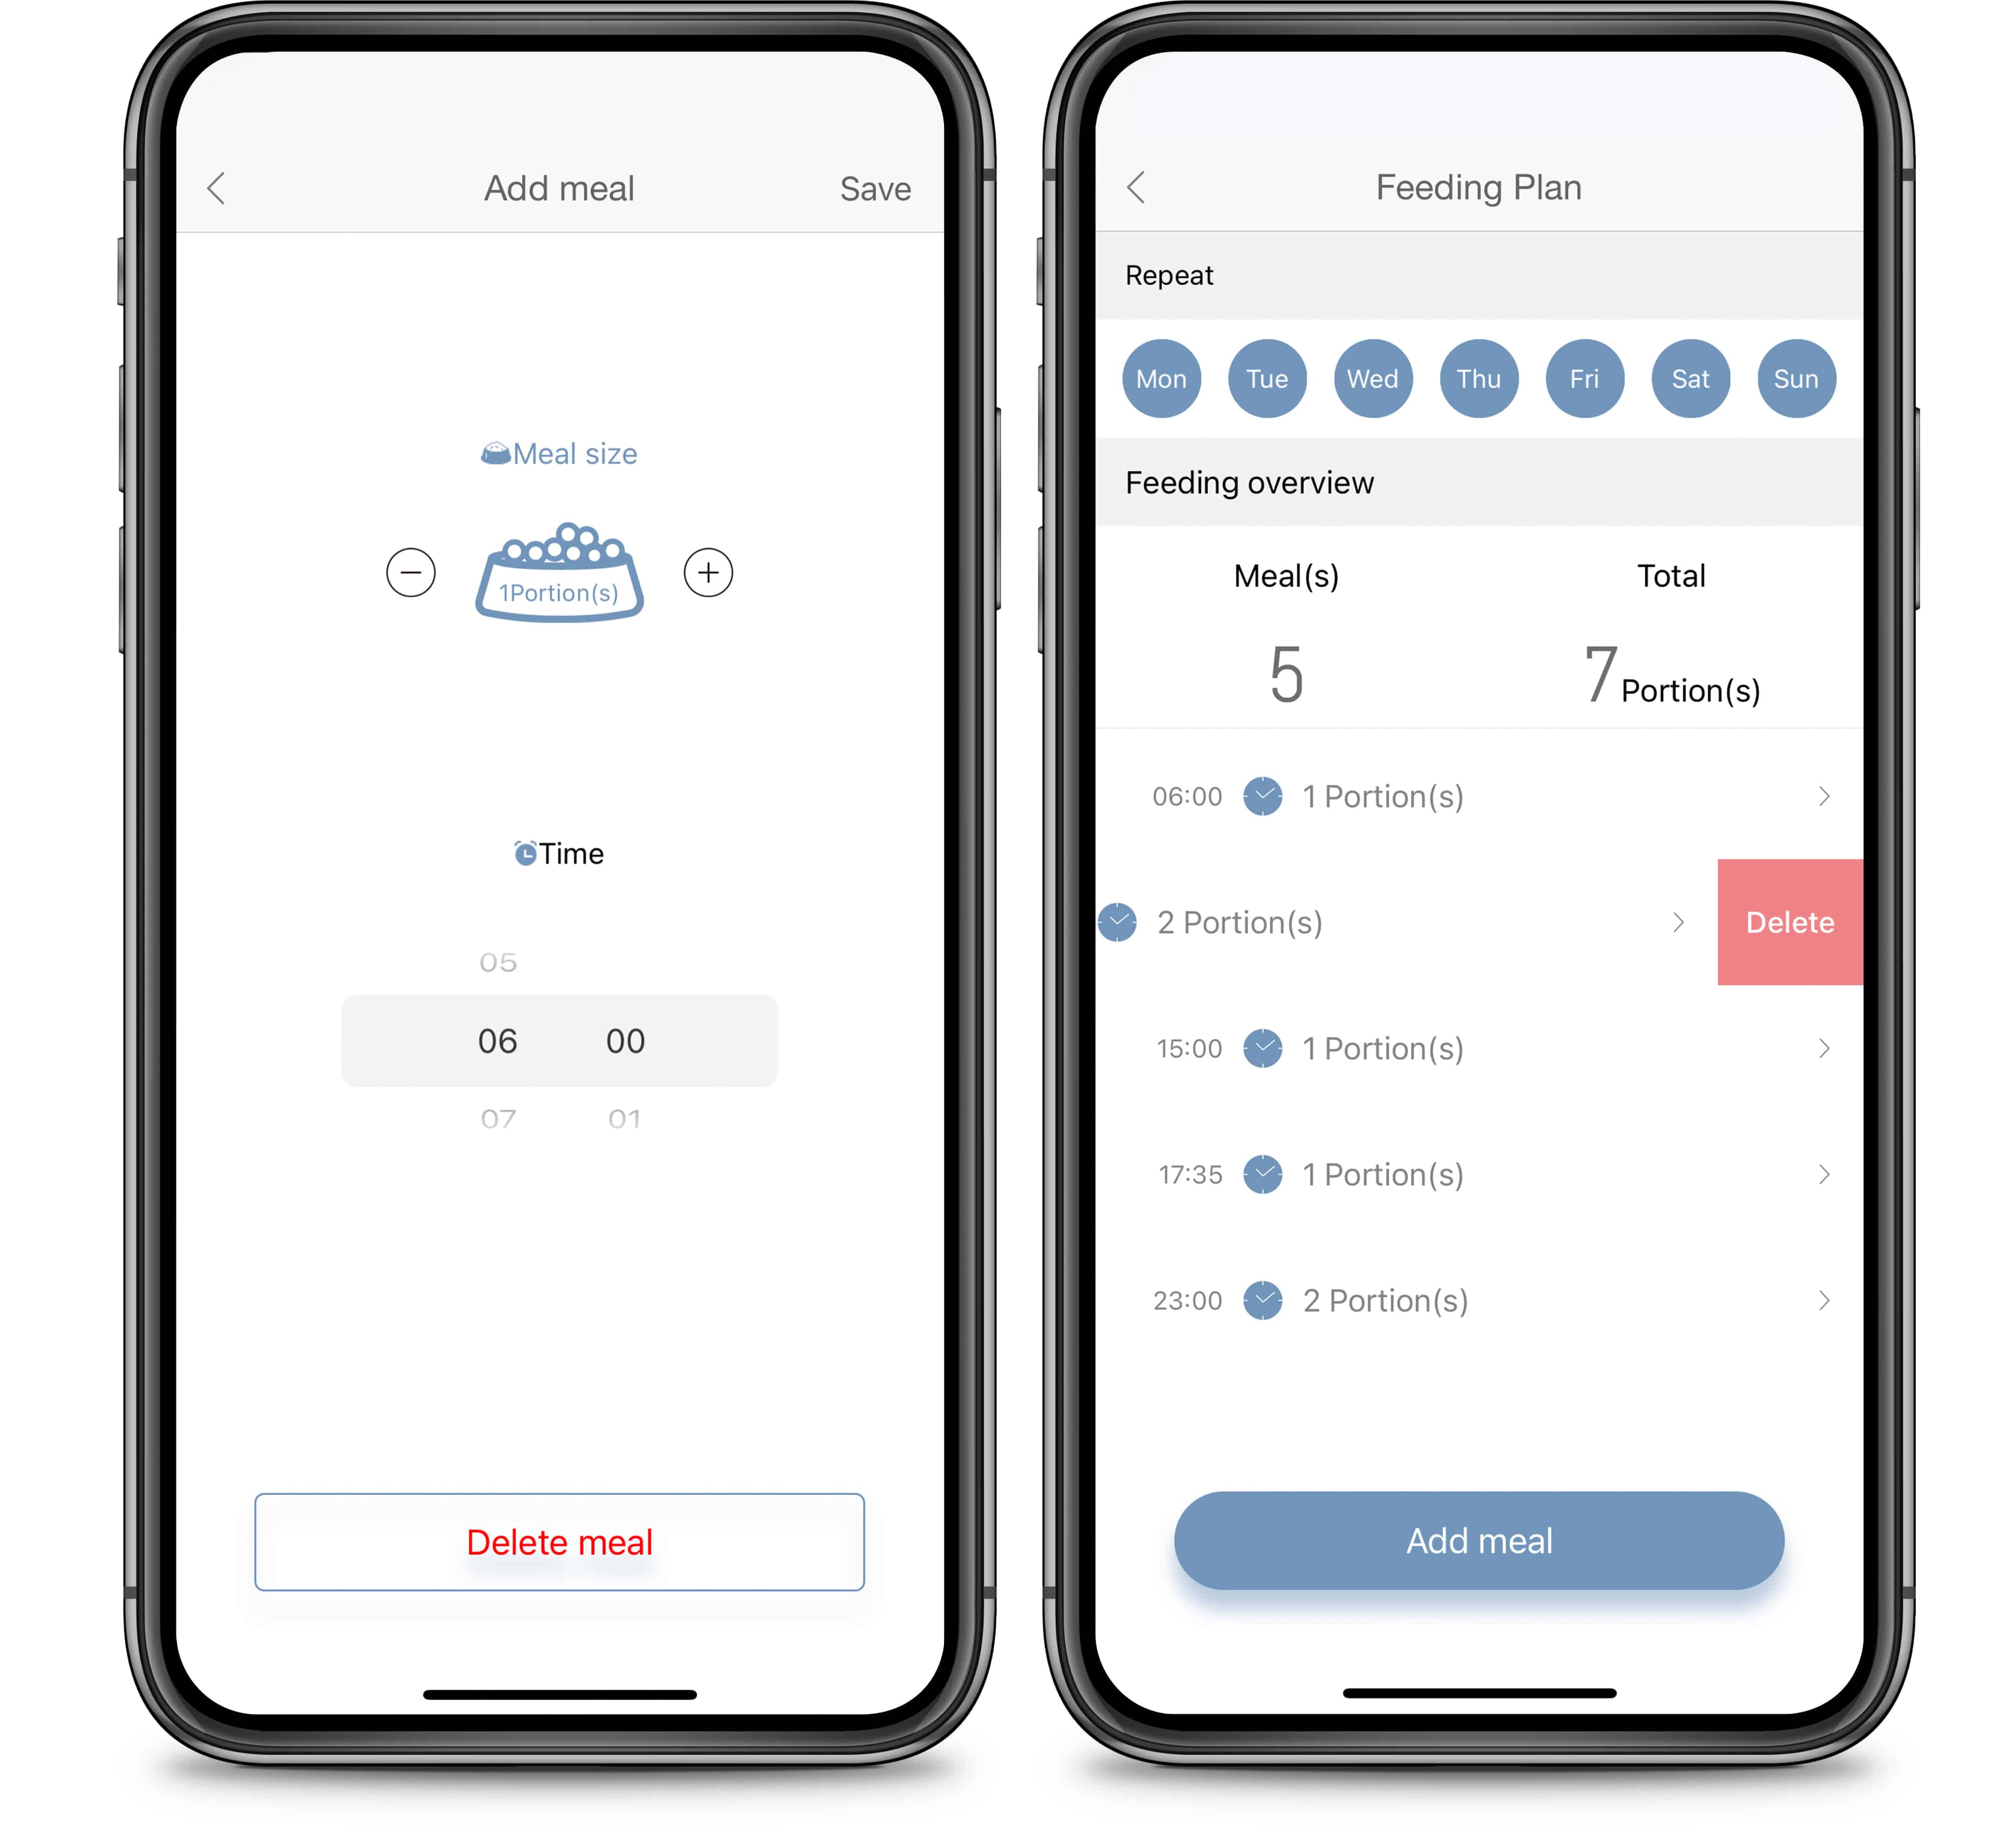
Scheduled meals can be adjusted, rescheduled, or deleted at any time.
To do so, tap ‘schedule’ and select the meal you would like to adjust.
Next, adjust the serving time or the meal size and save. You can delete the meal by tapping “delete meal” at the bottom of your screen. Another way of deleting a meal is by swiping it to the left in the overview and tapping “delete”.
5.5 Dispense food instantly
There are two ways of dispensing food instantly:
- by tapping ‘Dispense food’ in the feeder Home Screen
- by pressing the button on the side of the Catit PIXI Vision Smart Feeder (button can be disabled in the Settings menu)
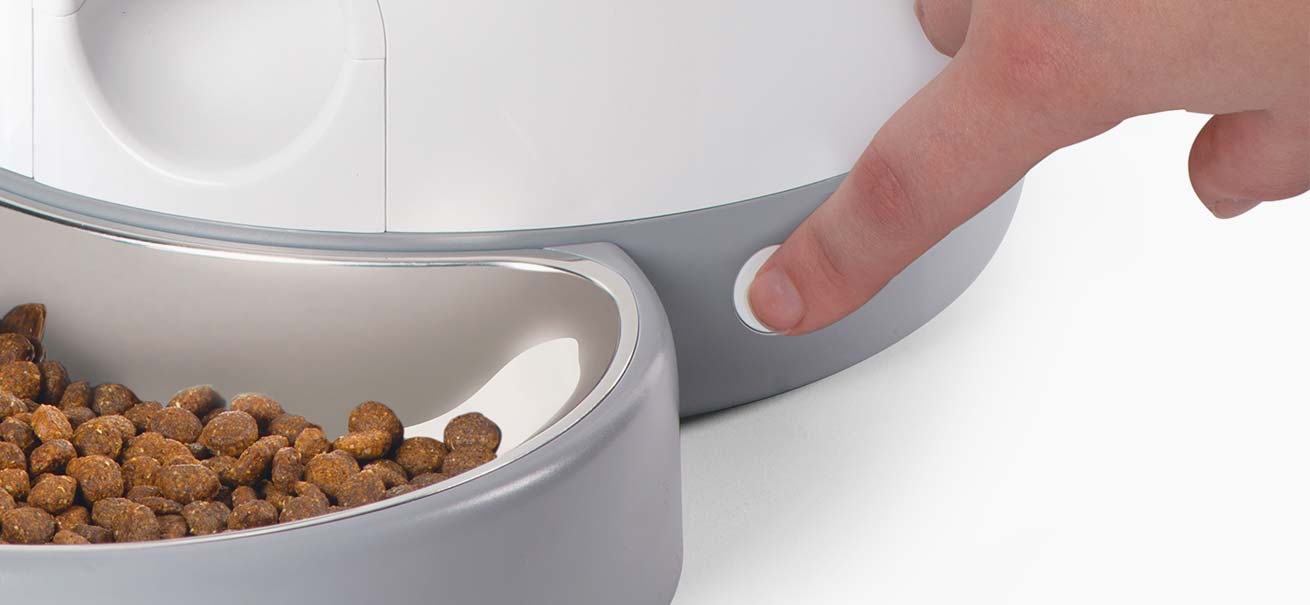
Both actions will instantly dispense one portion of food.
To adjust the default number of portions served when manually dispensing food, go to ‘settings’ and set the preferred meal size.
When you next dispense food using the app or the button on the side of the feeder, the newly set meal size will be served.
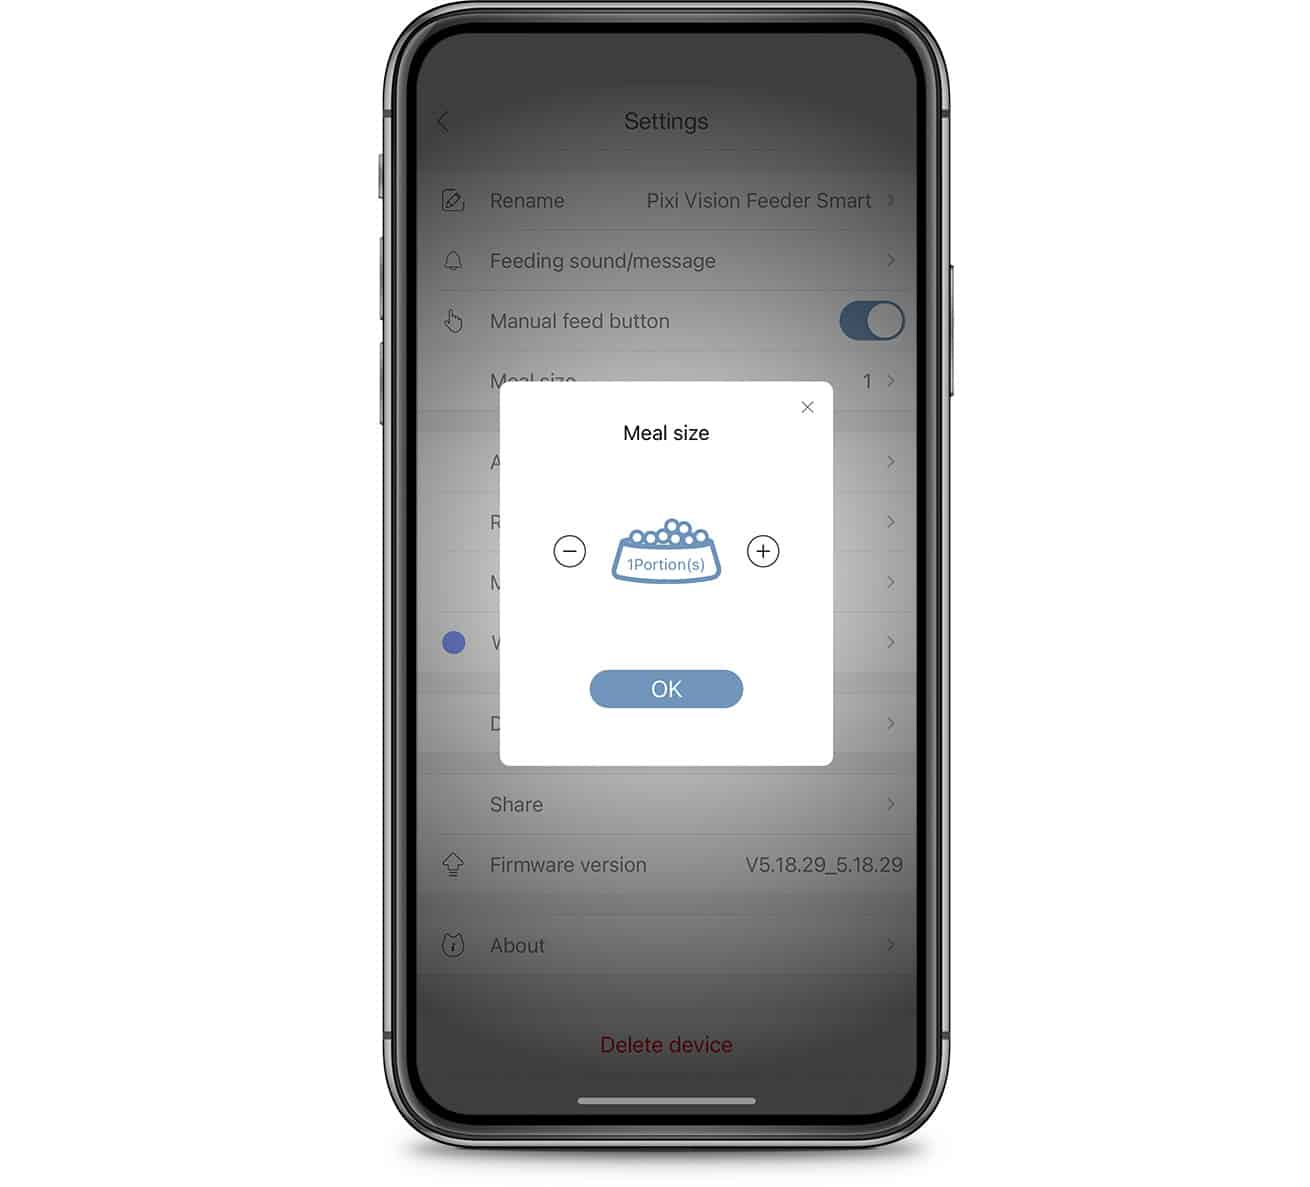
Note: The button on the side of your feeder can be disabled by toggling the slider in the Settings menu. If disabled, pressing this button will no longer dispense food.
5.6 Feeding sound/message
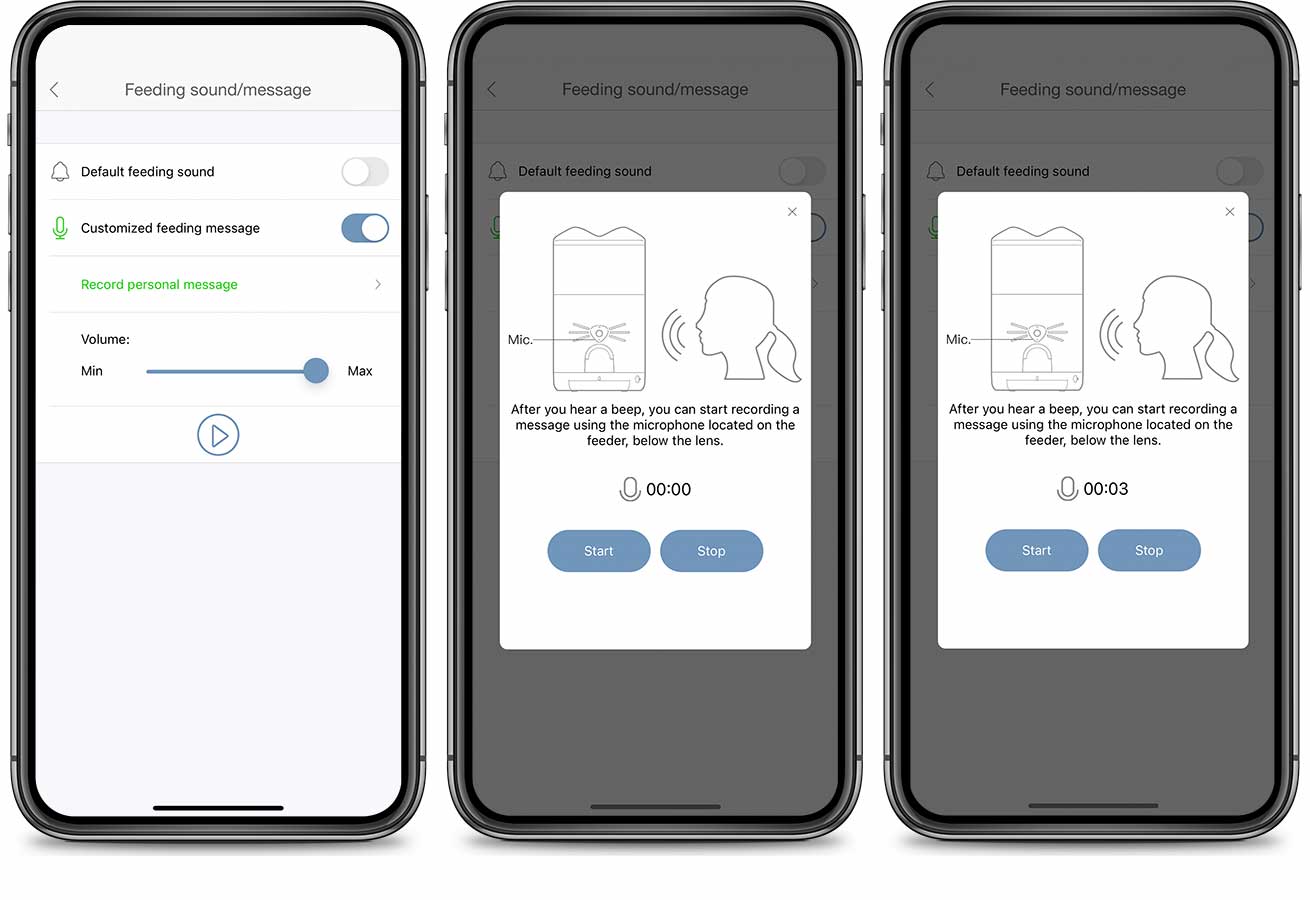
The audio on your feeder is disabled by default. When you enable the audio in the settings, the feeder will play a sound each time a meal is served to notify your cat.
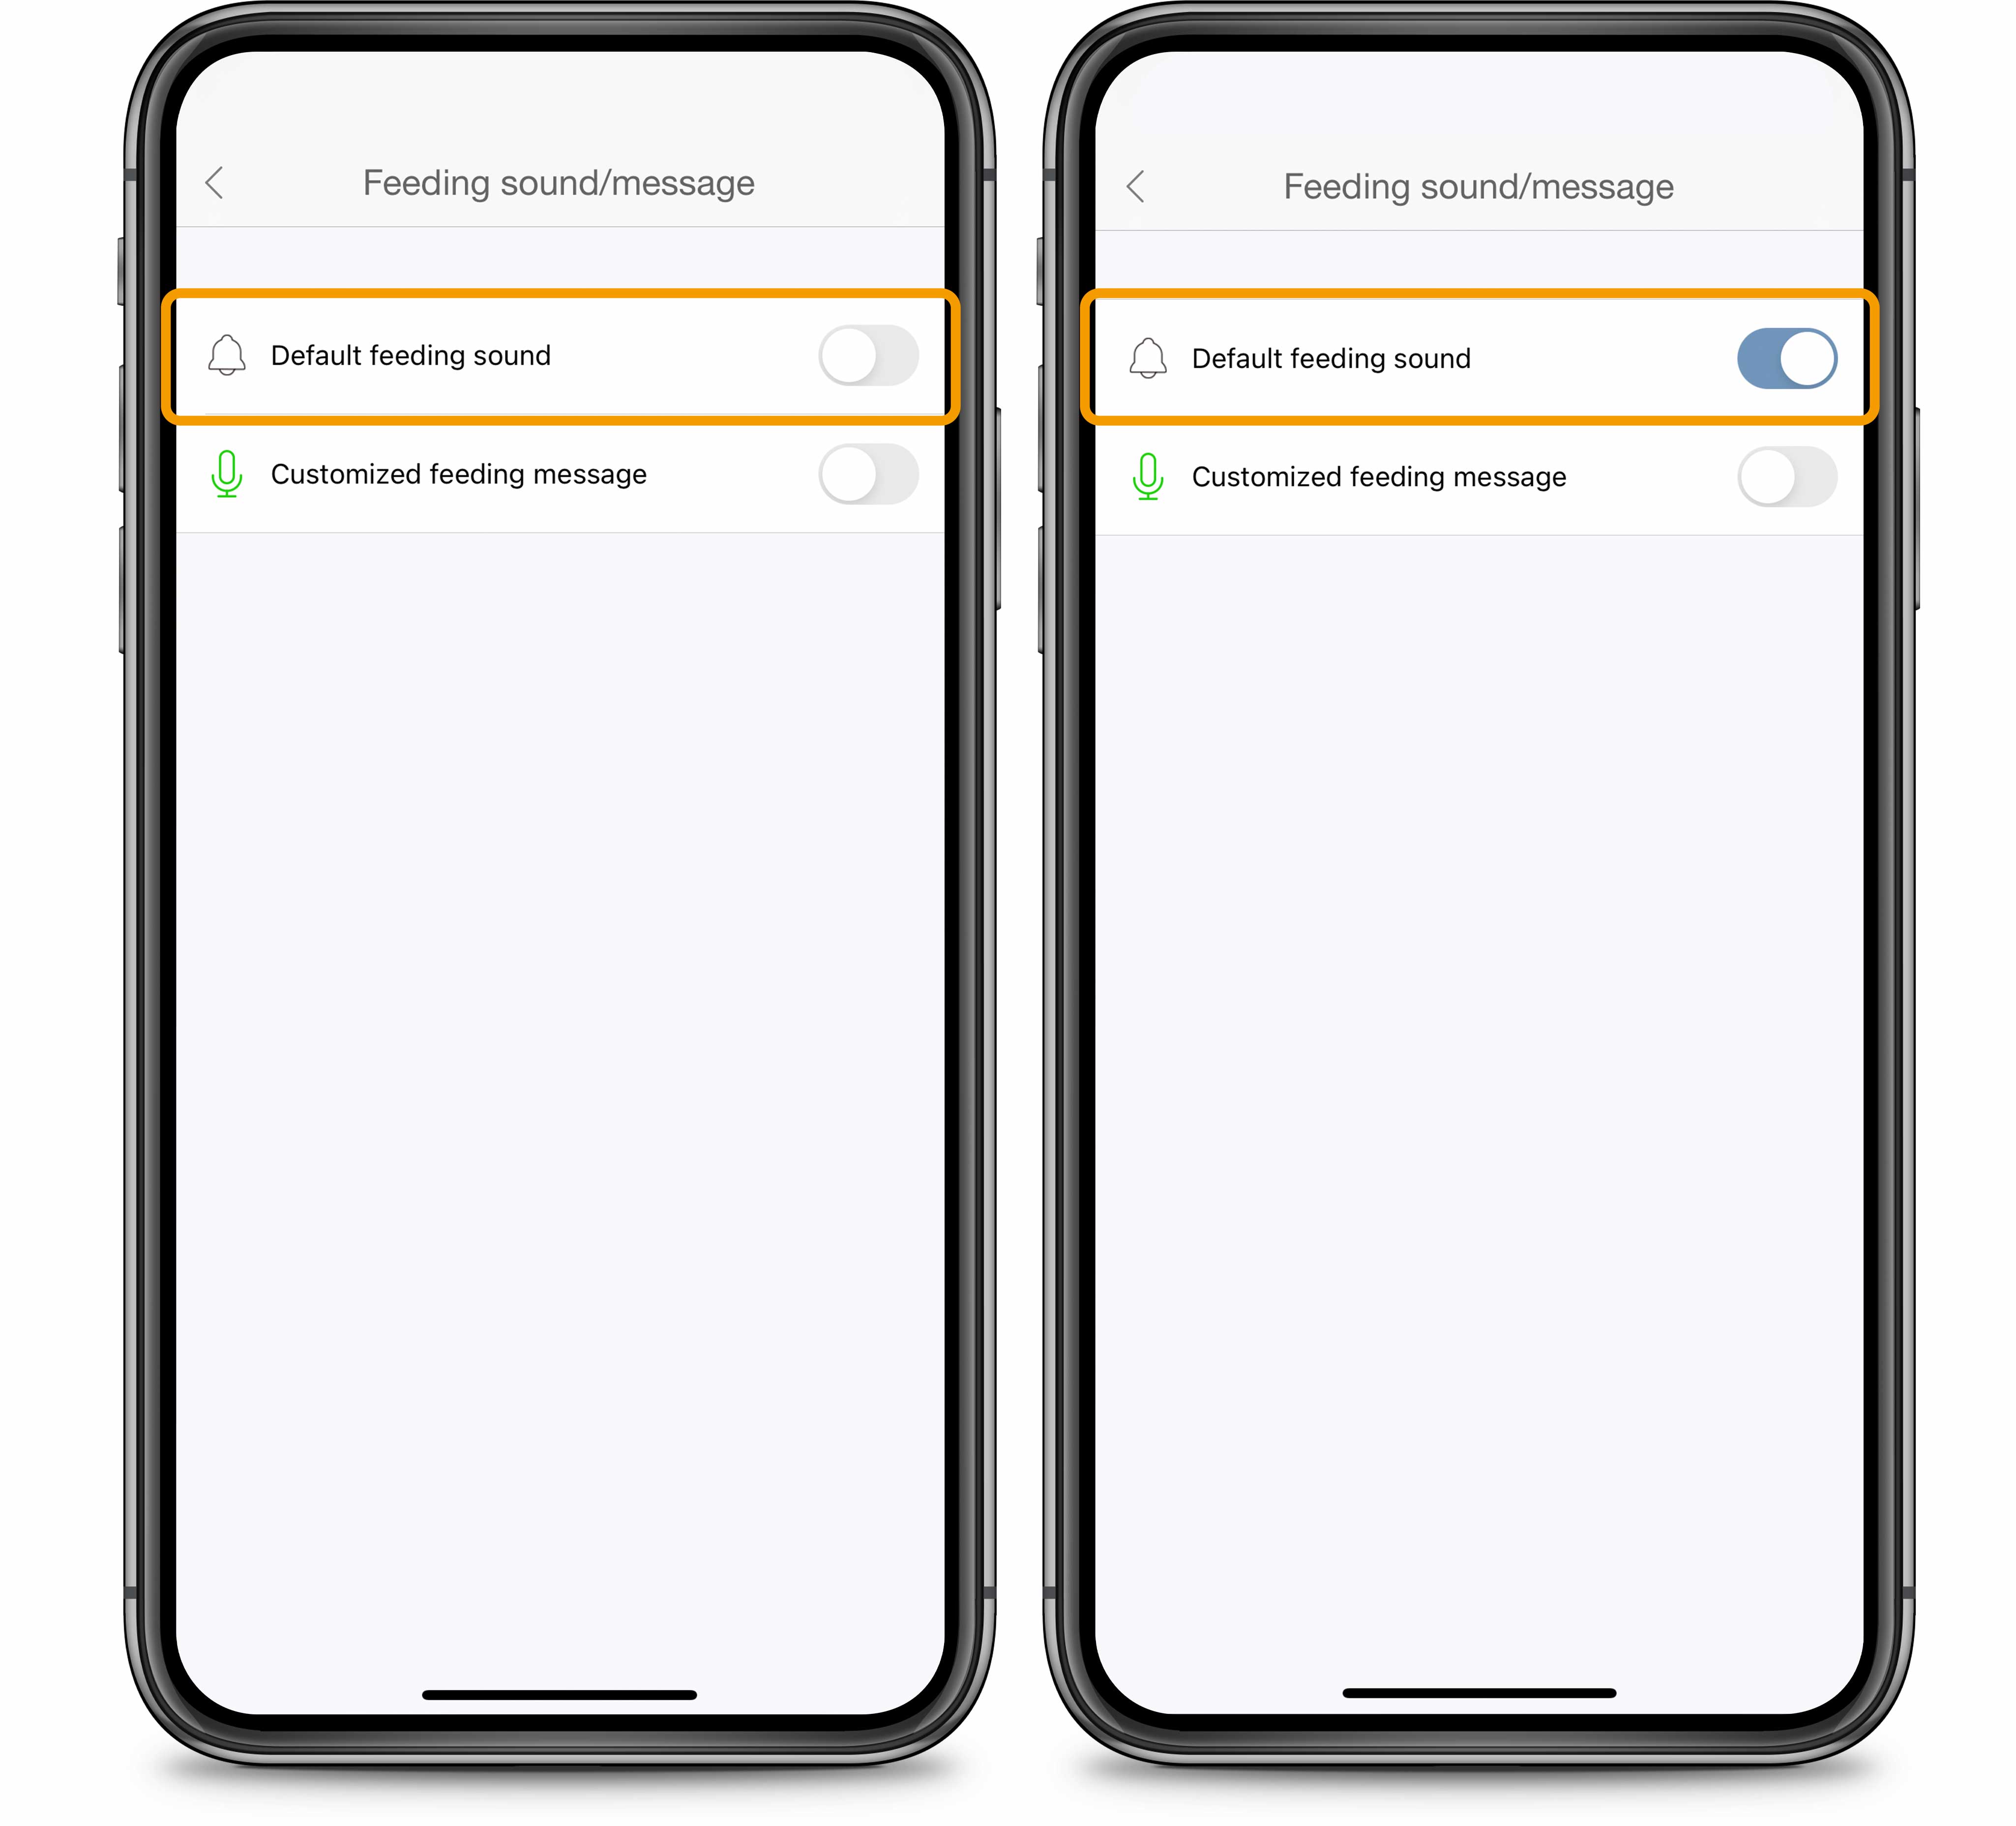
You can also record a personal message (max 10 sec long) and set this to play instead so your cat can hear your voice. Please note that you have to use the built-in microphone on the feeder to record your personal message, not your phone! The feeder microphone is located in the nose, below the camera. Please speak close to the feeder microphone for better audio and volume. Adjust the volume at which your recording will played to your cat, by moving the volume slider to the left or right. Hit the play button to play the customised sound back to yourself so you can decide if you like it.
5.7 Audio & Video settings
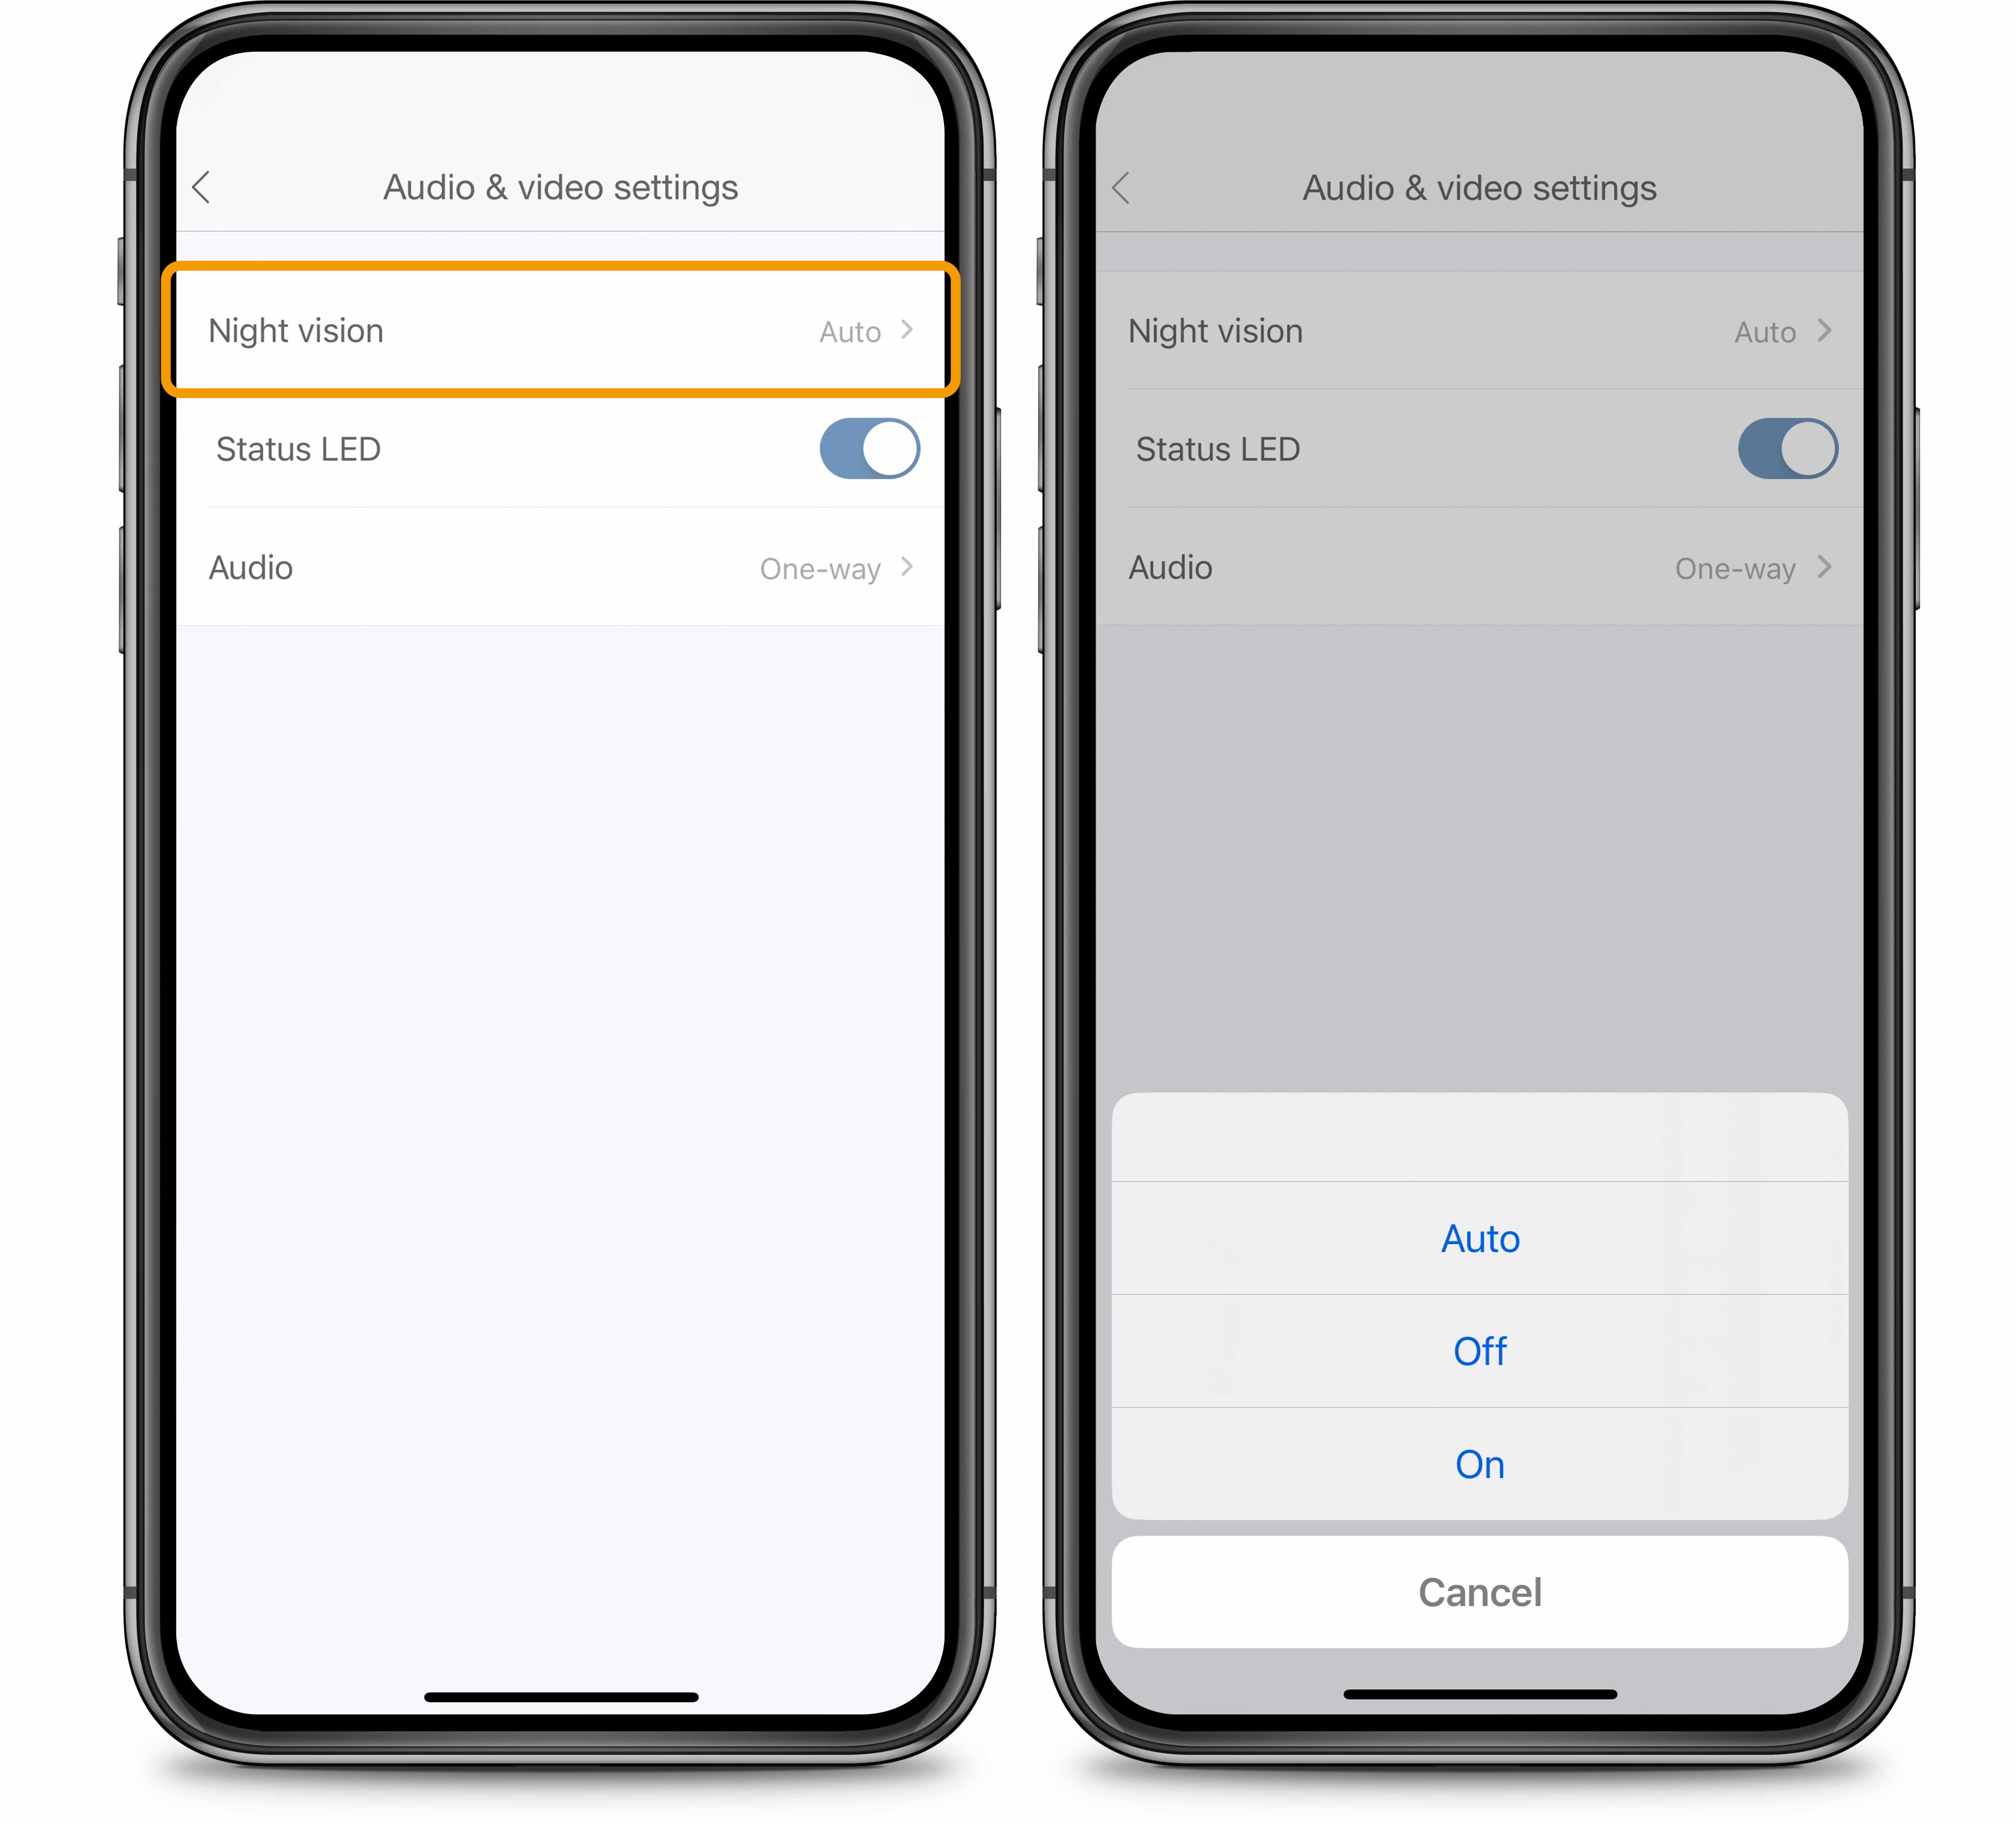
Here, You can adjust the night vision settings. When set to auto, the night vision will be switched on automatically when needed.
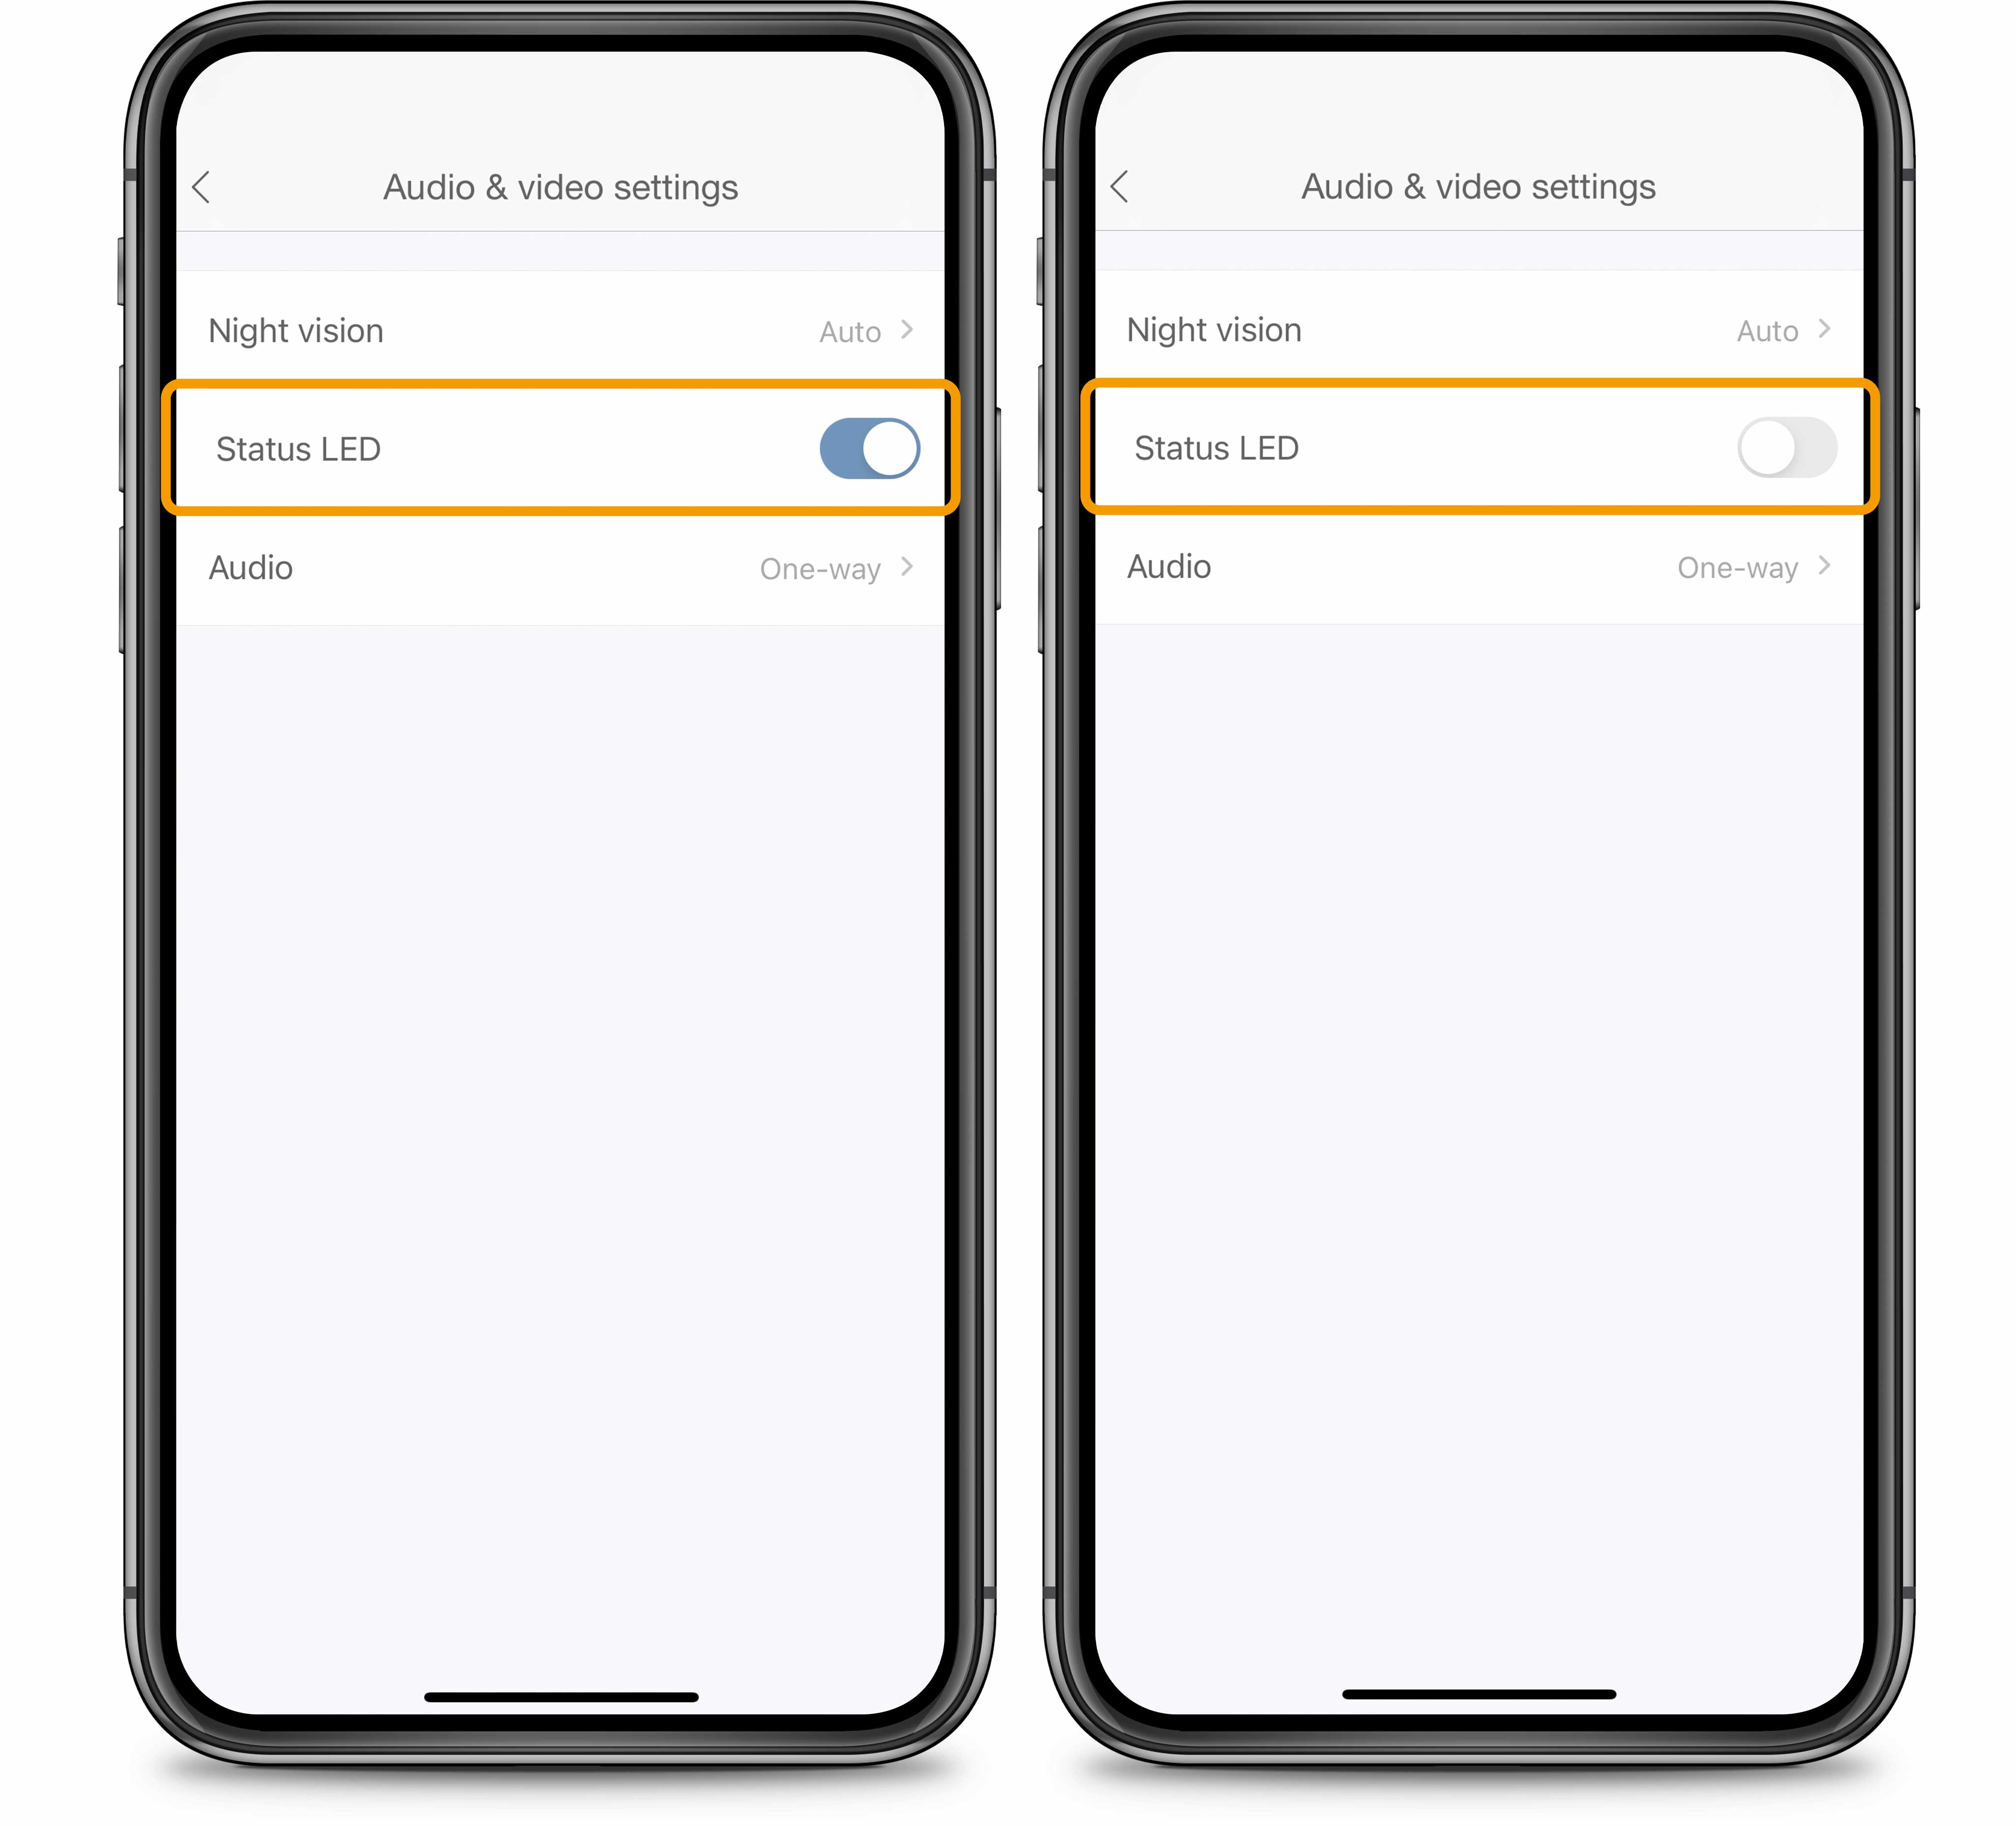
The status LED toggle will make sure the LED status light, which indicates whether the Wi-Fi connection is still present, is turned on or off.
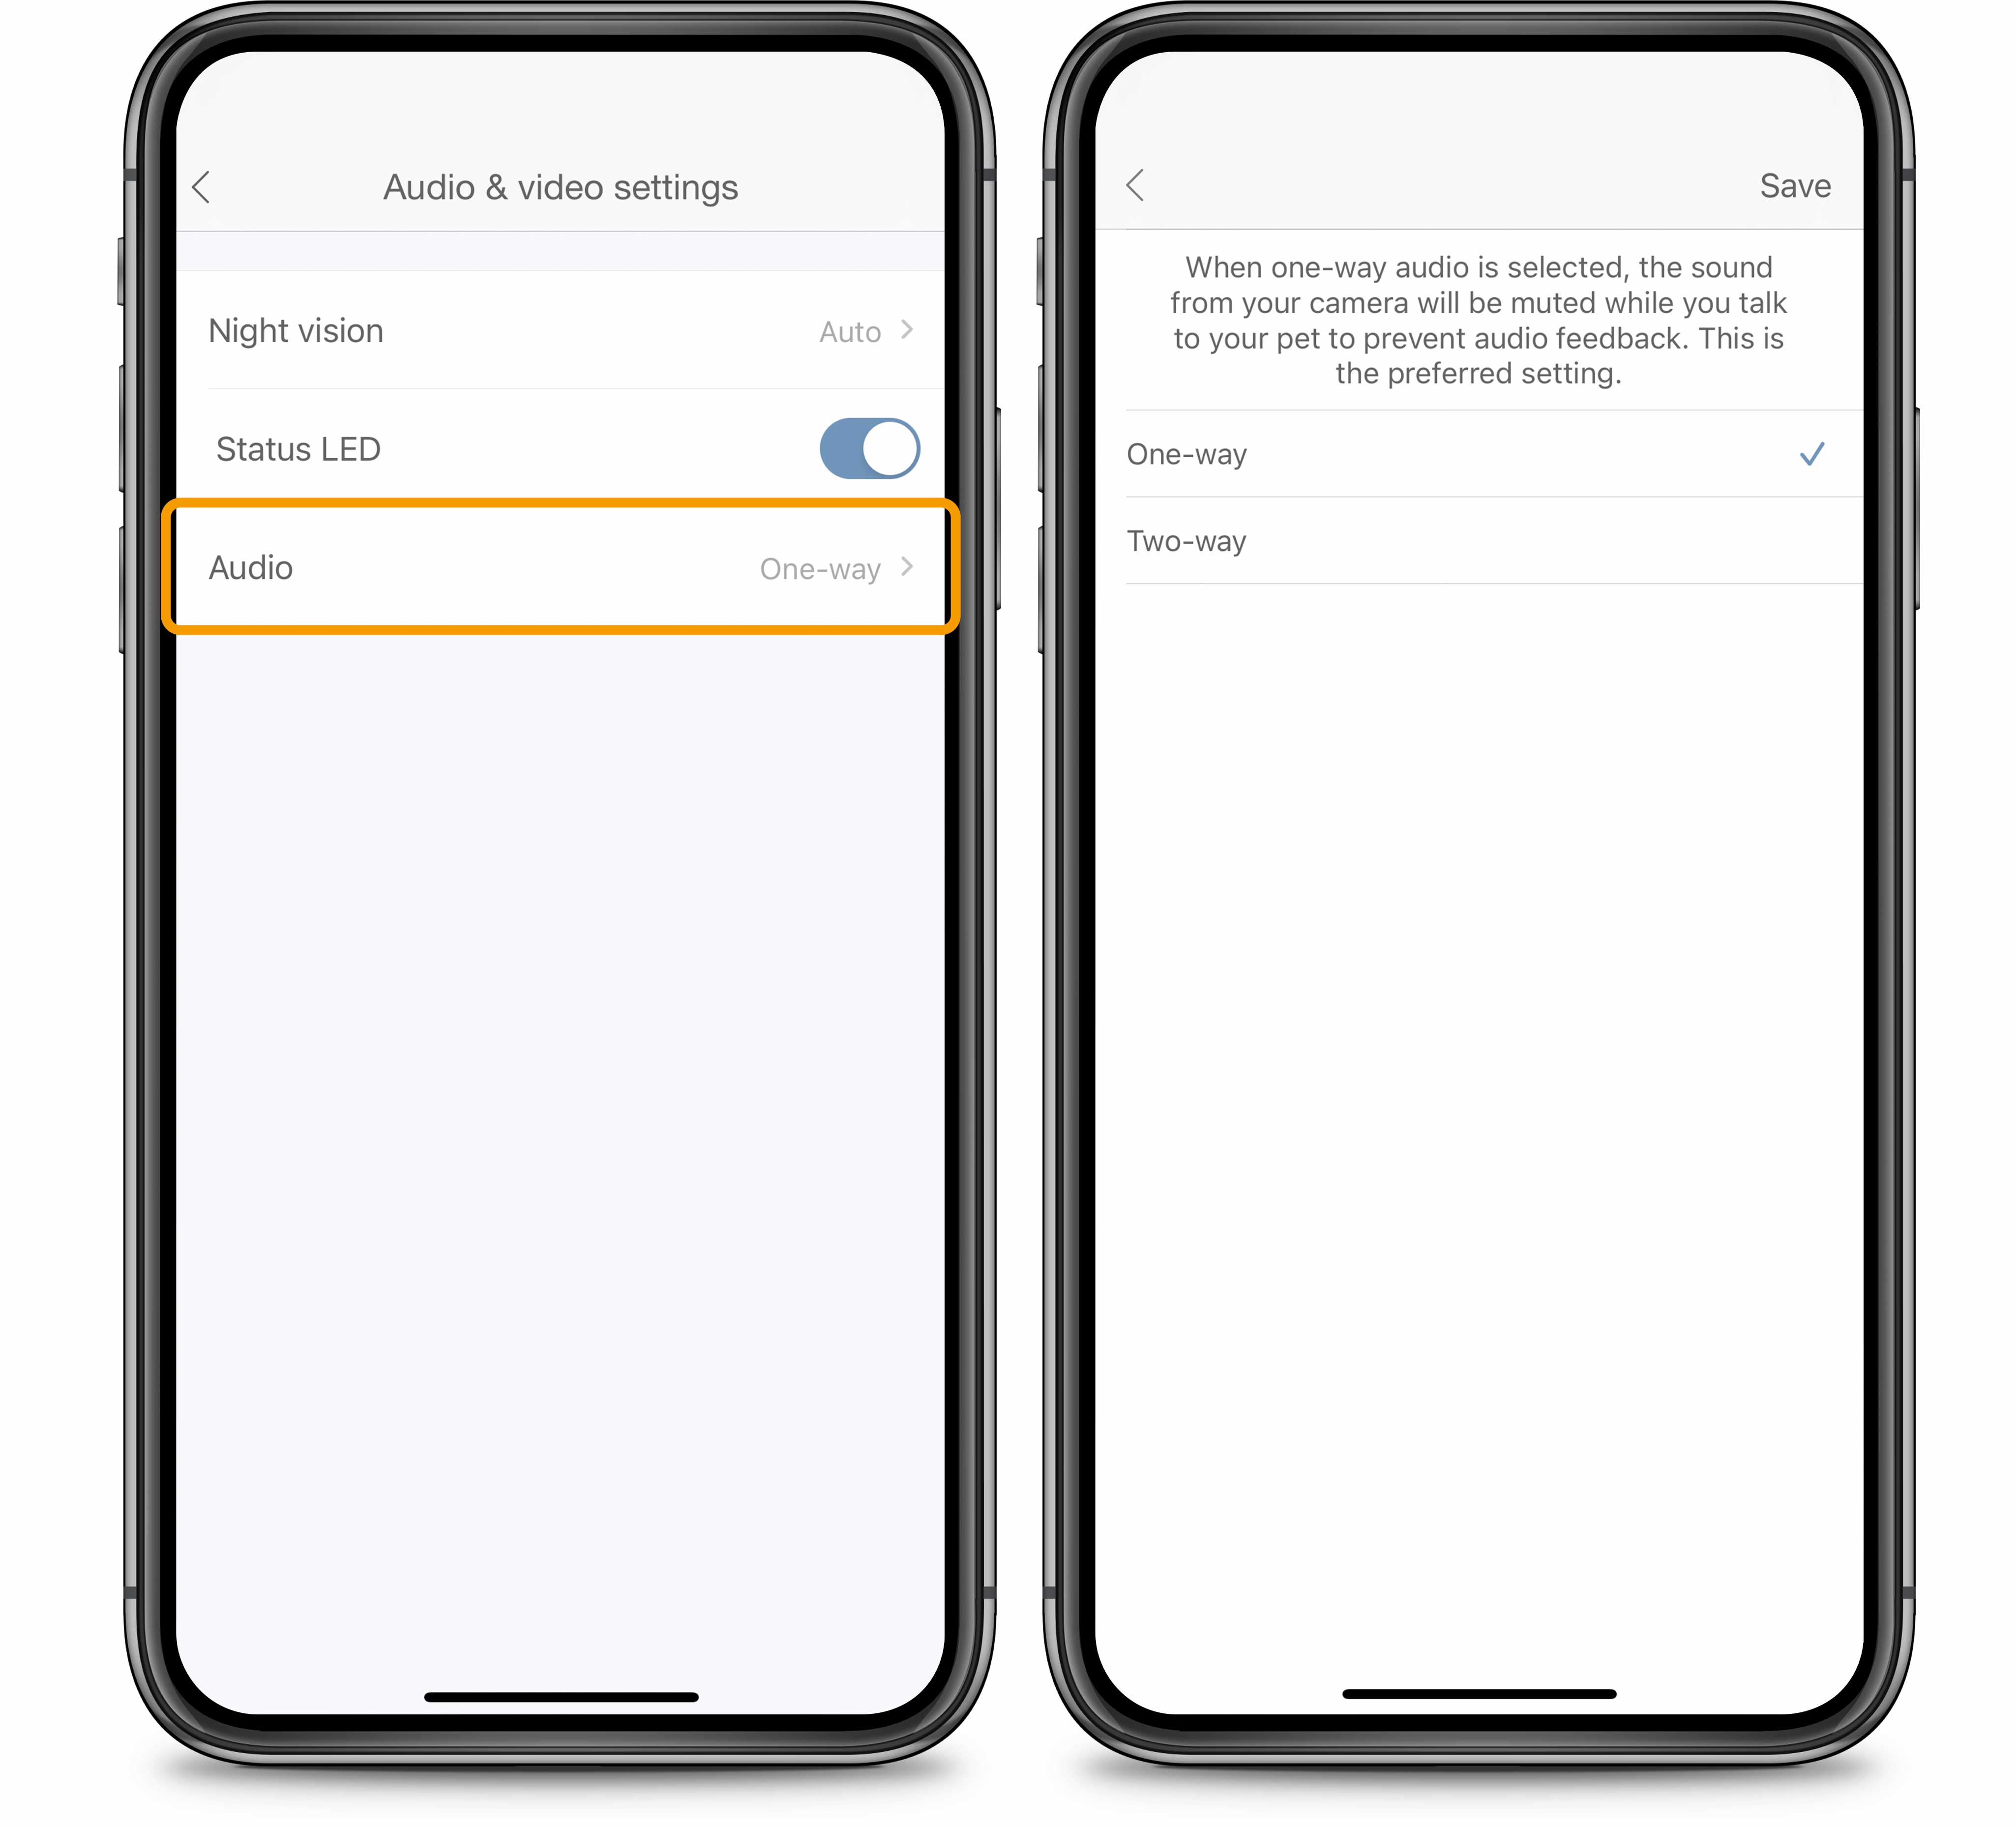
The audio setting allows you to adjust the way sound is used on the feeder. When one-way audio is selected, the sound from your camera will be muted while you talk to your pet to prevent audio feedback. This is the preferred setting.
5.8 Recording settings
Recording settings is only needed when you have a MicroSD card in your feeder. Here you can adjust when the recording should be started.
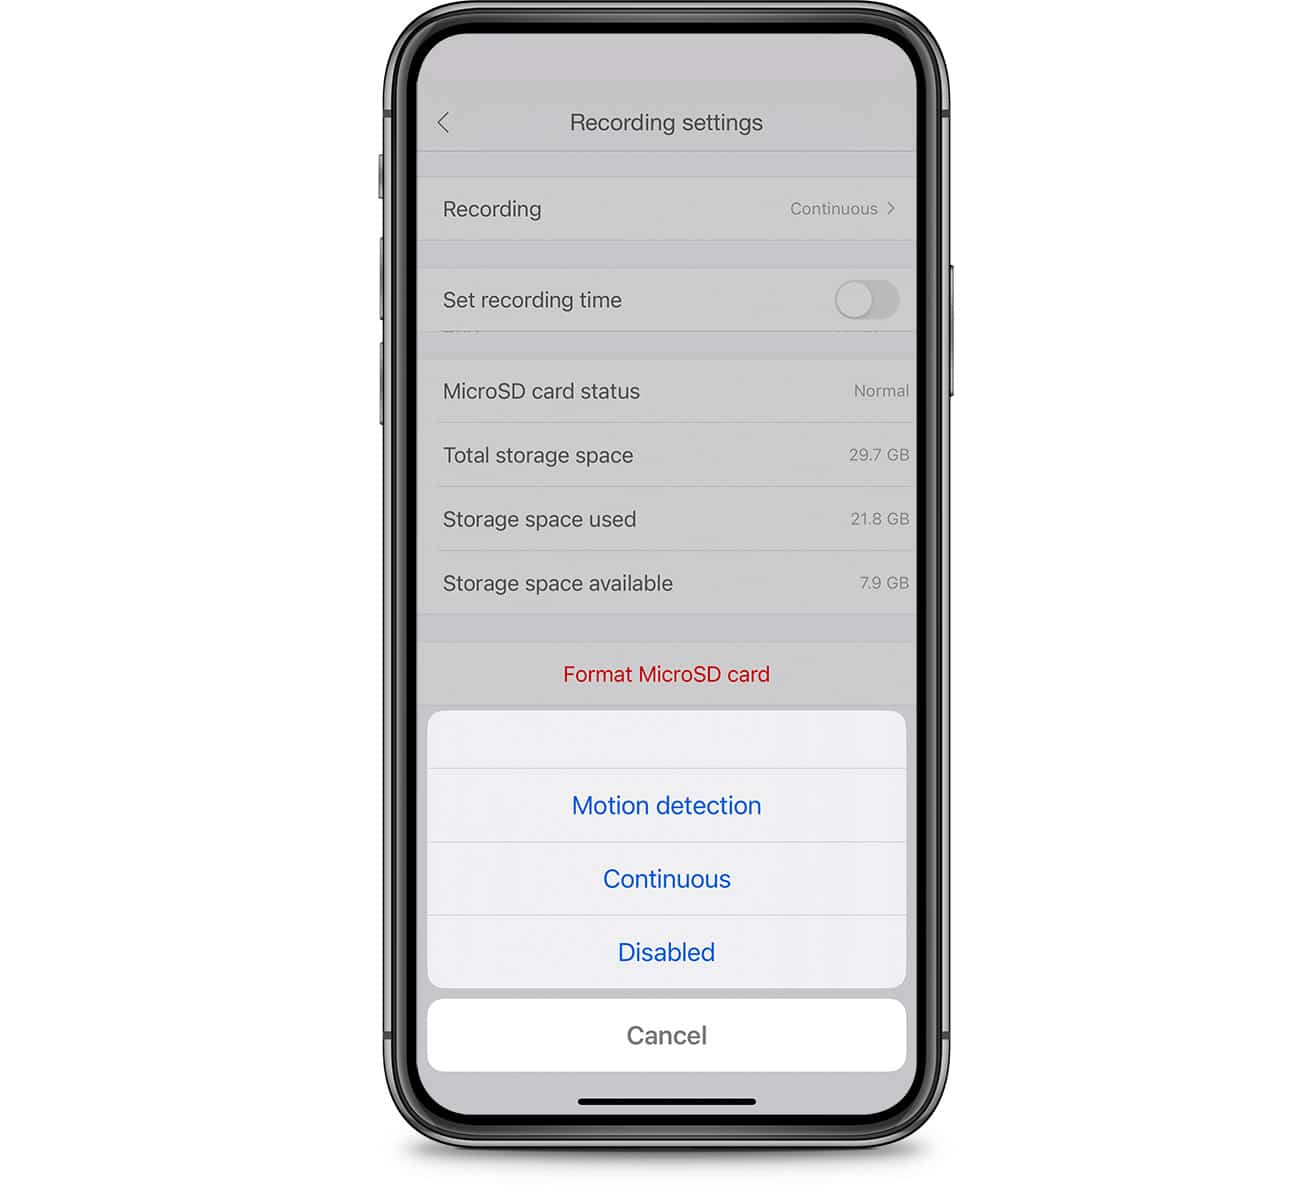
Motion detection; only when motion is detected
Continuous; record continuously. When the SD card runs out of storage space, the oldest data will be overwritten.
Disabled; don’t make any automatic recordings at all
When you want the feeder to make recordings during a specific time interval only, you can set a timer in the recording settings. For example, you can set the feeder to record at night so you can see what your kitties were up to while you were asleep.
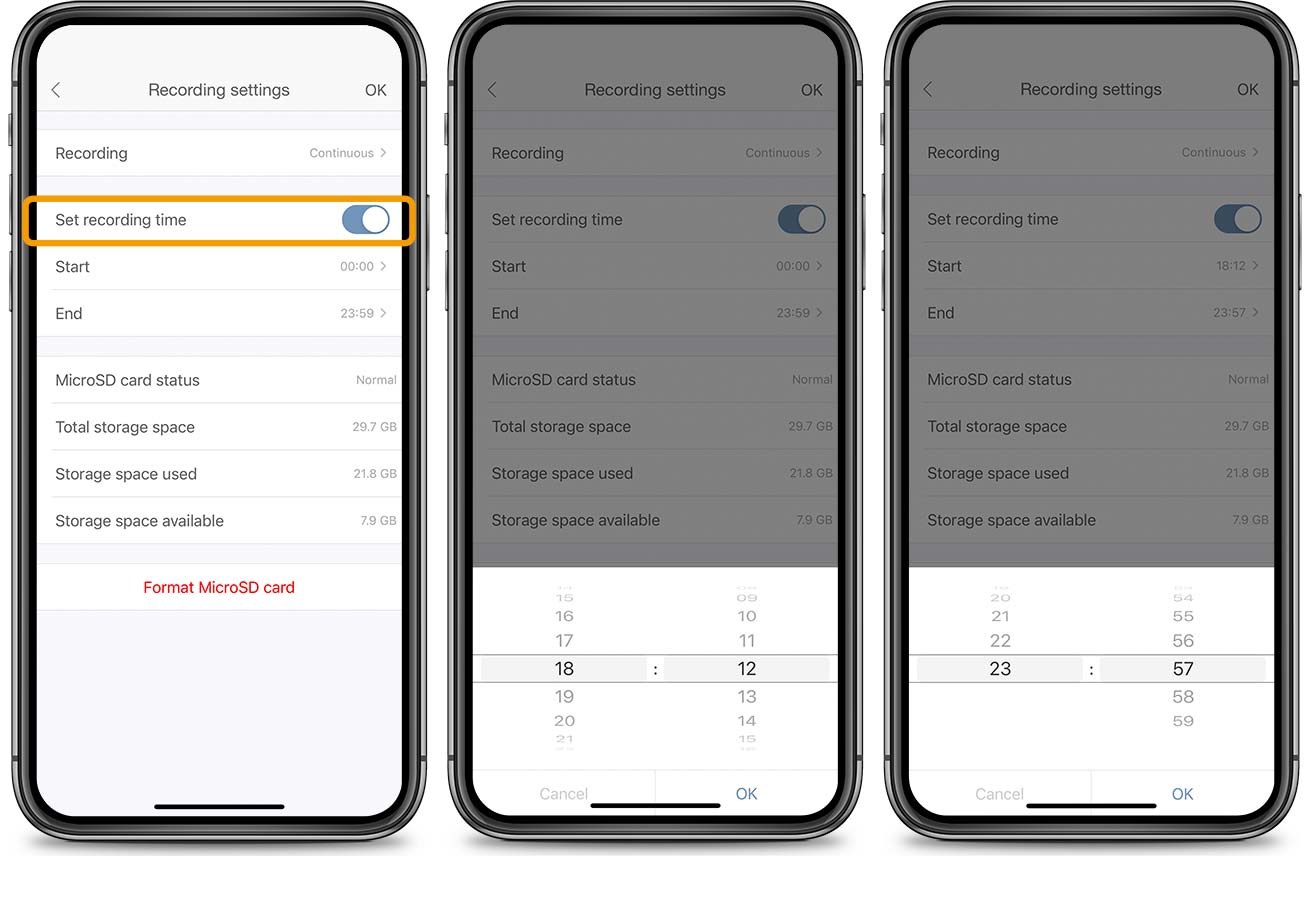
You will also find info on the status of the MicroSD card as well as the remaining storage capacity
5.9 Motion detection settings
With motion detection enabled, you will receive a notification on your smartphone when movement is picked up by the Catit PIXI Vision Smart Feeder, and it will start filming if you selected recording by motion detection (can be selected in the recording settings). The notification allows you to check the live video feed in the app at the right moment, and to manually take photos or to start recording.
To enable motion detection, go to Motion detection settings and switch the motion detection toggle on.
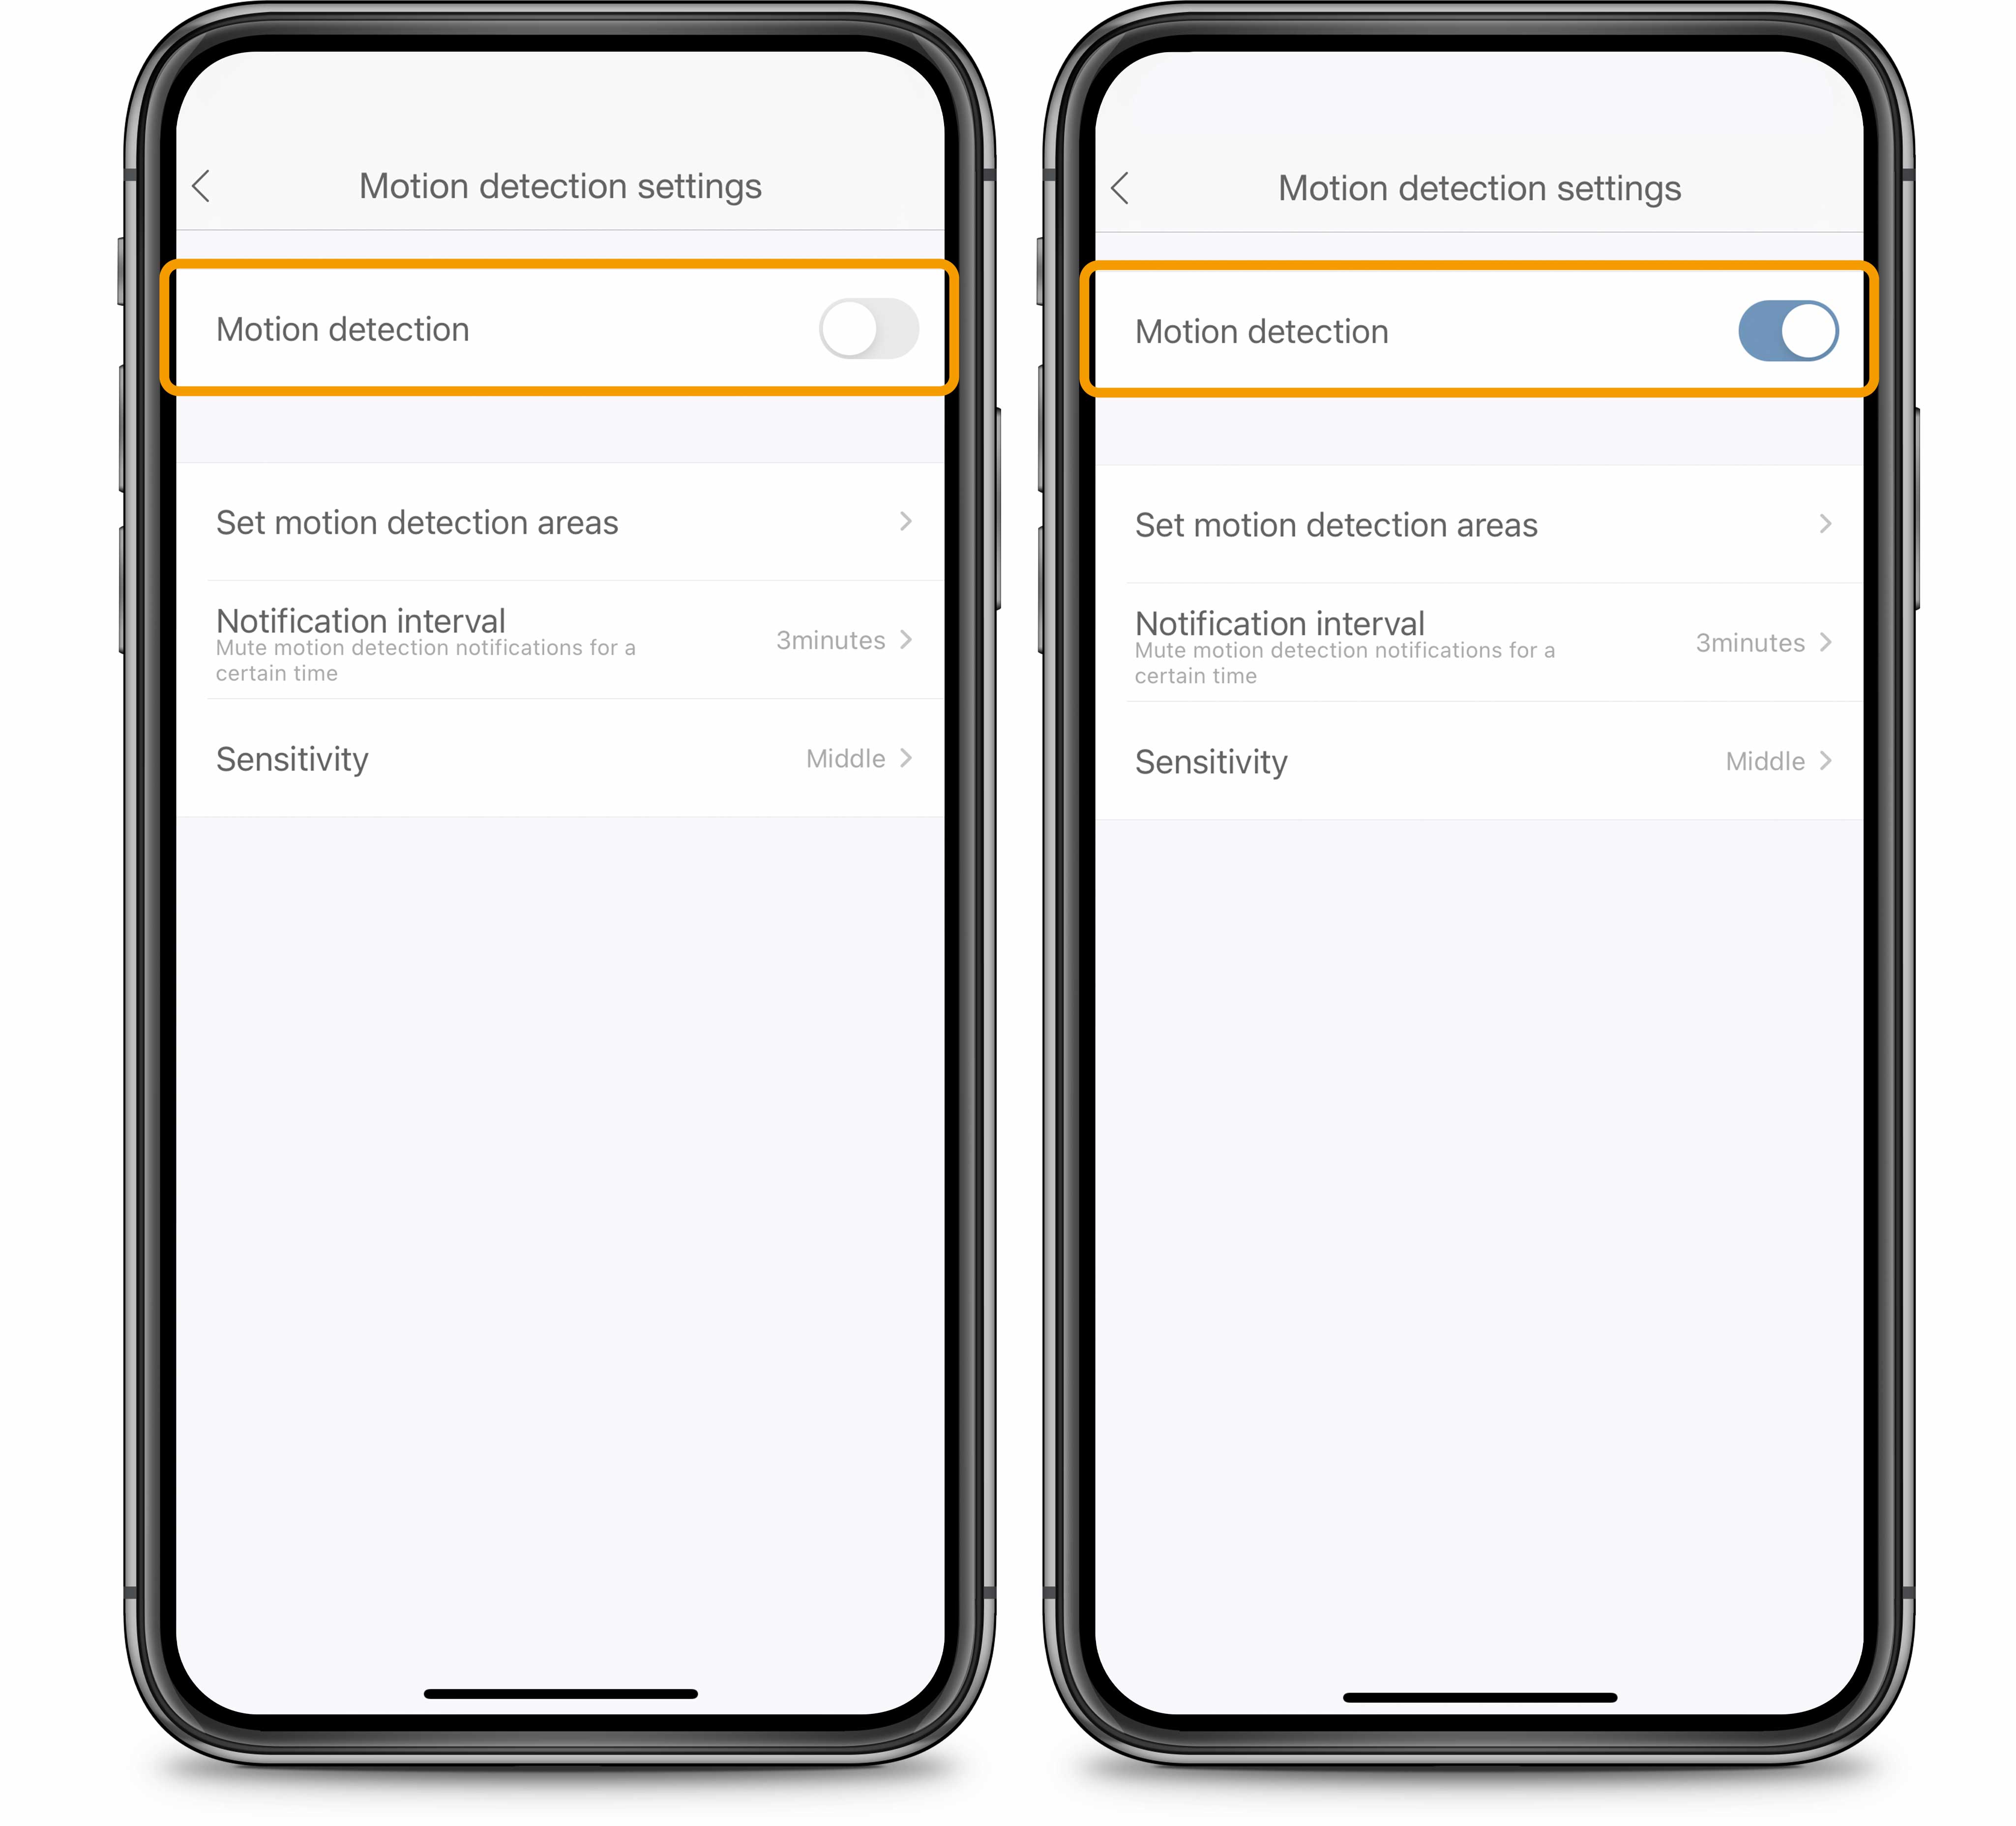
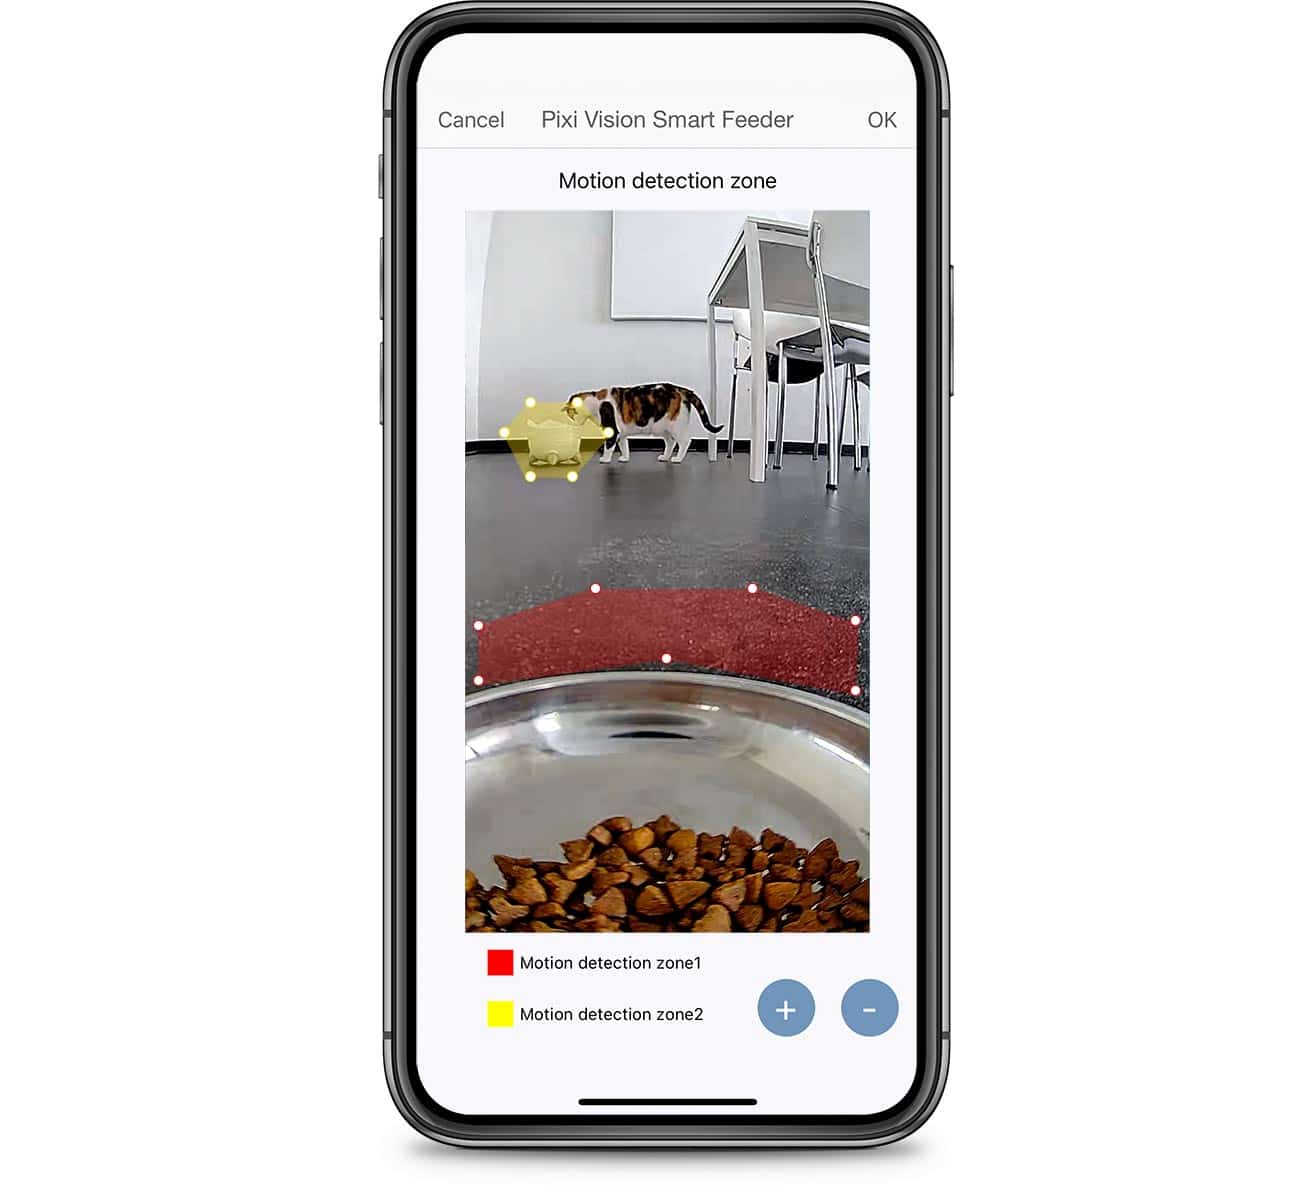
Set motion detection areas:
In the app’s Motion detection settings, you’ll have the option to set 2 motion detection areas for selective monitoring such as by your cat’s feeder or drinking fountain. Tap the + button to add a motion detection zone. Tap and drag the little dots to select the area in the camera’s field of vision that you wish to monitor. You can set up to two different motion detection areas within the camera’s field of view. Remove a motion detection zone by tapping the – button.
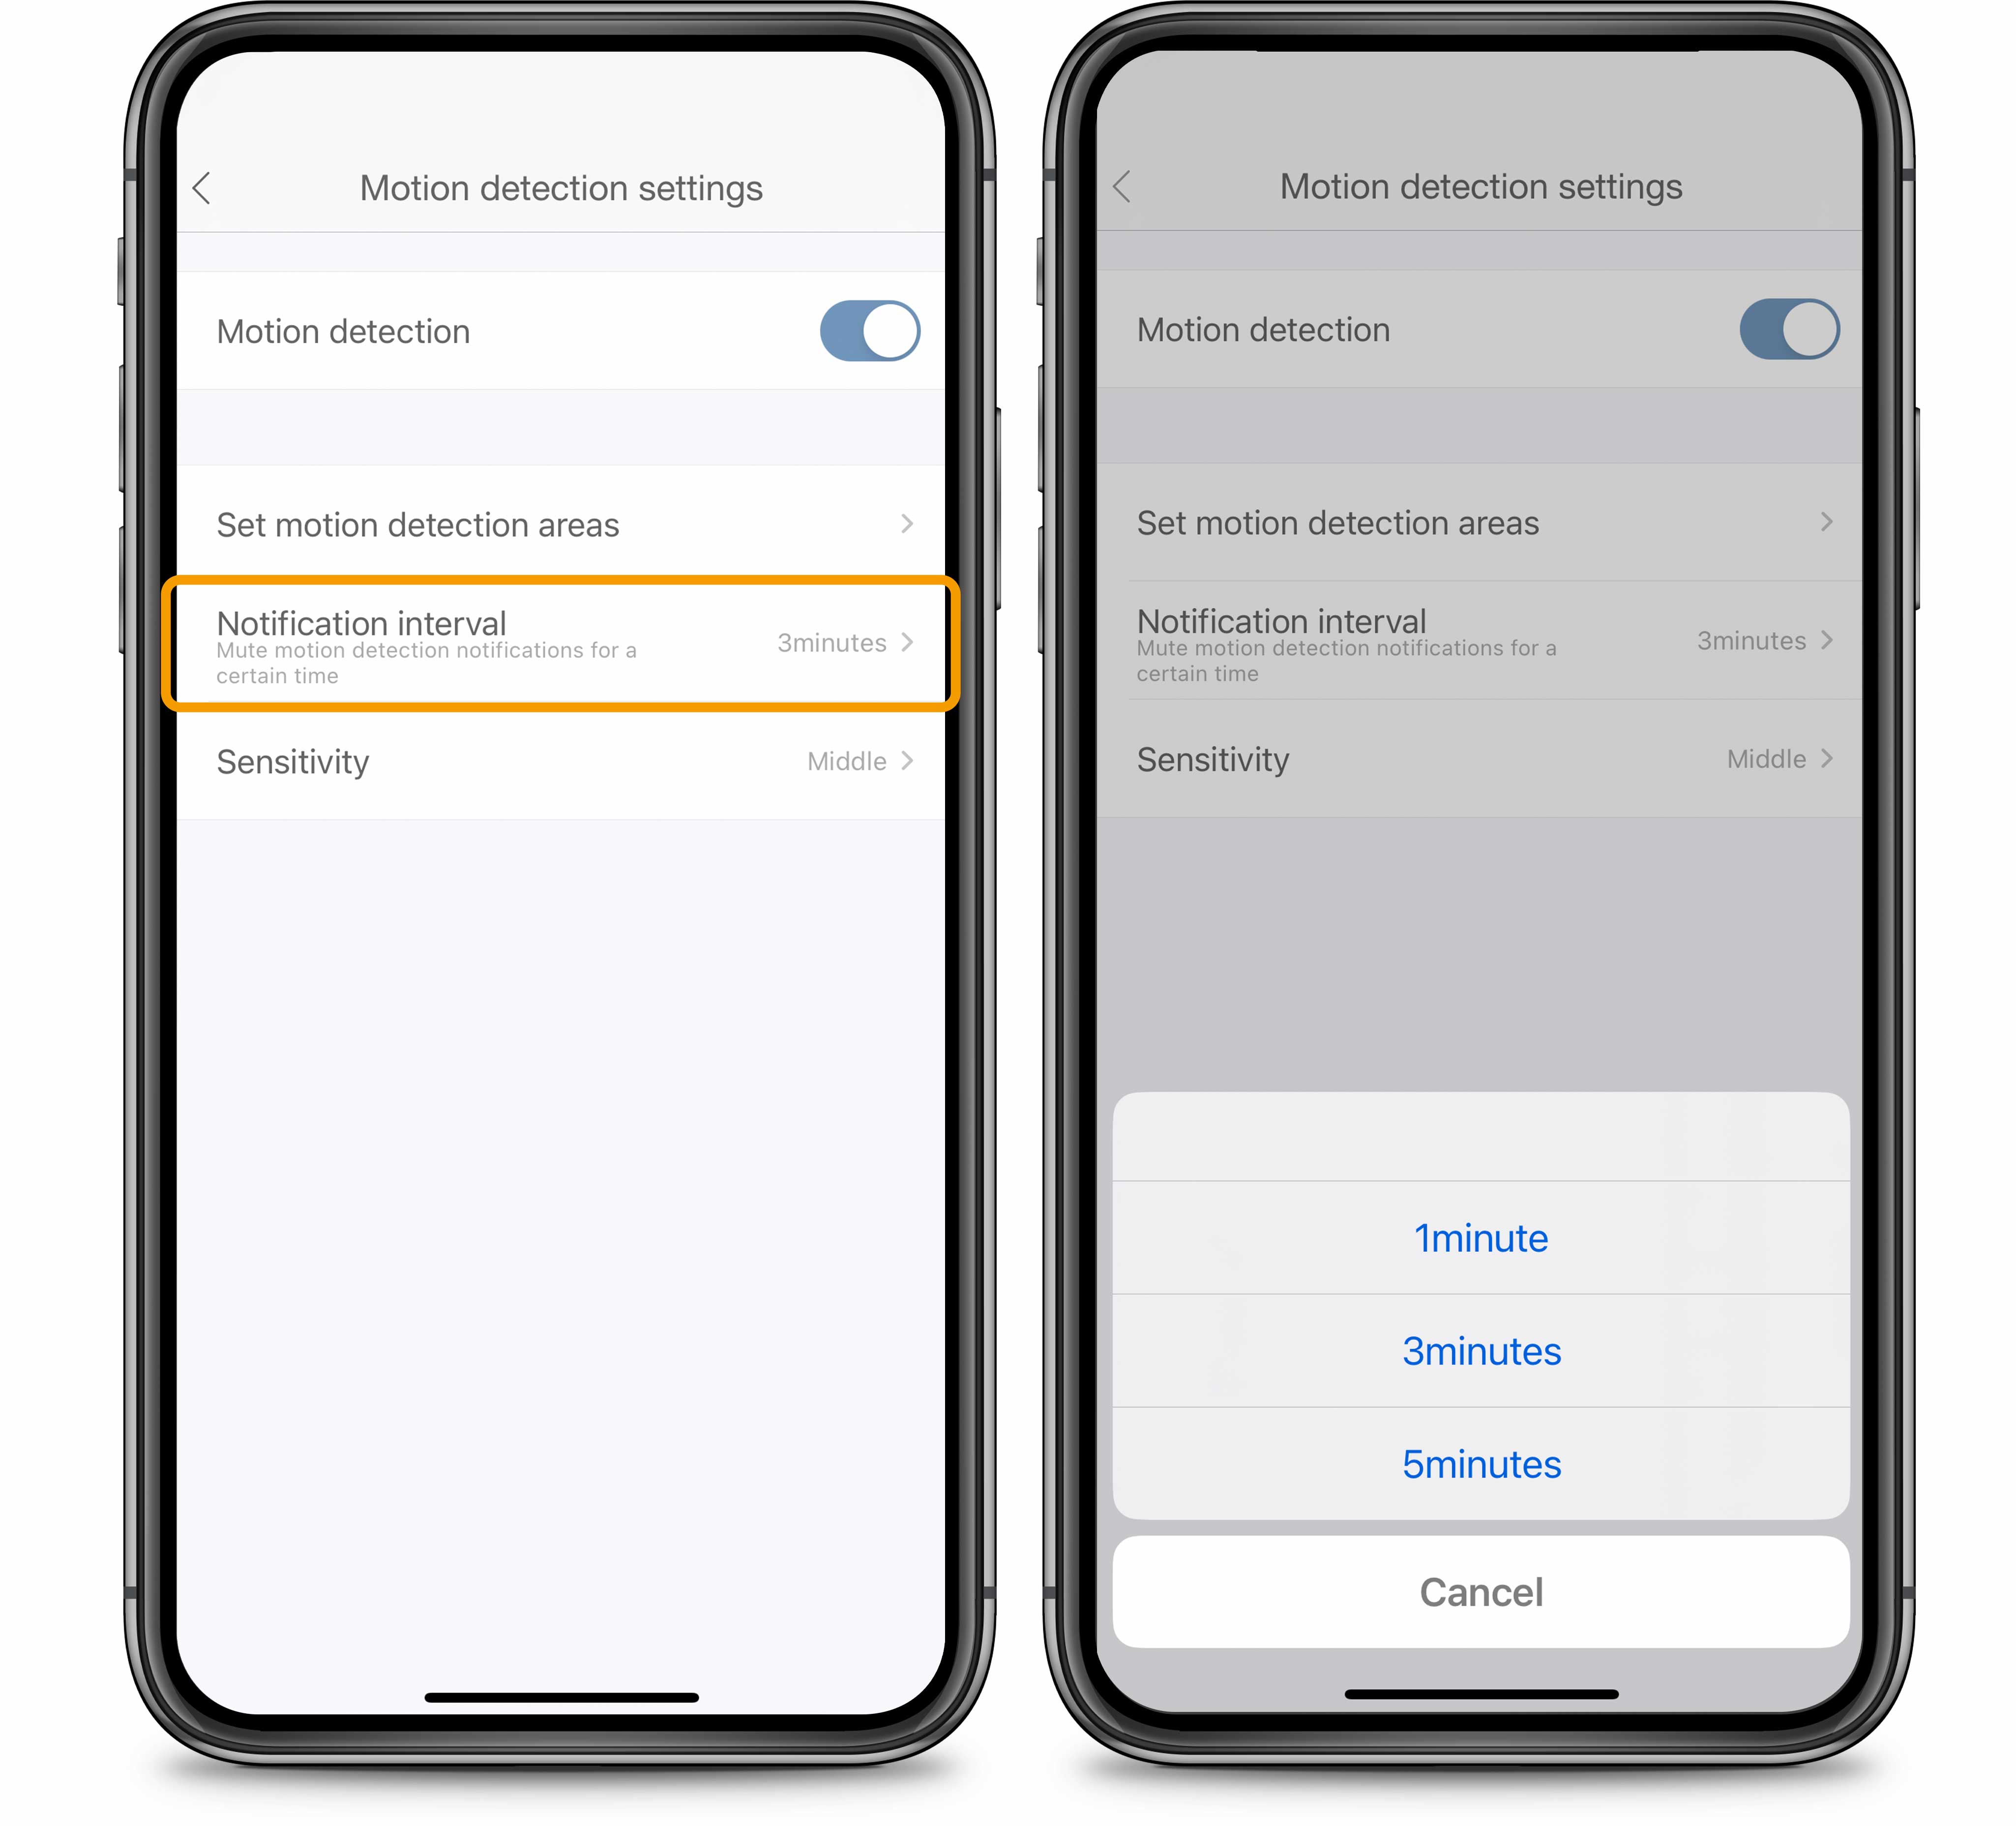
Set notification intervals:
You may not want to receive a notification every single time the camera picks up on motion (either in general or within your set motion detection areas). Setting a notification interval allows a pause of 1, 3 or 5 minutes between notifications. See our article on Notifications for more information on how to customise the settings.
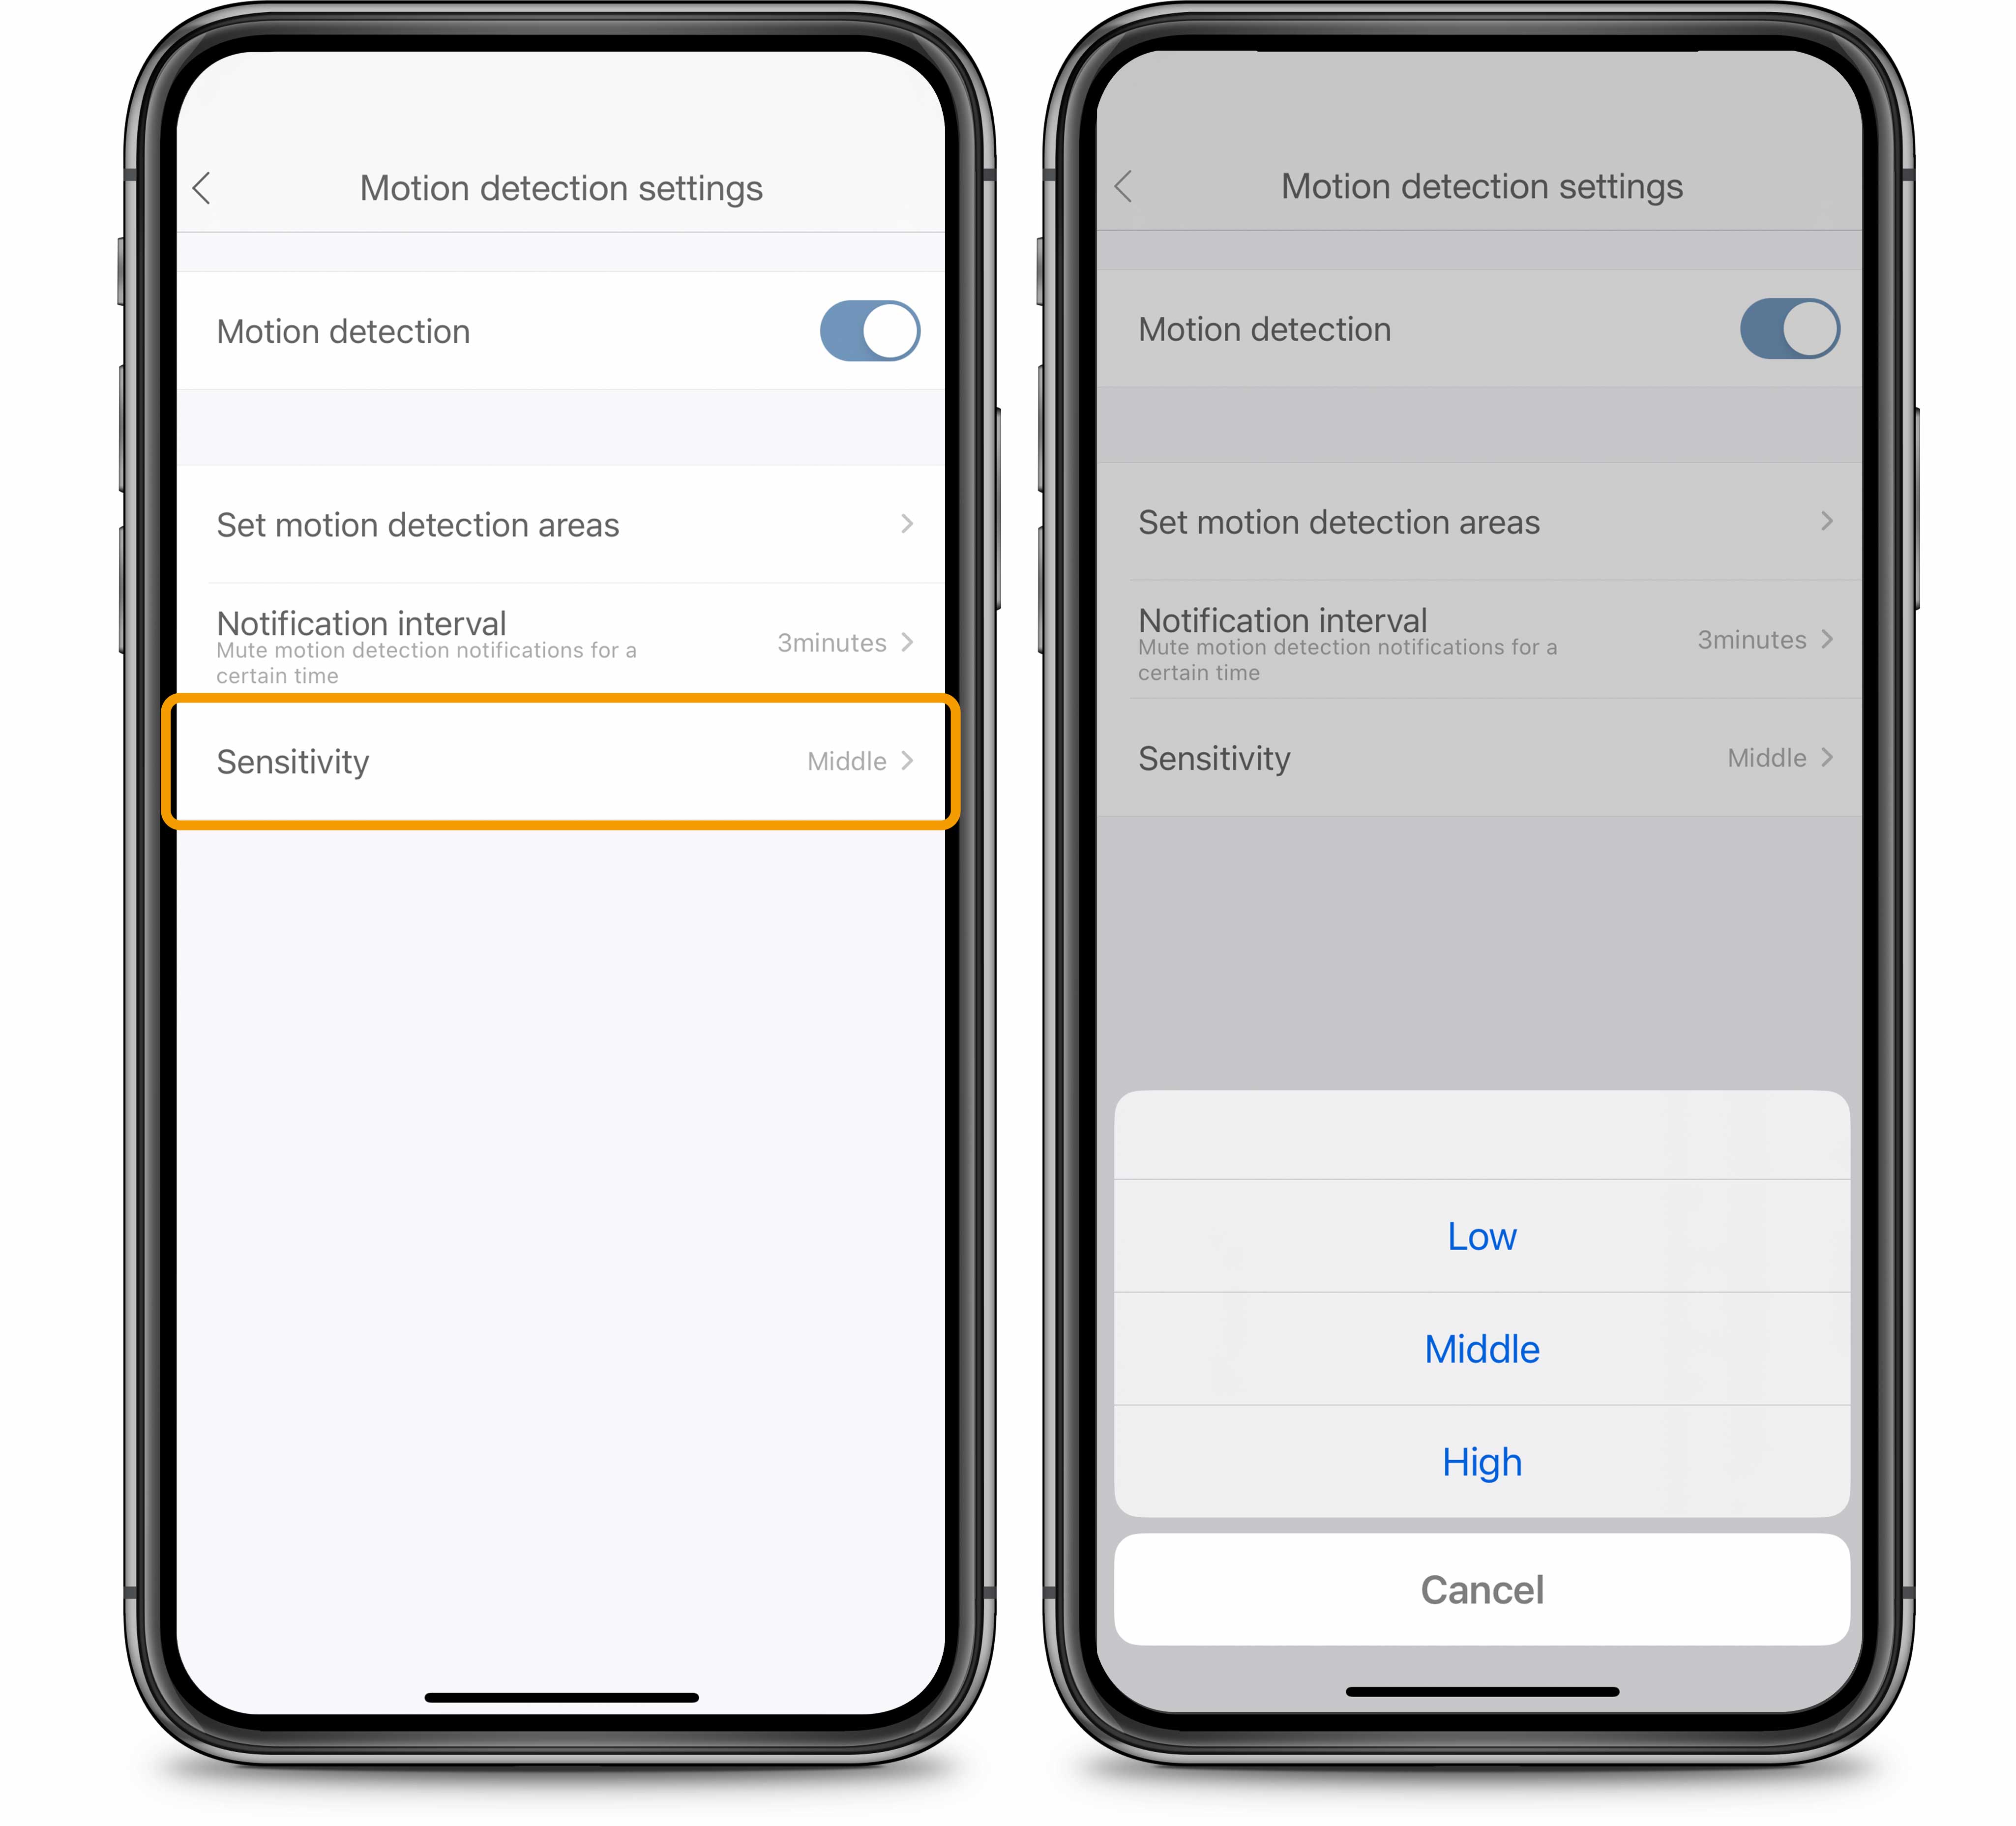
Adjusting sensitivity:
The Catit PIXI Vision Smart Feeder can be set to 3 levels of sensitivity in the Motion detection settings. It’s recommended to start at the ‘High’ setting and work your way down to ‘Medium’ or ‘Low’ only when you find that motion detection notifications or recordings are triggered too easily, such as by moving shadows instead of your cat actually walking past.
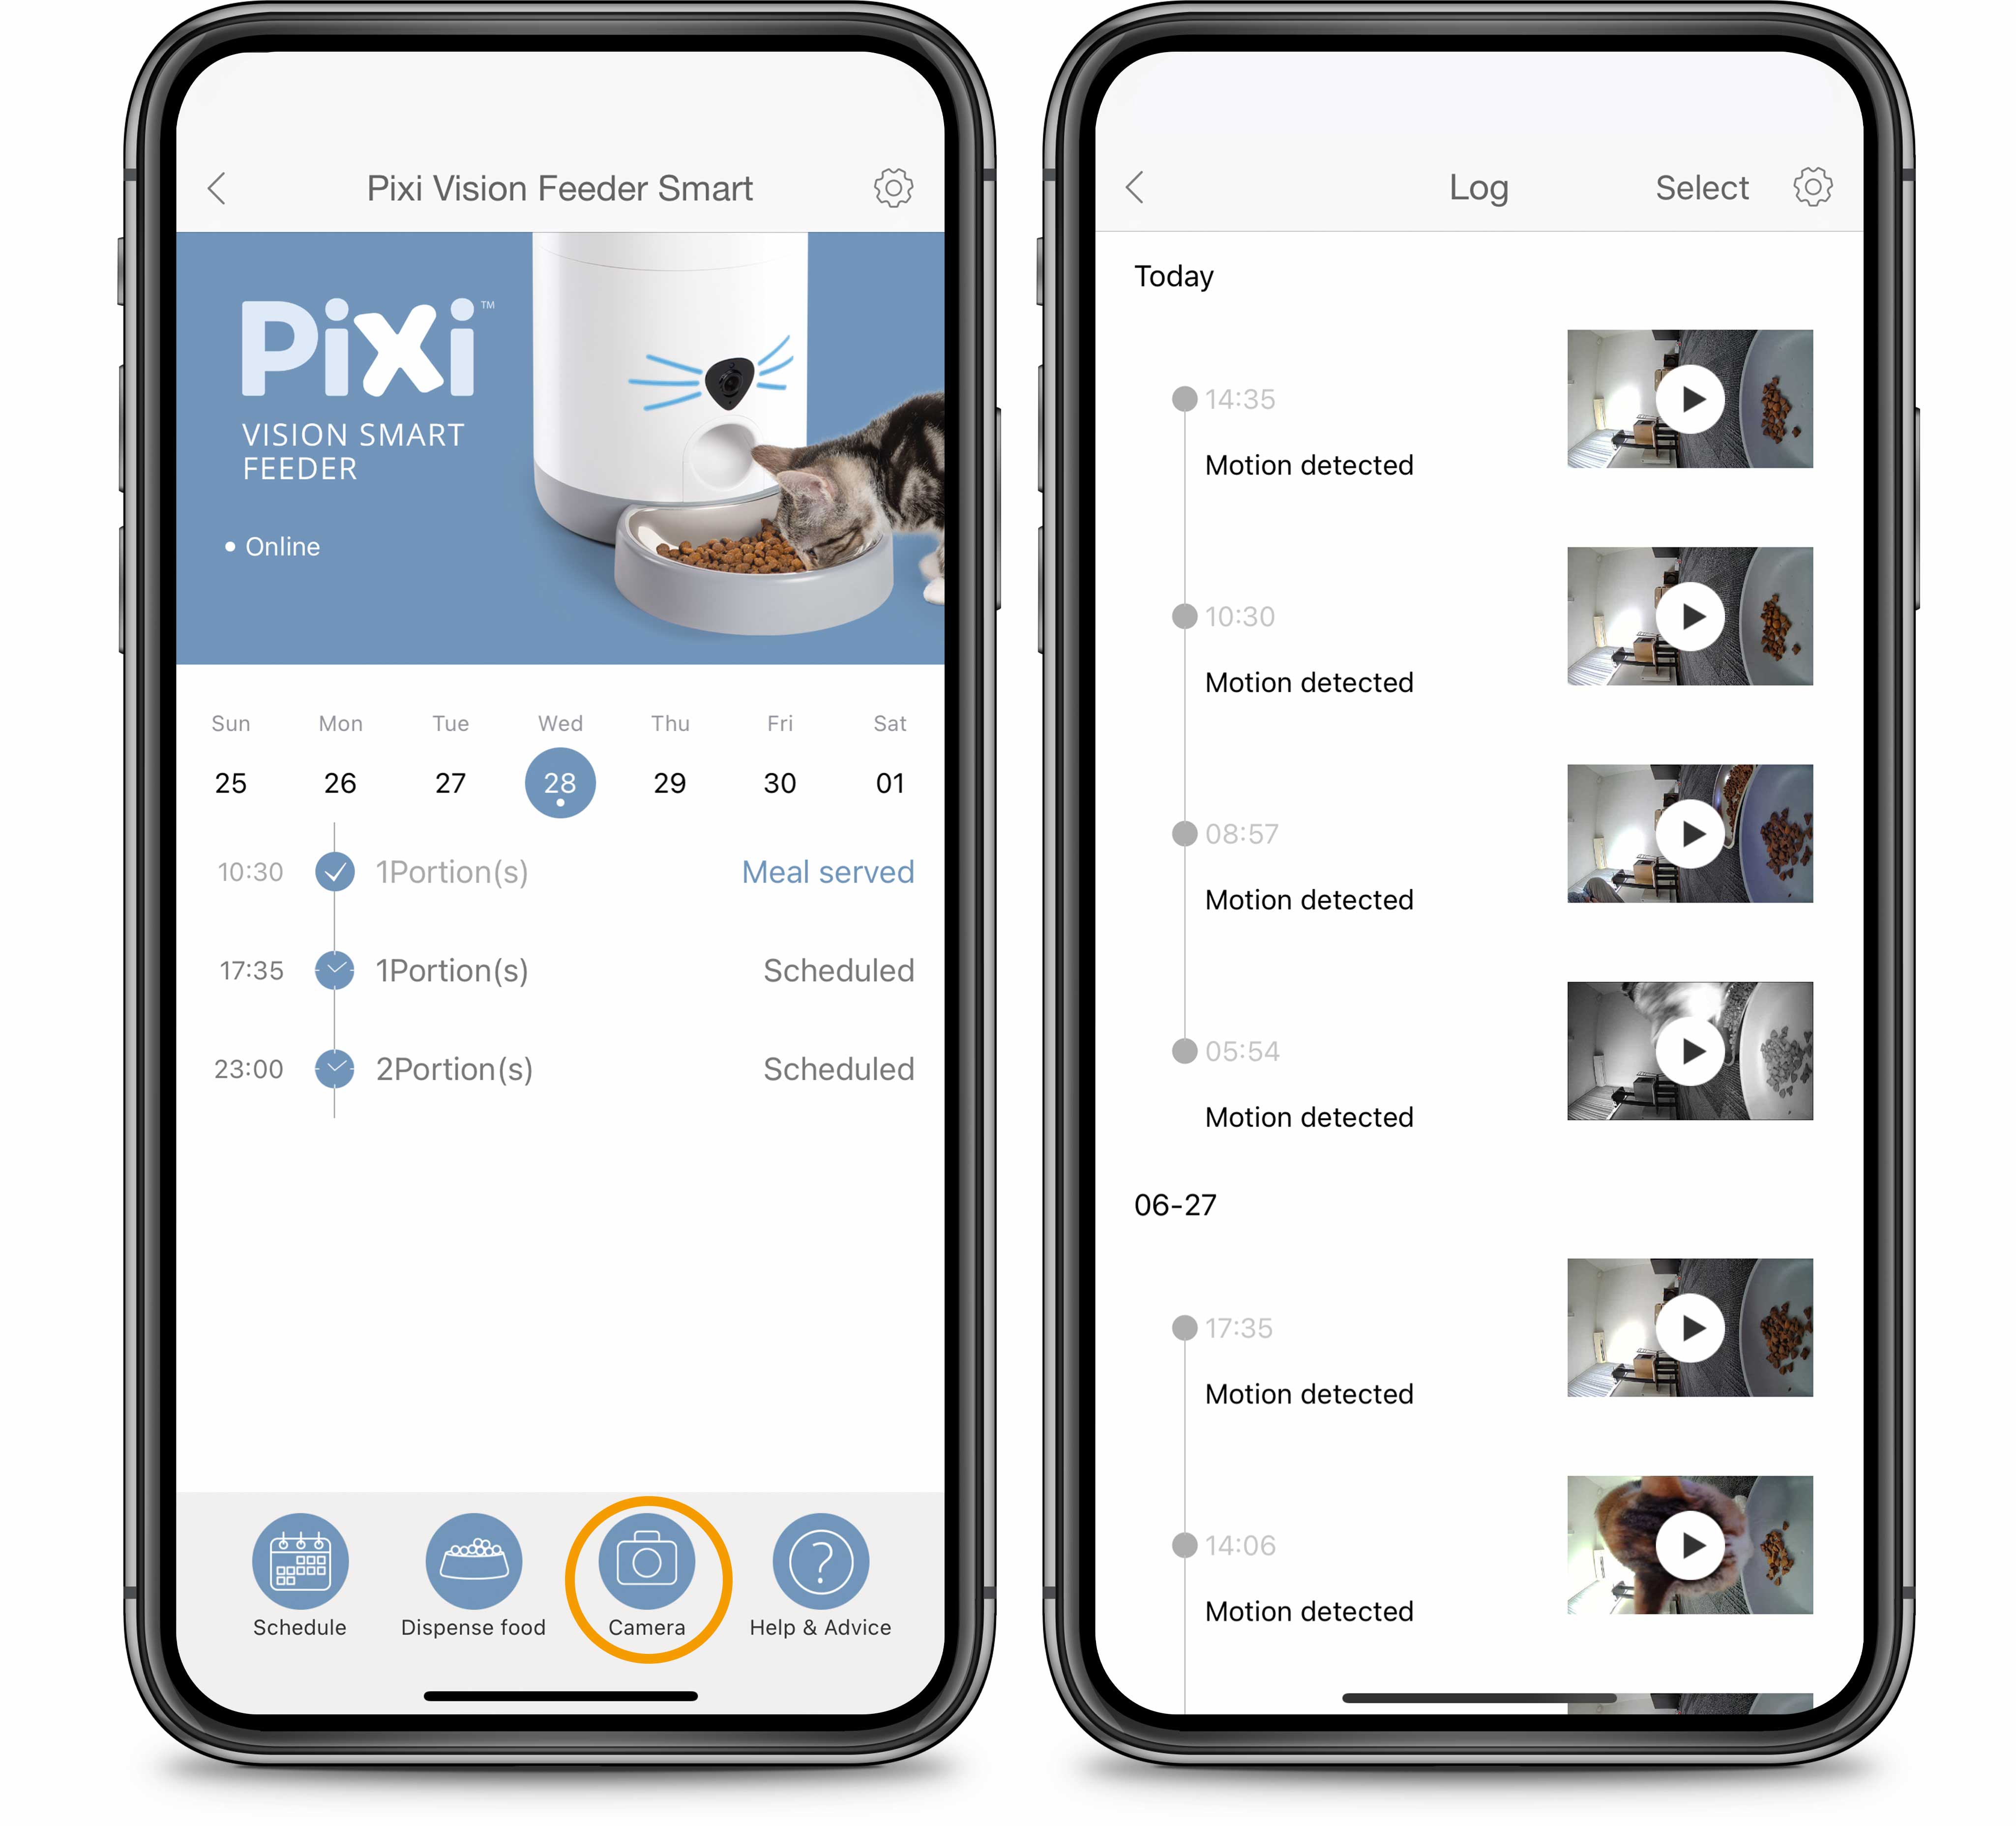
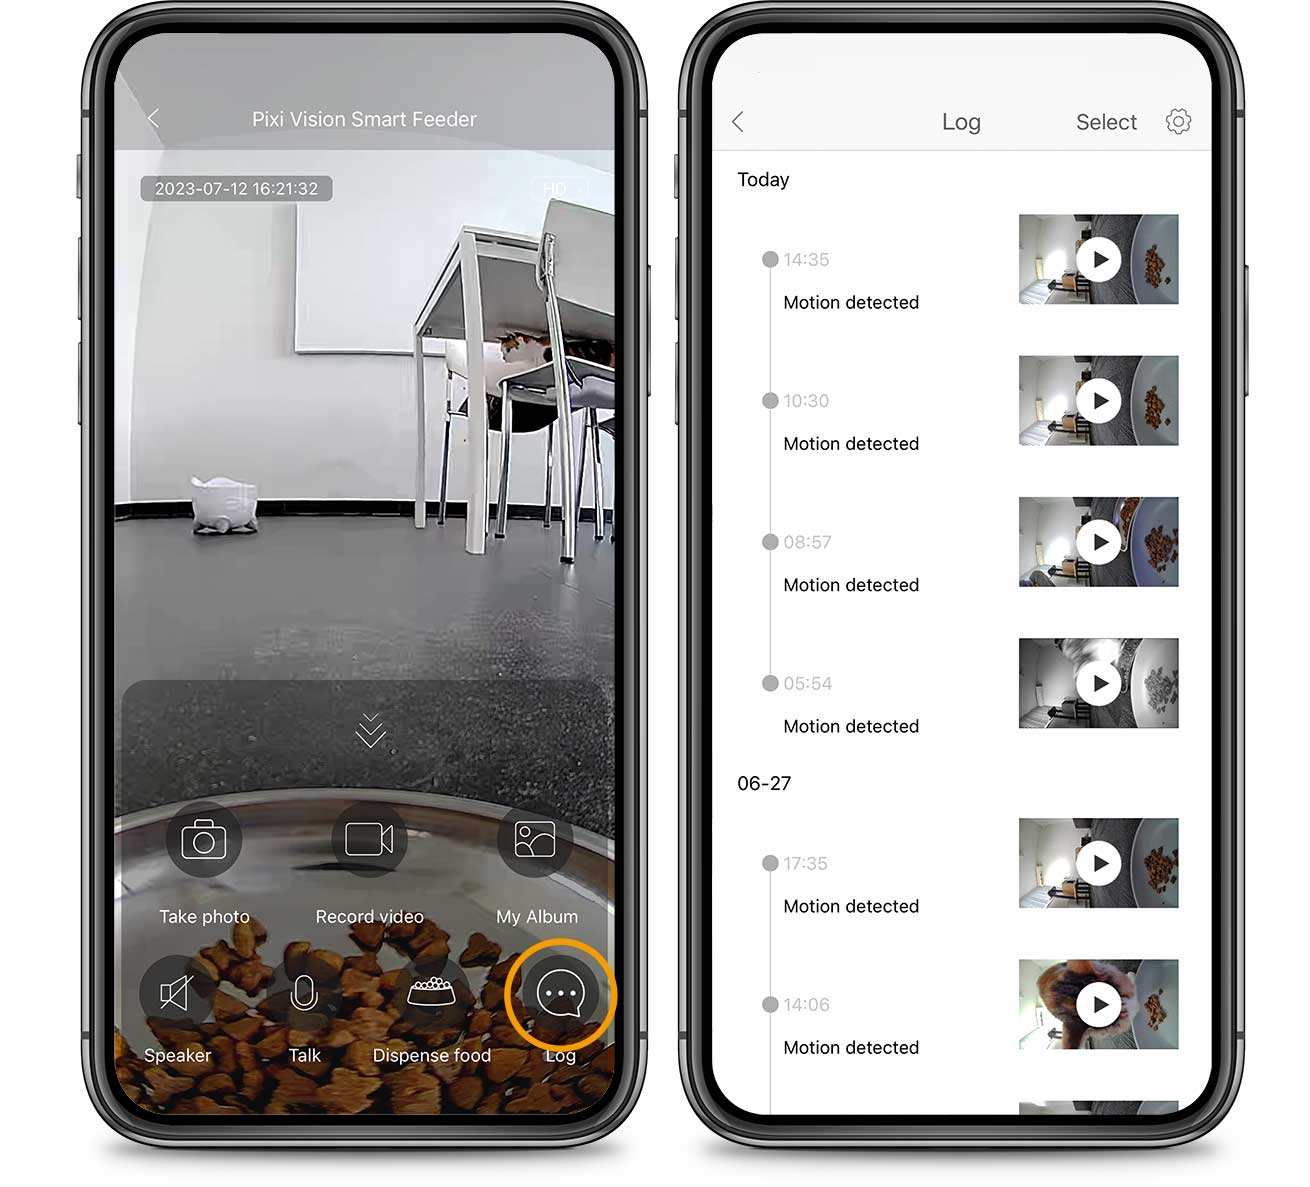
Motion detection log:
You can open the motion detection log by tapping the camera icon on the feeder Home Screen, next tapping the ‘log‘ button. The app’s motion detection log allows you to easily keep track of when the Catit PIXI Vision Smart Feeder has picked up on movement over time. All occurrences are listed in a chronological overview in the Motion detection log, along with a photo or short video clip (note: video is only enabled when you’ve inserted a MicroSD card into the camera).
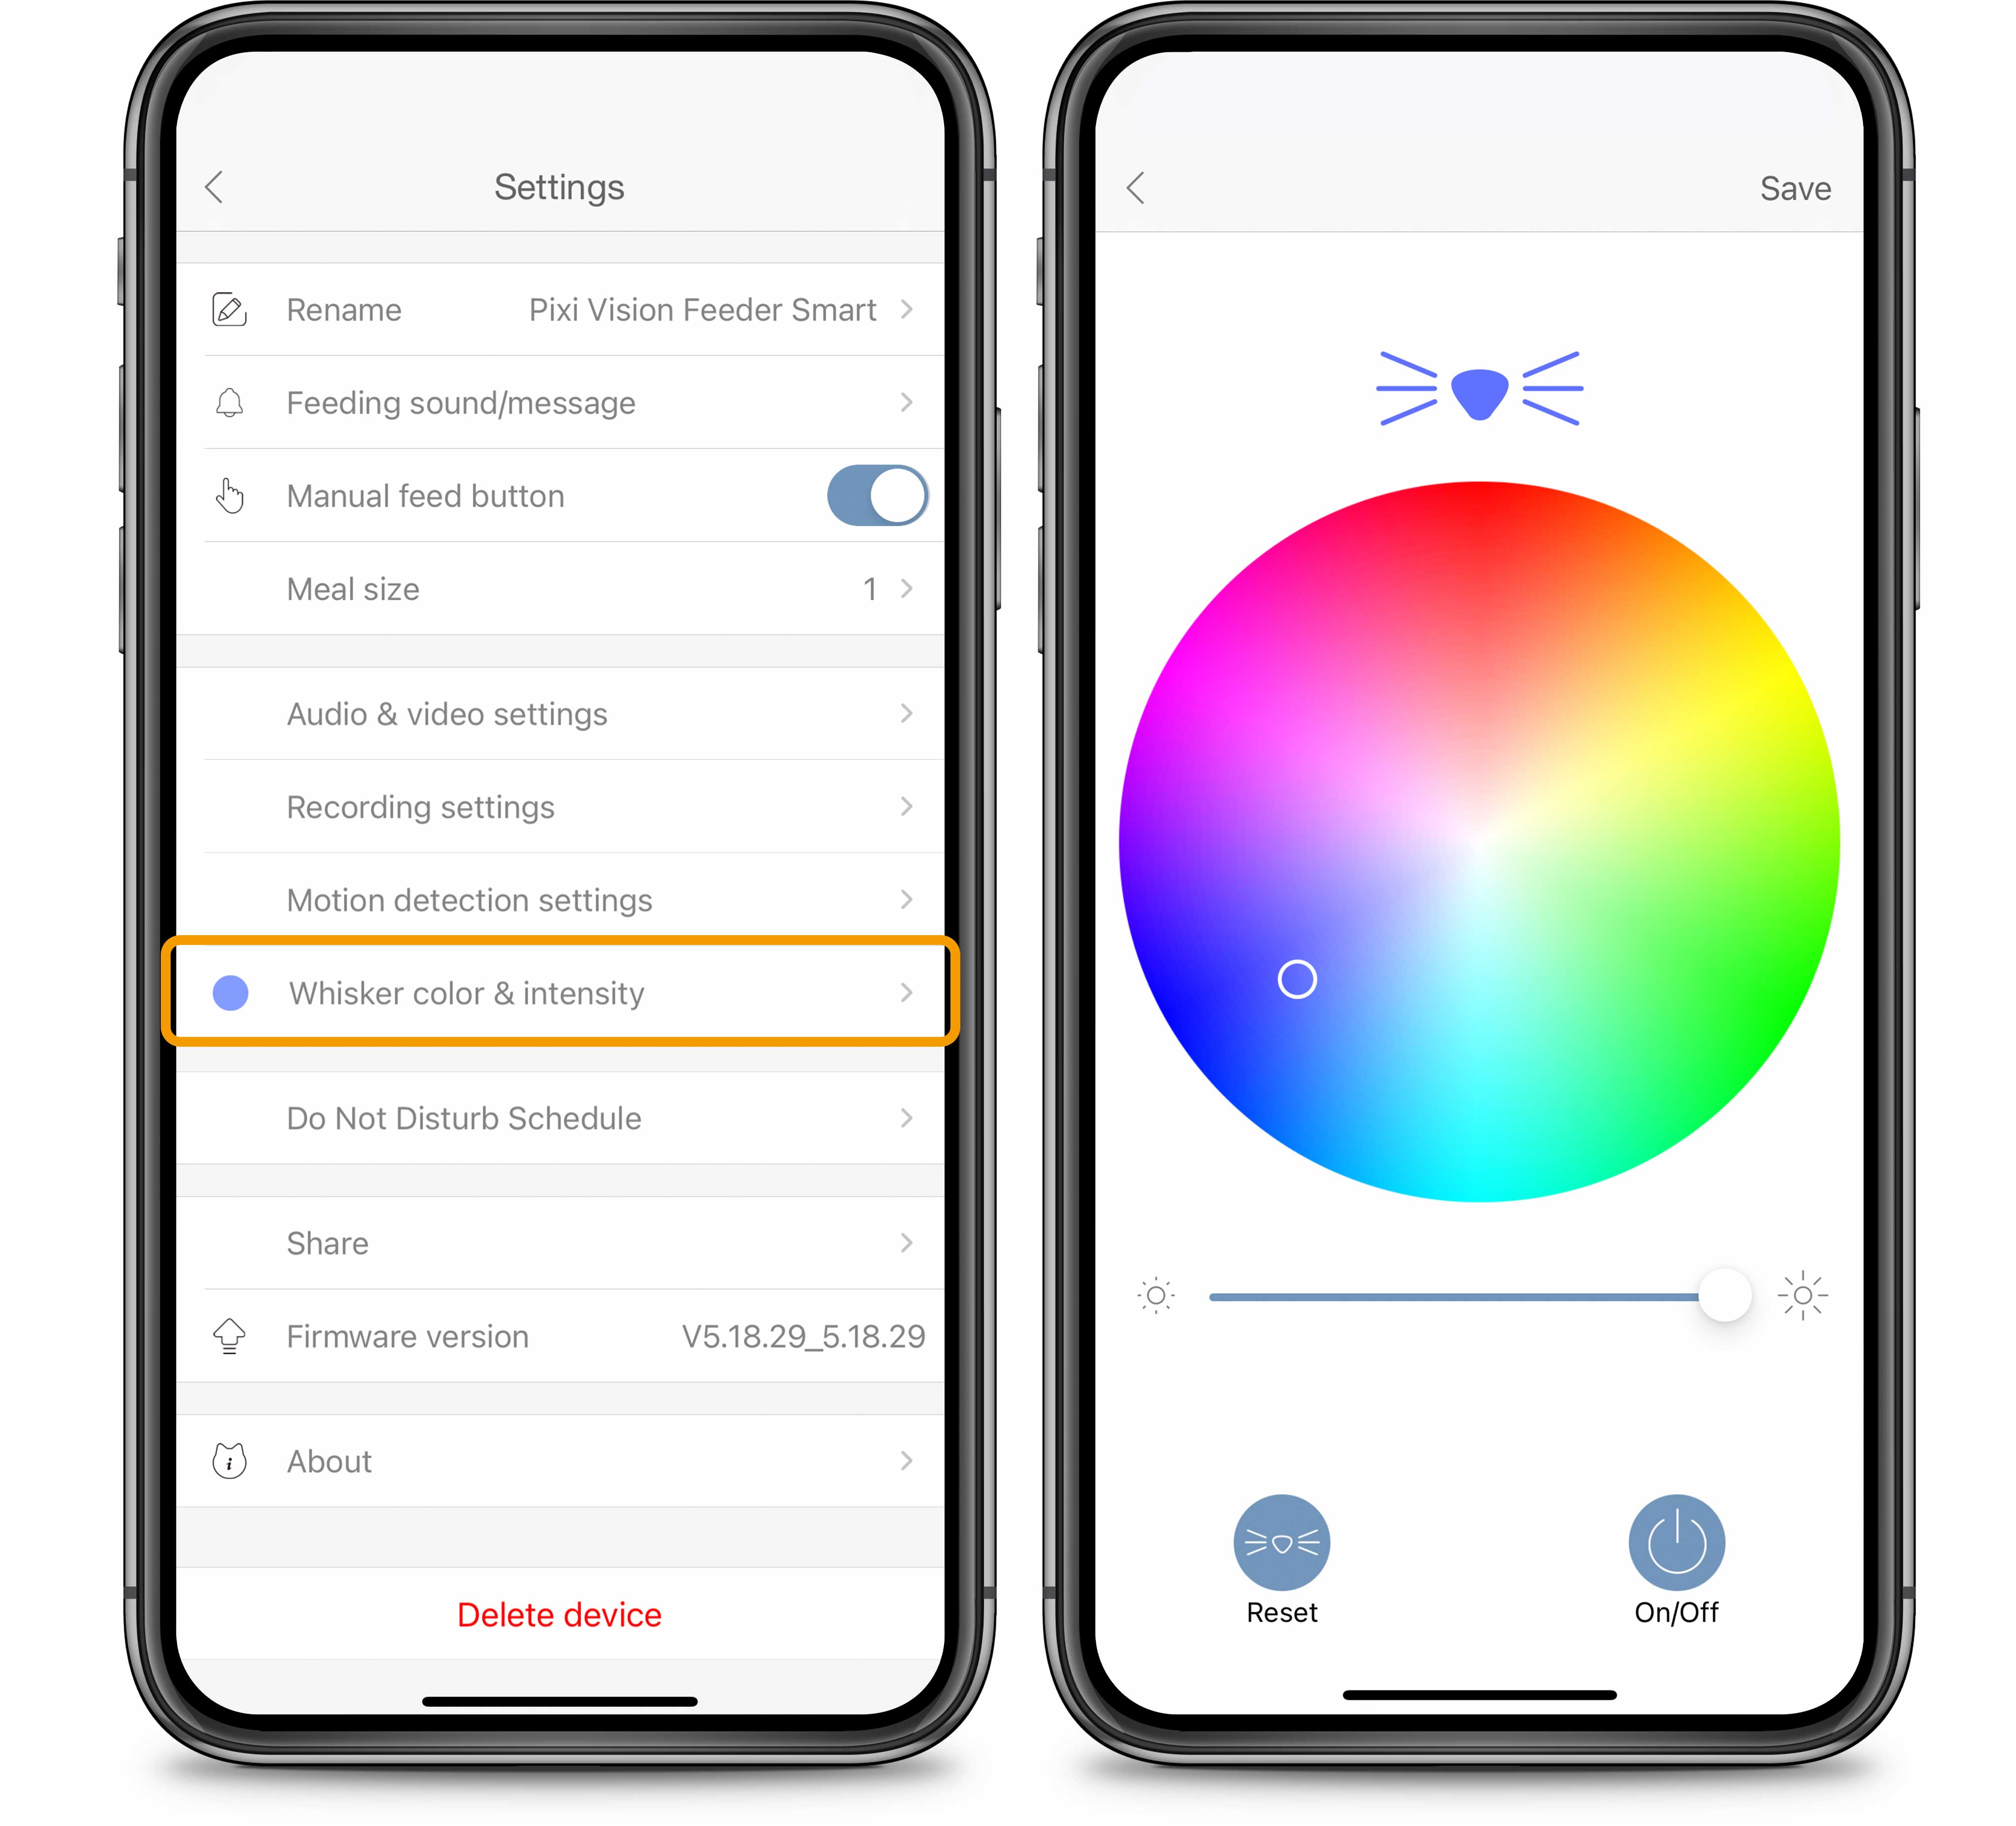
5.10 Whisker color & intensity
Here you can adjust the light color/brightness of the whisker light. The on/off button turns the whisker lights on and off. You can change the color of the whiskers by picking a color on the color wheel. Tapping the reset button will set the whisker color back to white (default setting). Press ‘save’ in the top right corner to save the settings. Next, tap the arrow in the top left corner to go back to the general settings screen.
5.11 Do not disturb schedule
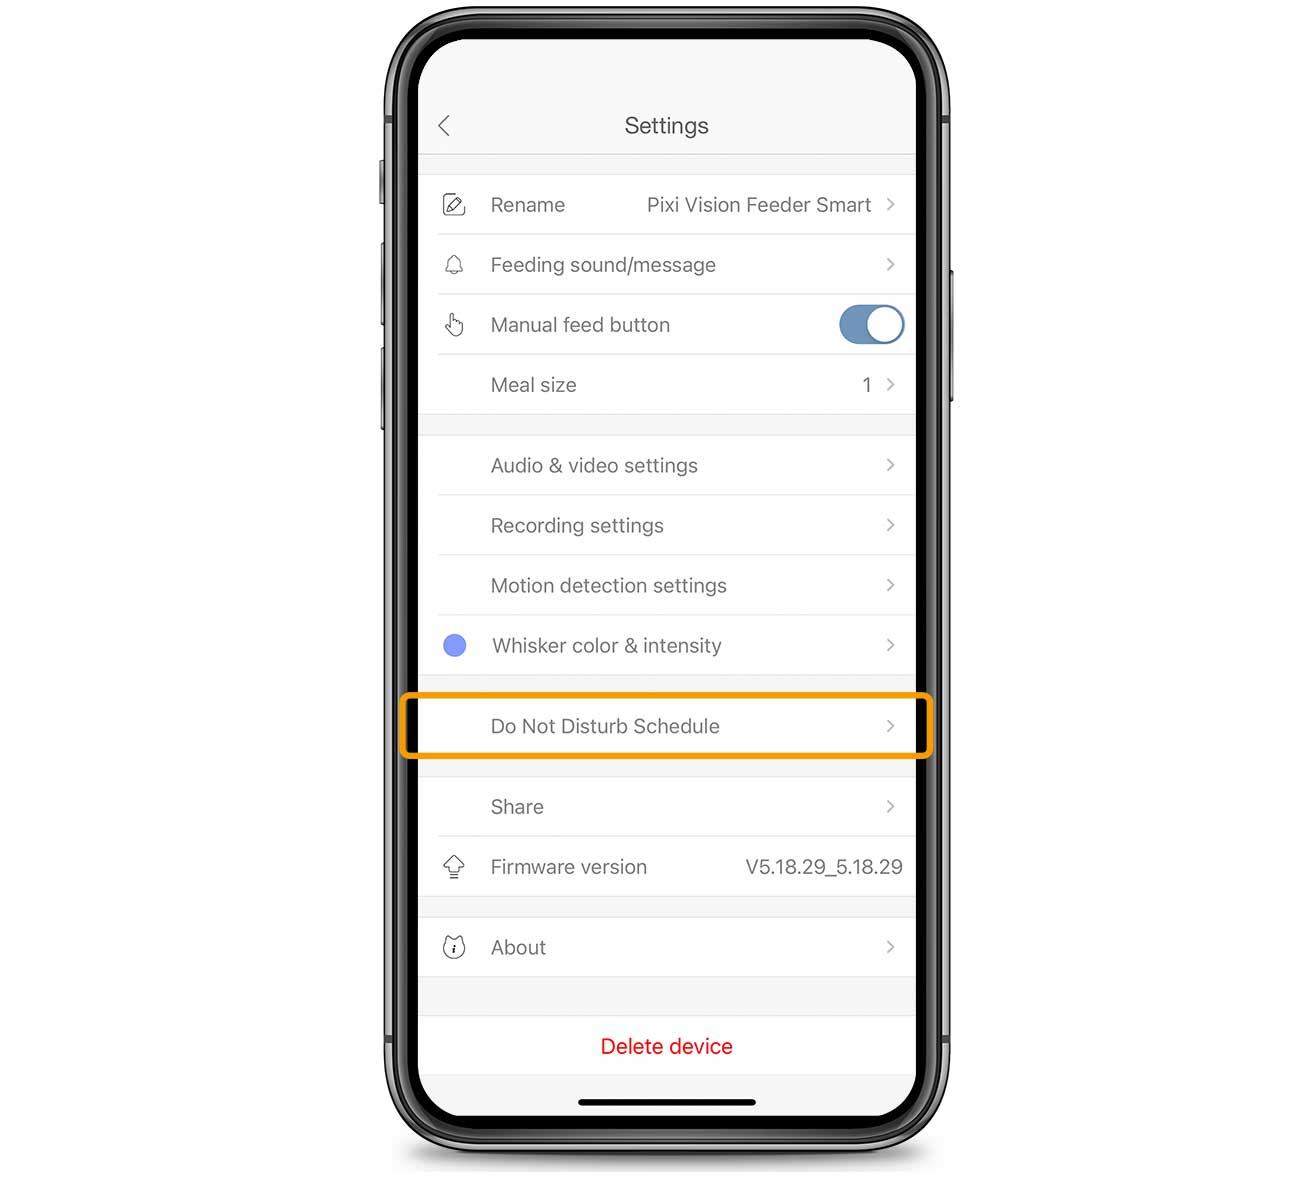
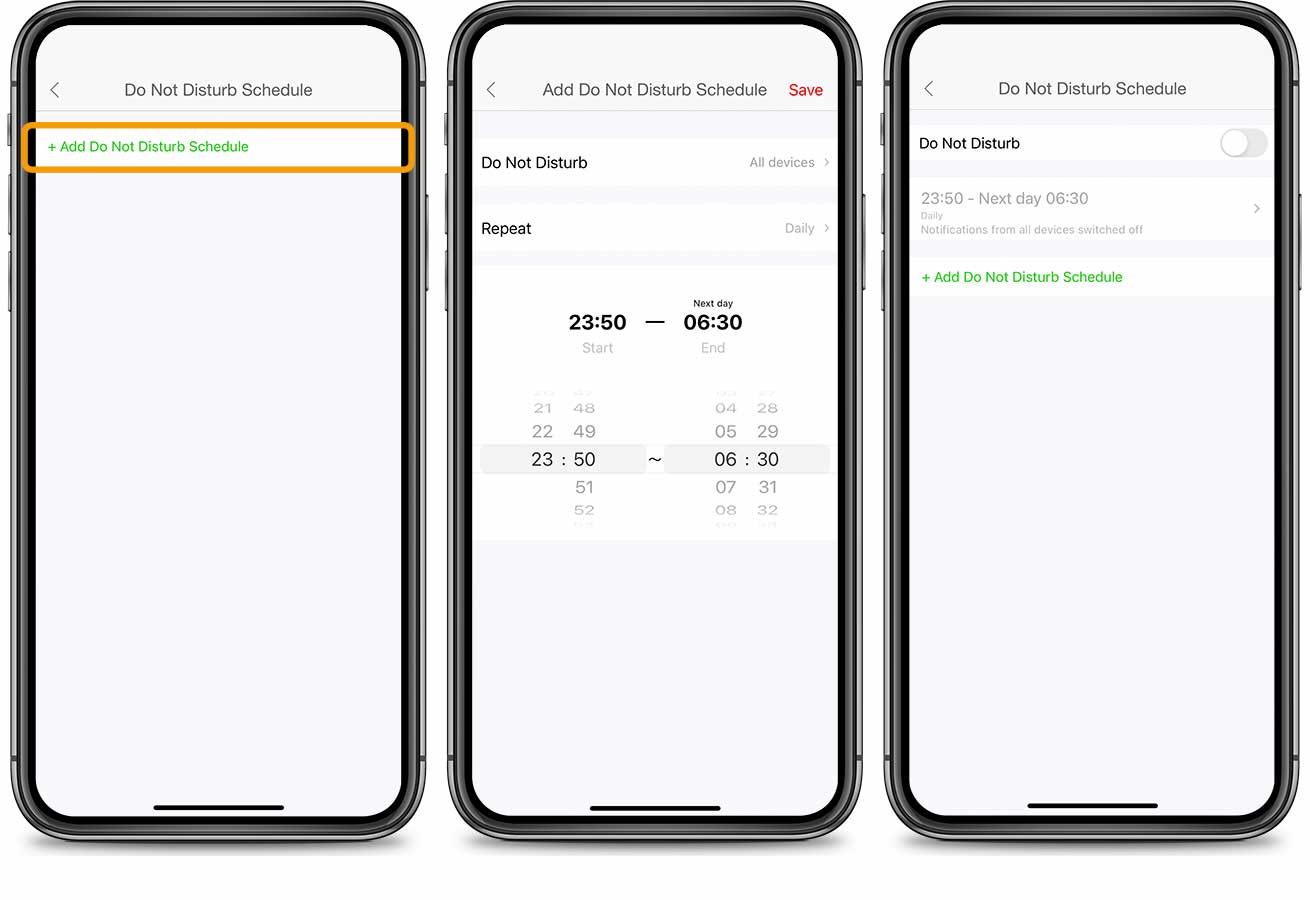
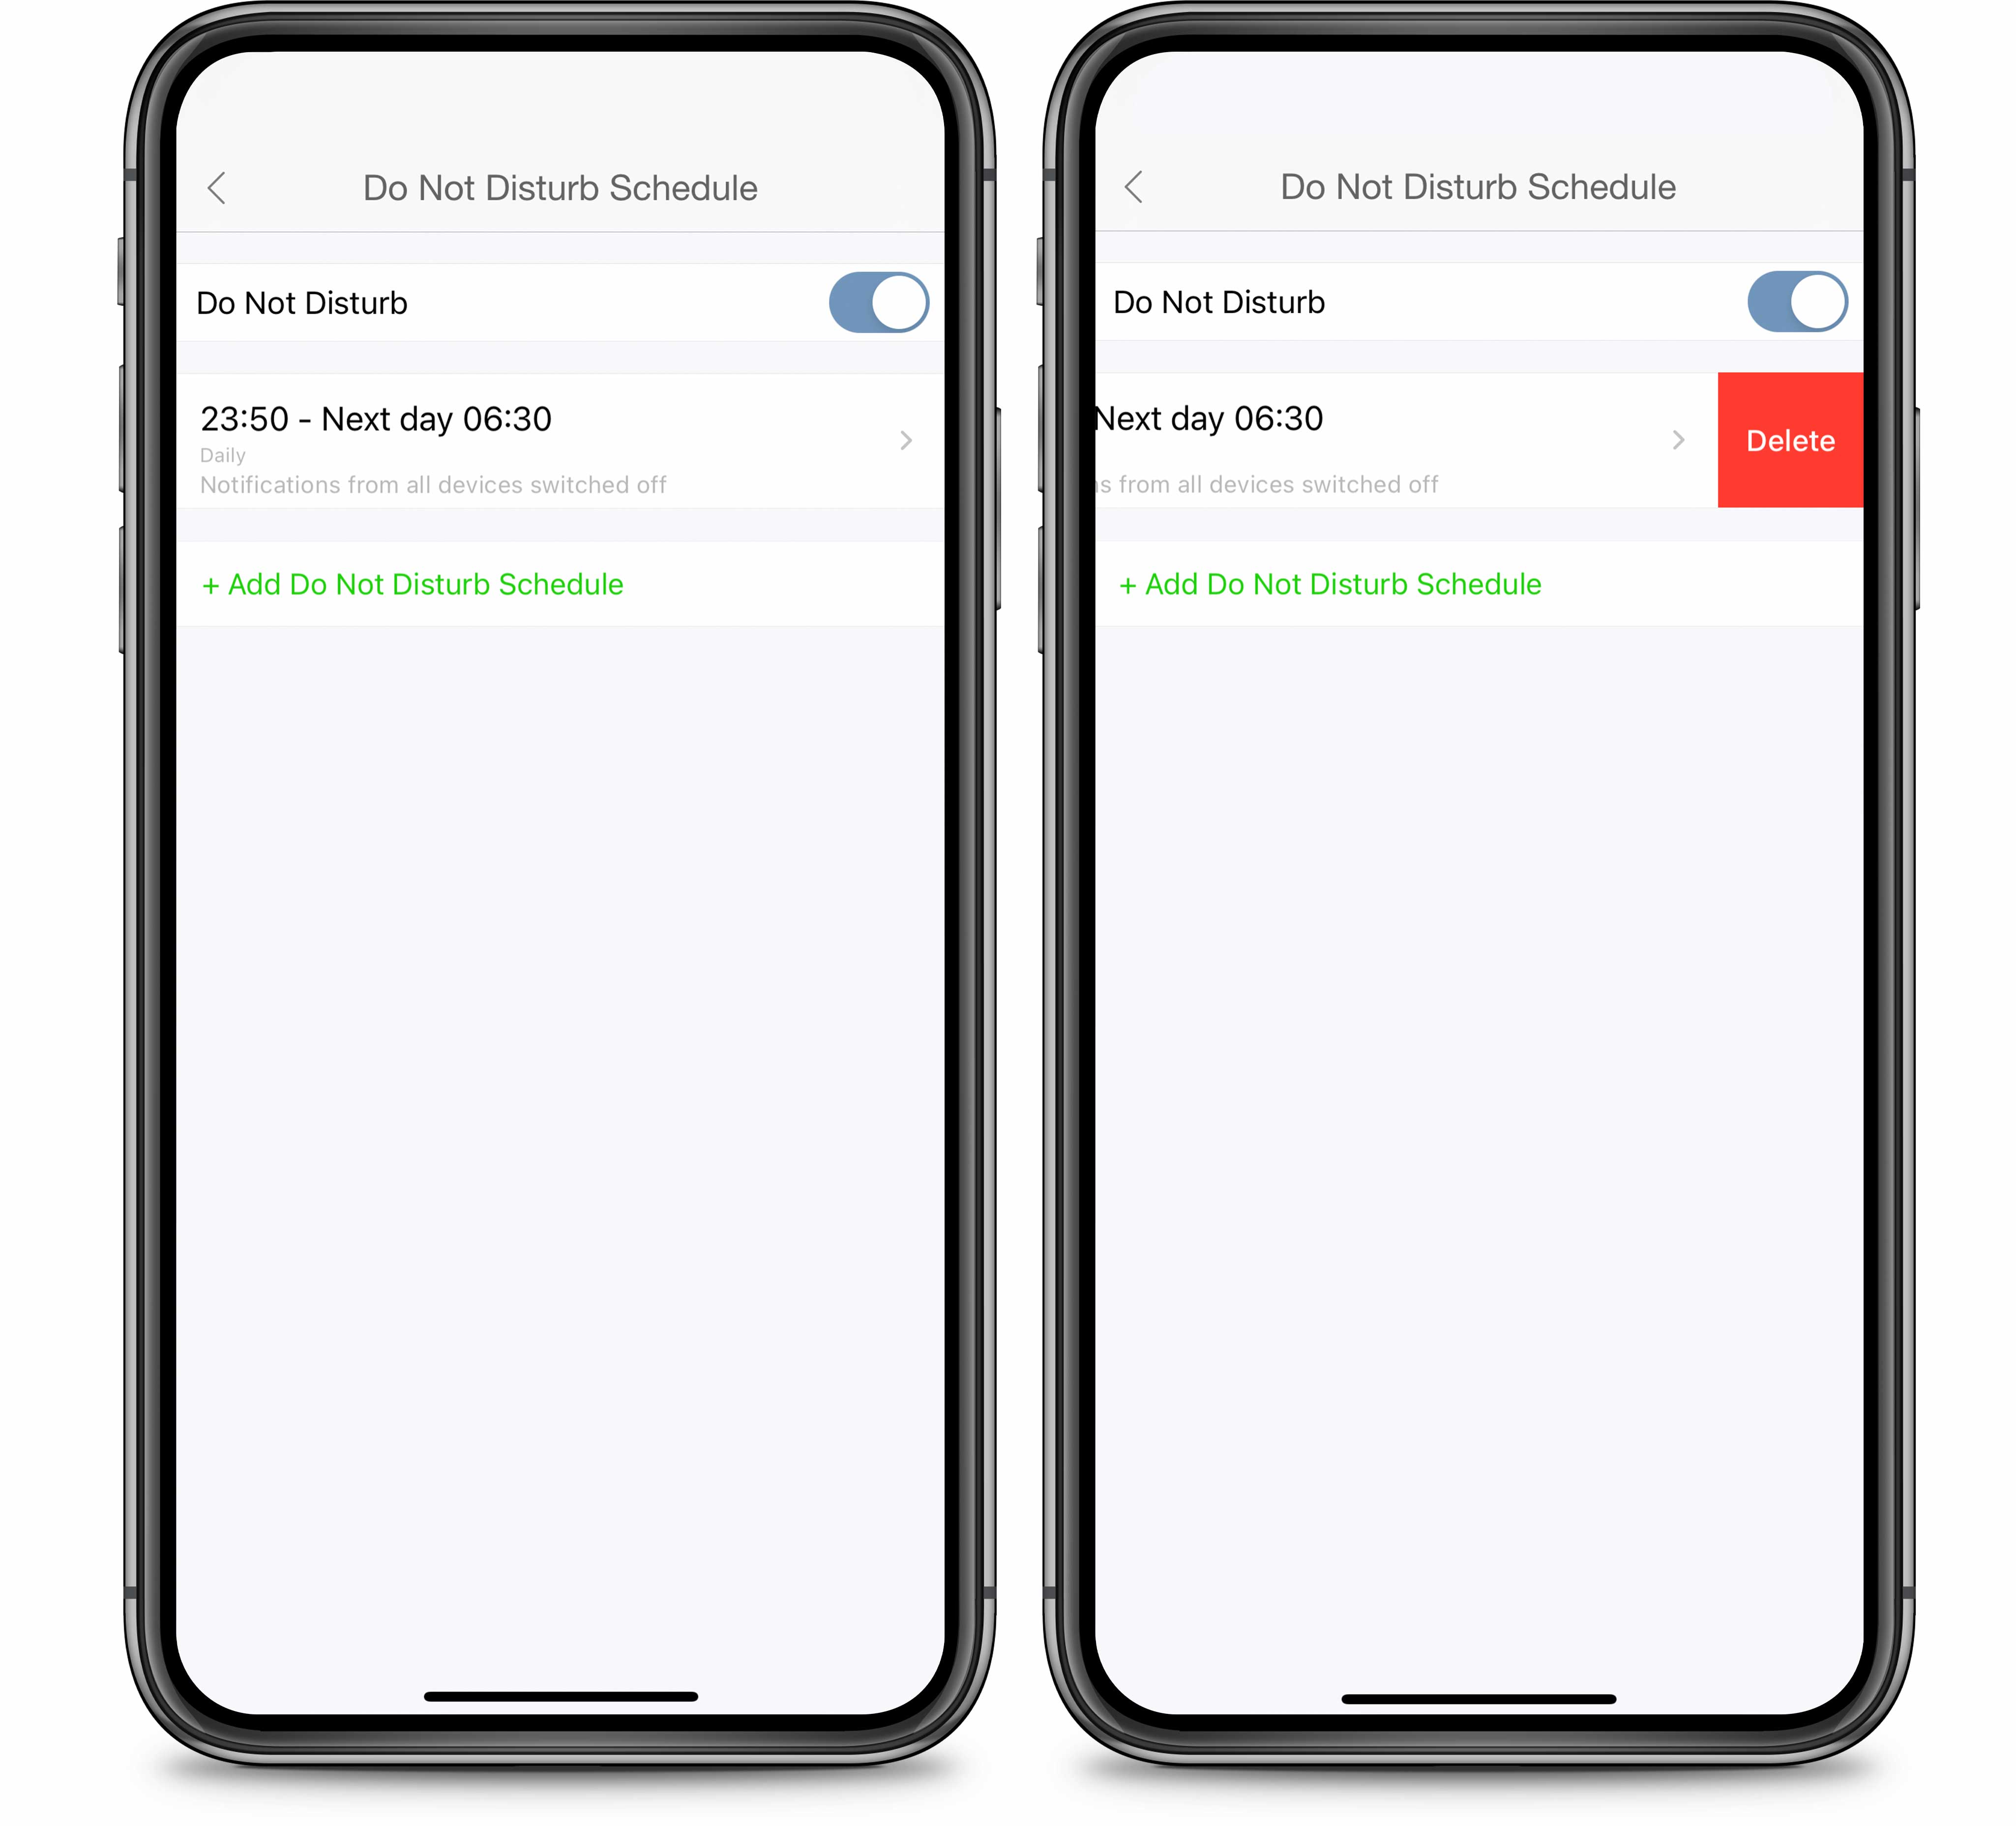
While mobile notifications come in handy when you’re on the go, you may not want to receive these updates when you’re at home or asleep. The Do Not Disturb feature allows you to set a timeframe during which you won’t receive notifications from a particular or any of your Catit PIXI Smart devices.
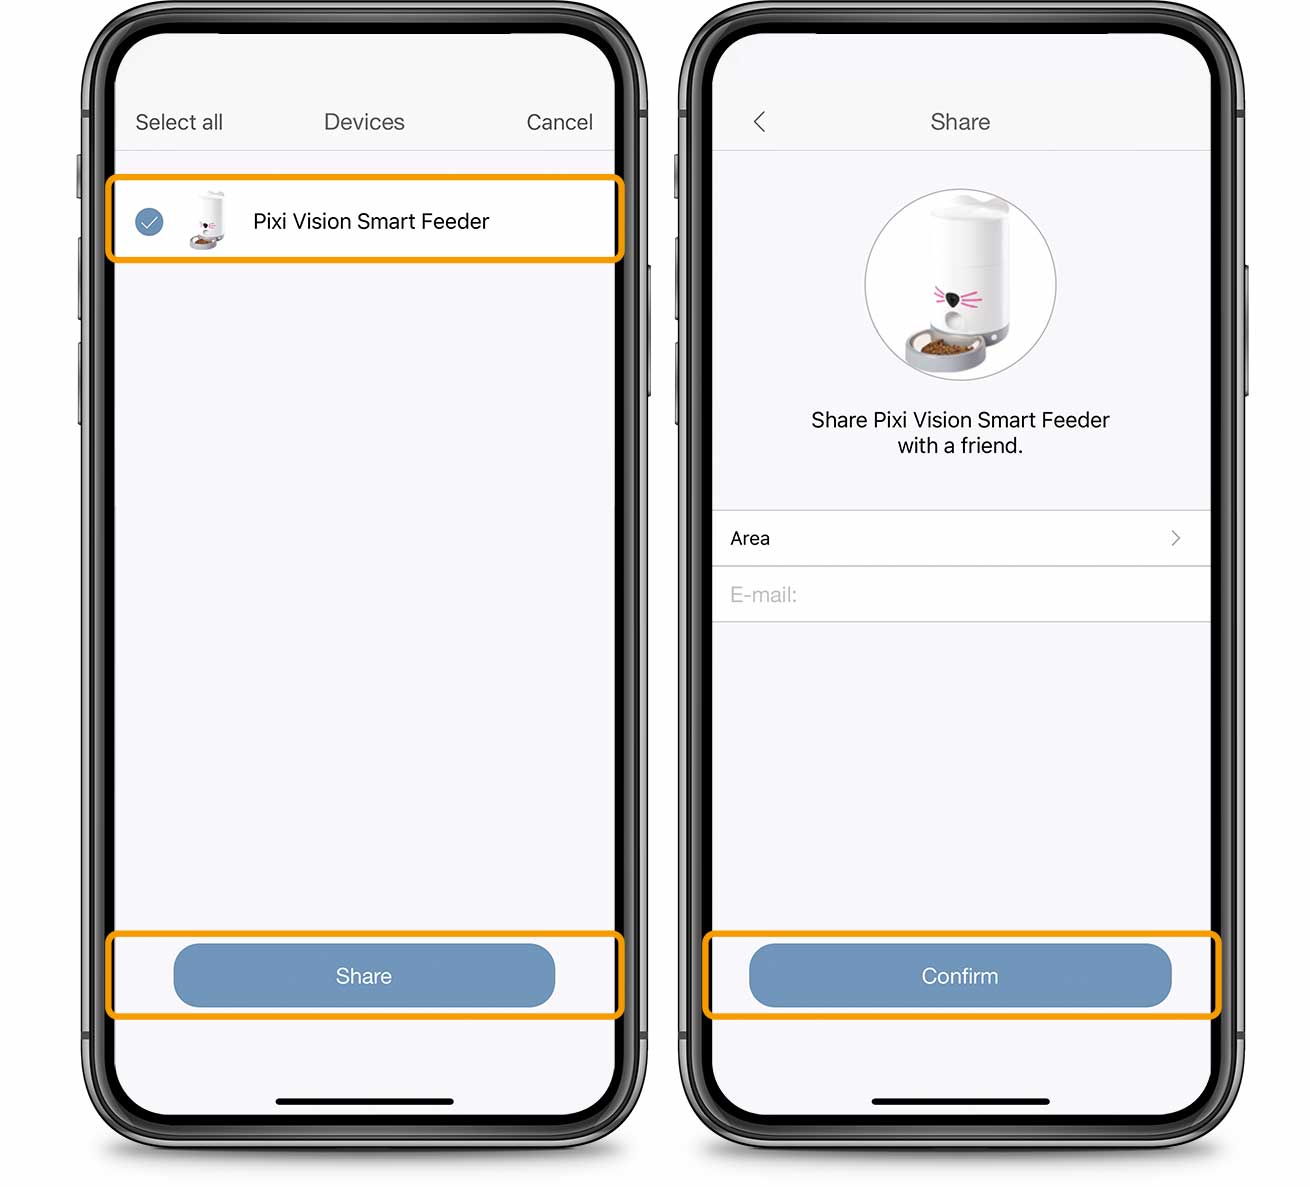
5.12 Share your device
It’s possible to share control of your Catit PIXI Smart device with your friends or family, so that they can help care for your cat. Sharing means they will be given the same access to your device’s features as you have.
To start sharing, go to ‘Account’ and select ‘Share’.
Select the device and tap ‘Share’.
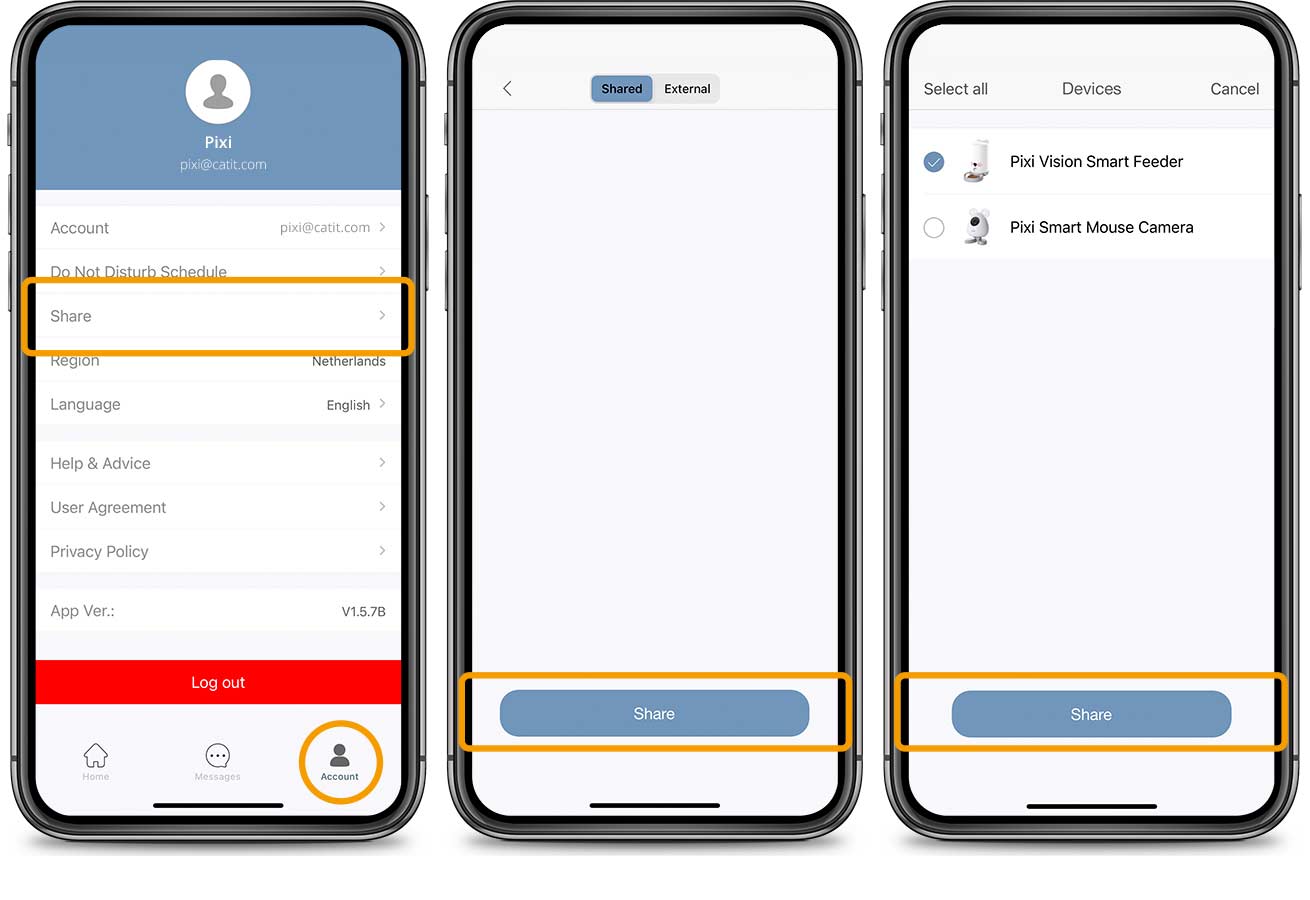
Ensure that whomever you are sharing the device with has already created an account on the PIXI app. Put in the email address that your friend’s account is linked to and press ‘Share’. Your PIXI Smart device will now appear in your friend’s app
5.13 Manage your shared devices
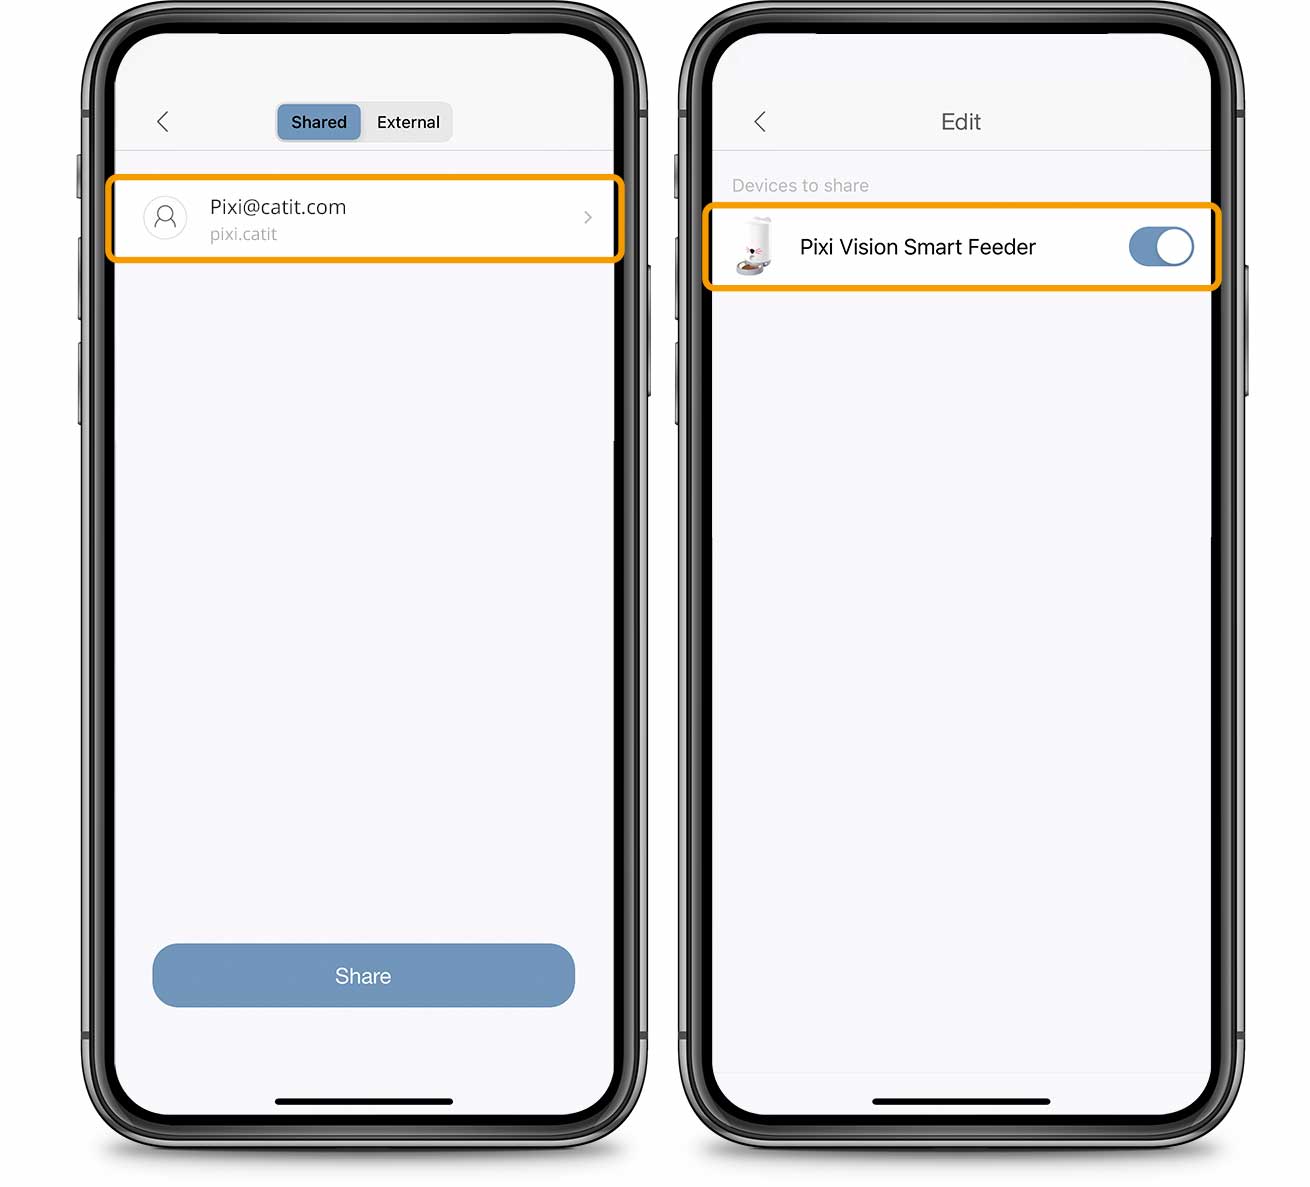
For an overview of the people you are sharing Catit PIXI Smart devices with, go to ‘Account’ and tap ‘Share’.
To stop sharing your device with someone else, select their email from the list and toggle the switch next to the device to the off position.
Toggle the switch back on to start sharing the device with them again.
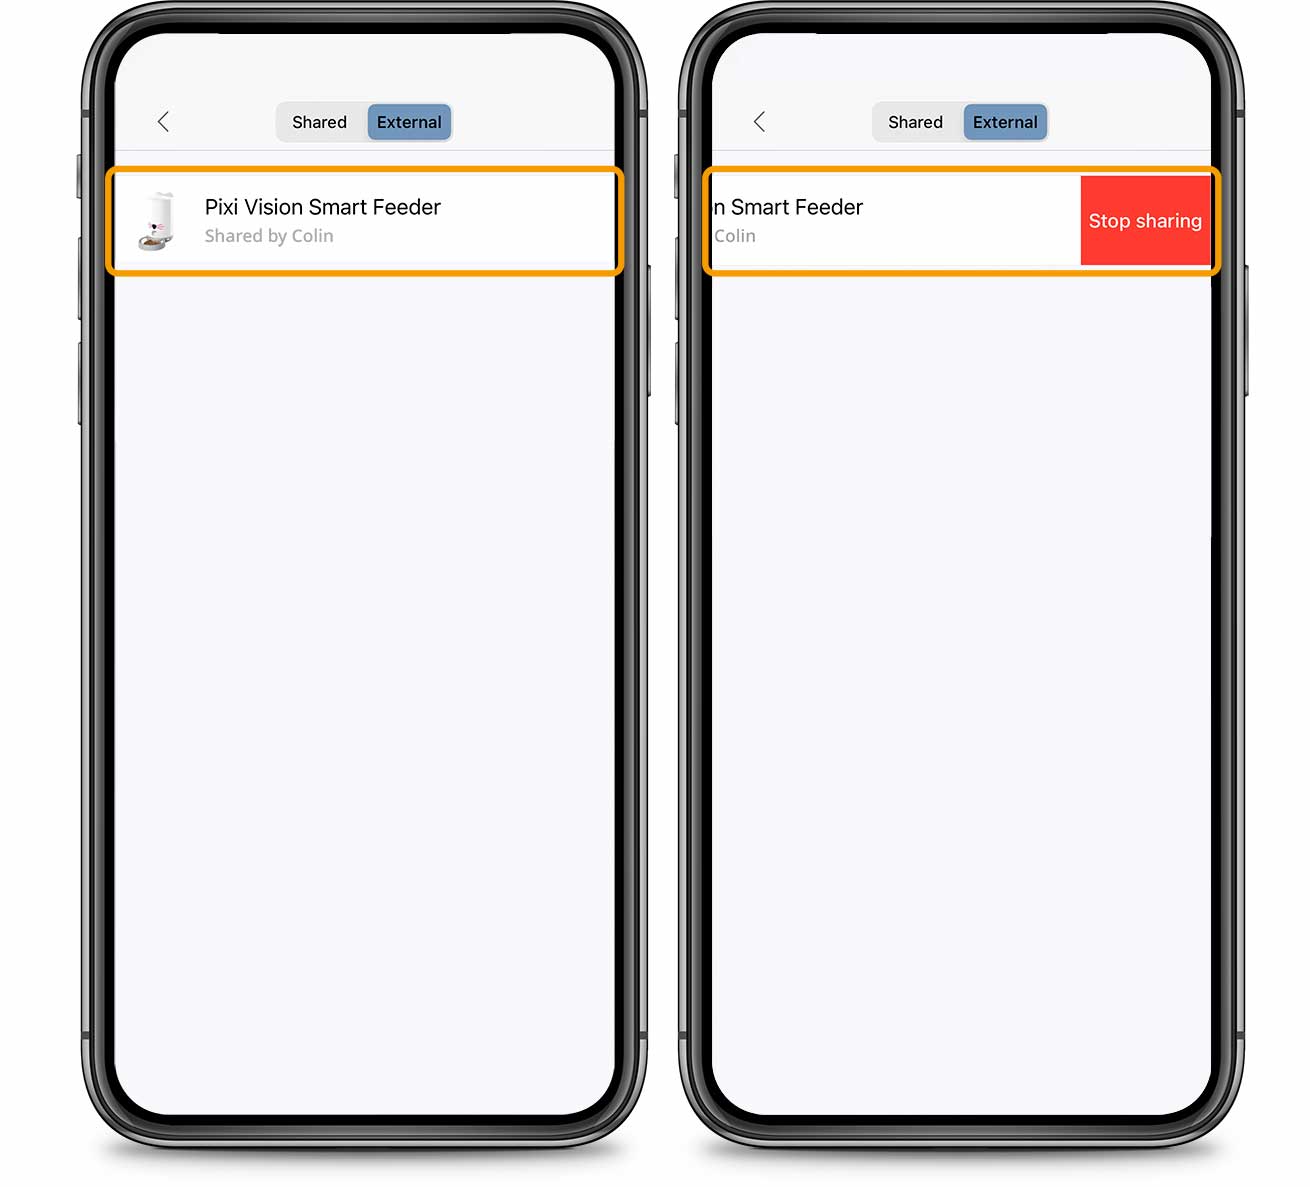
To stop sharing devices that belong to someone else, open the ‘External’ tab and swipe the device to the left. Tap ‘Stop sharing’ and confirm.
5.14 Camera
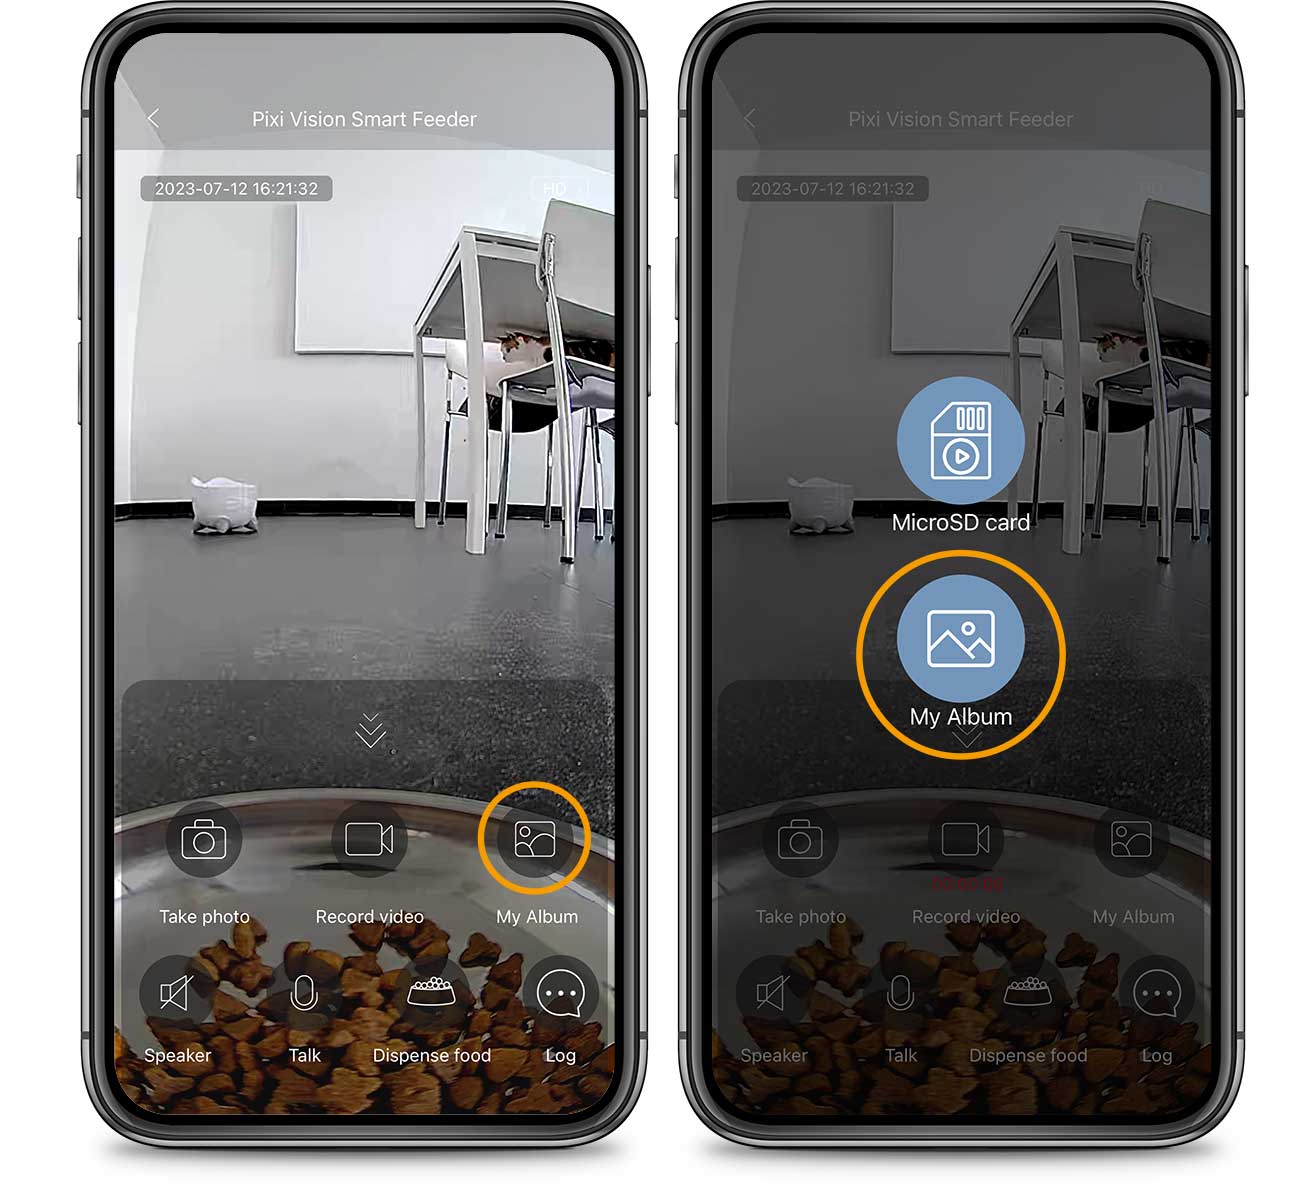
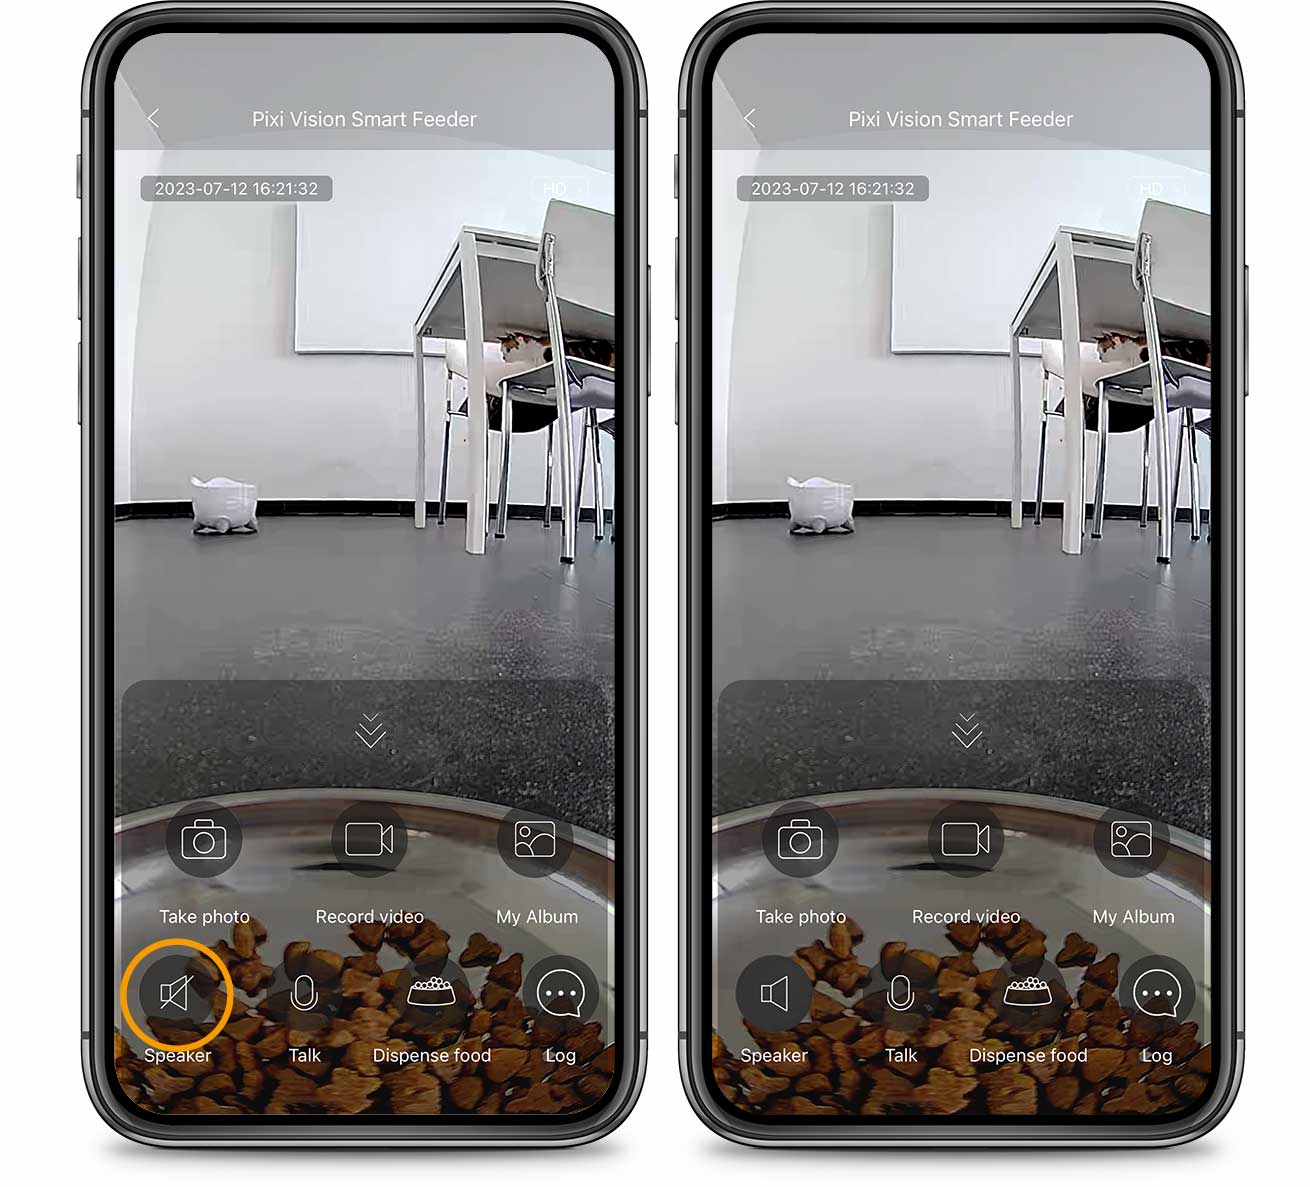
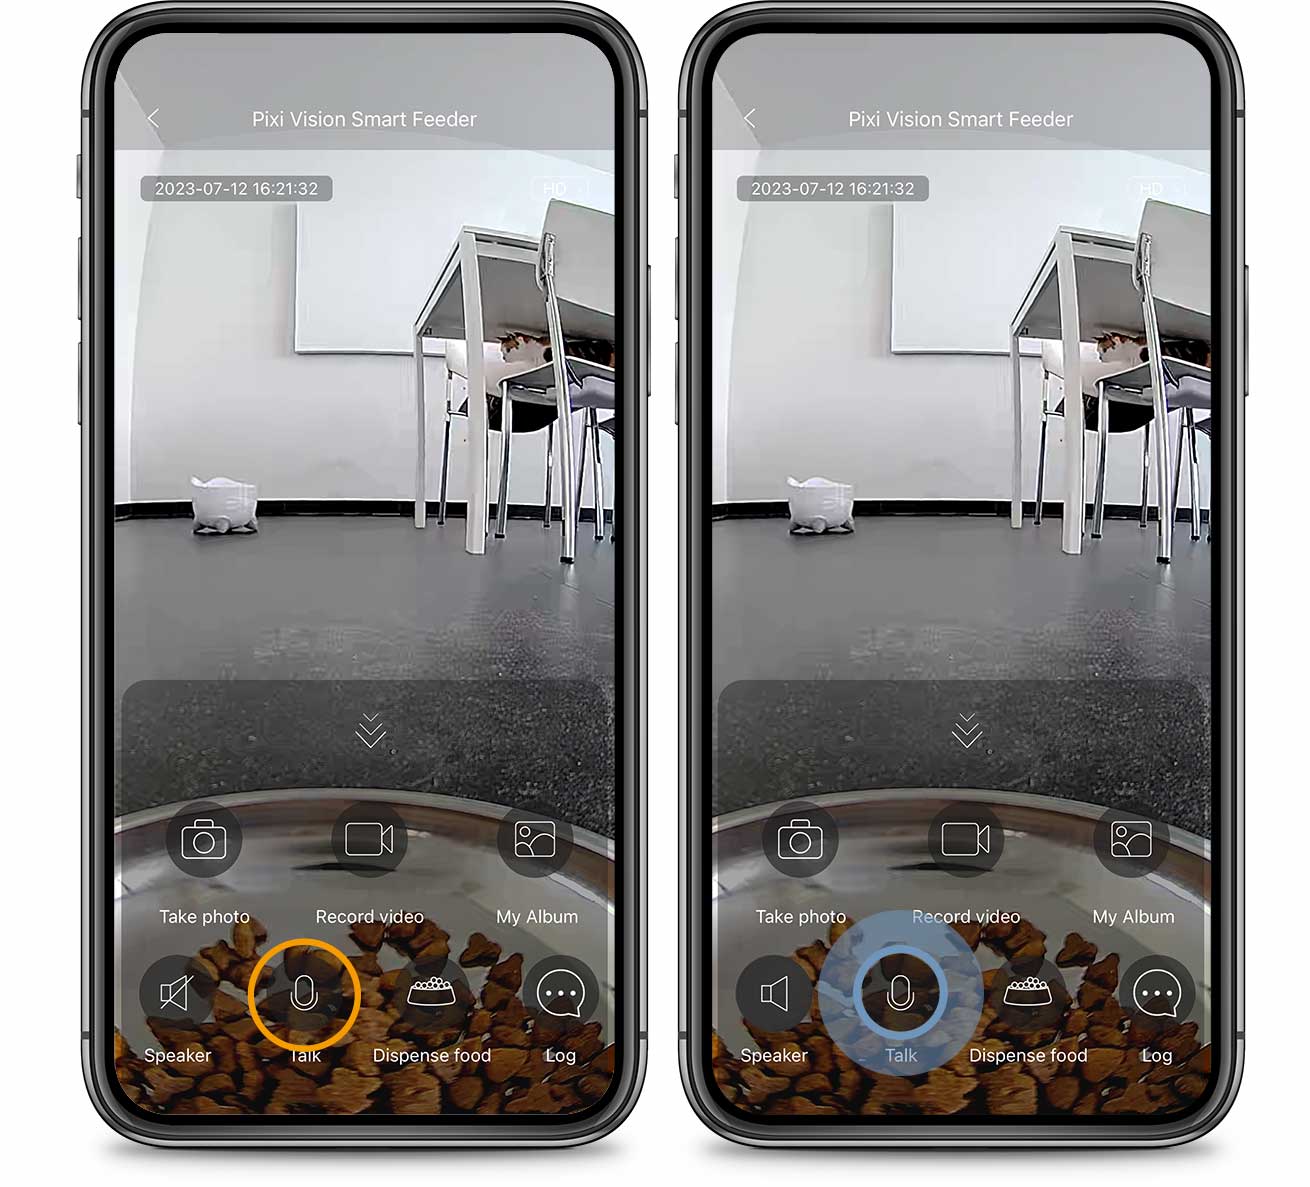
When you press the camera button in the app, you will see the camera view of the feeder.
- Take a photo; this will take a photo and save it to your ‘My Album’ and your phone. Please note that once it is delete in one stop, it will also be deleted in the other.
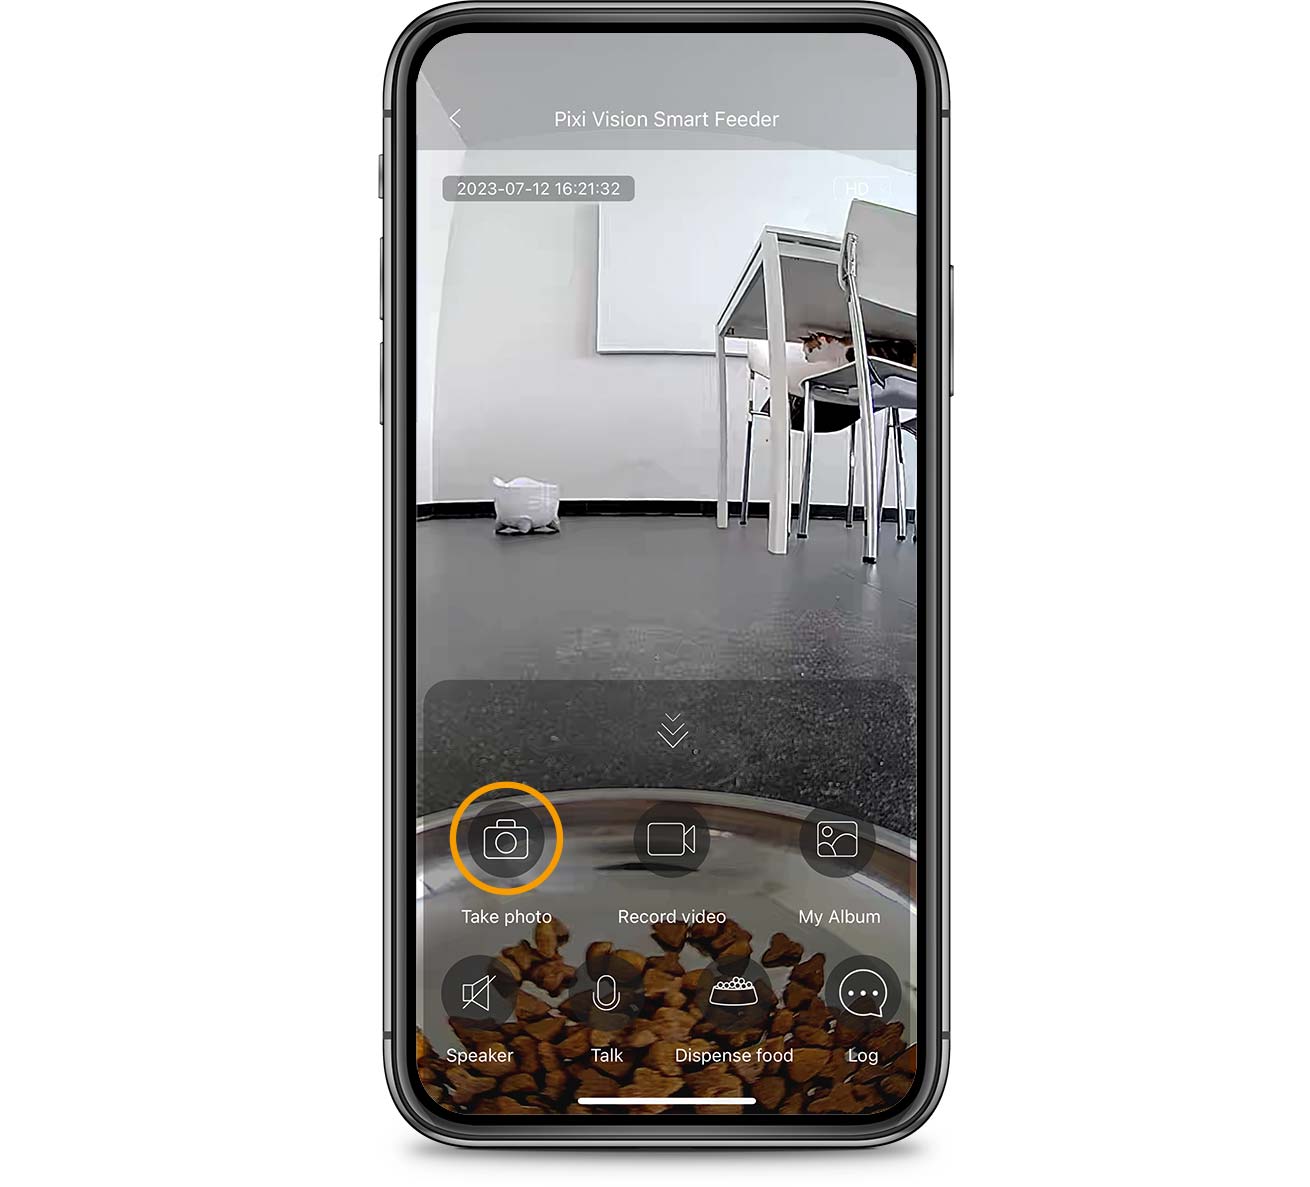
- Recorded video; record a video of what is happening live
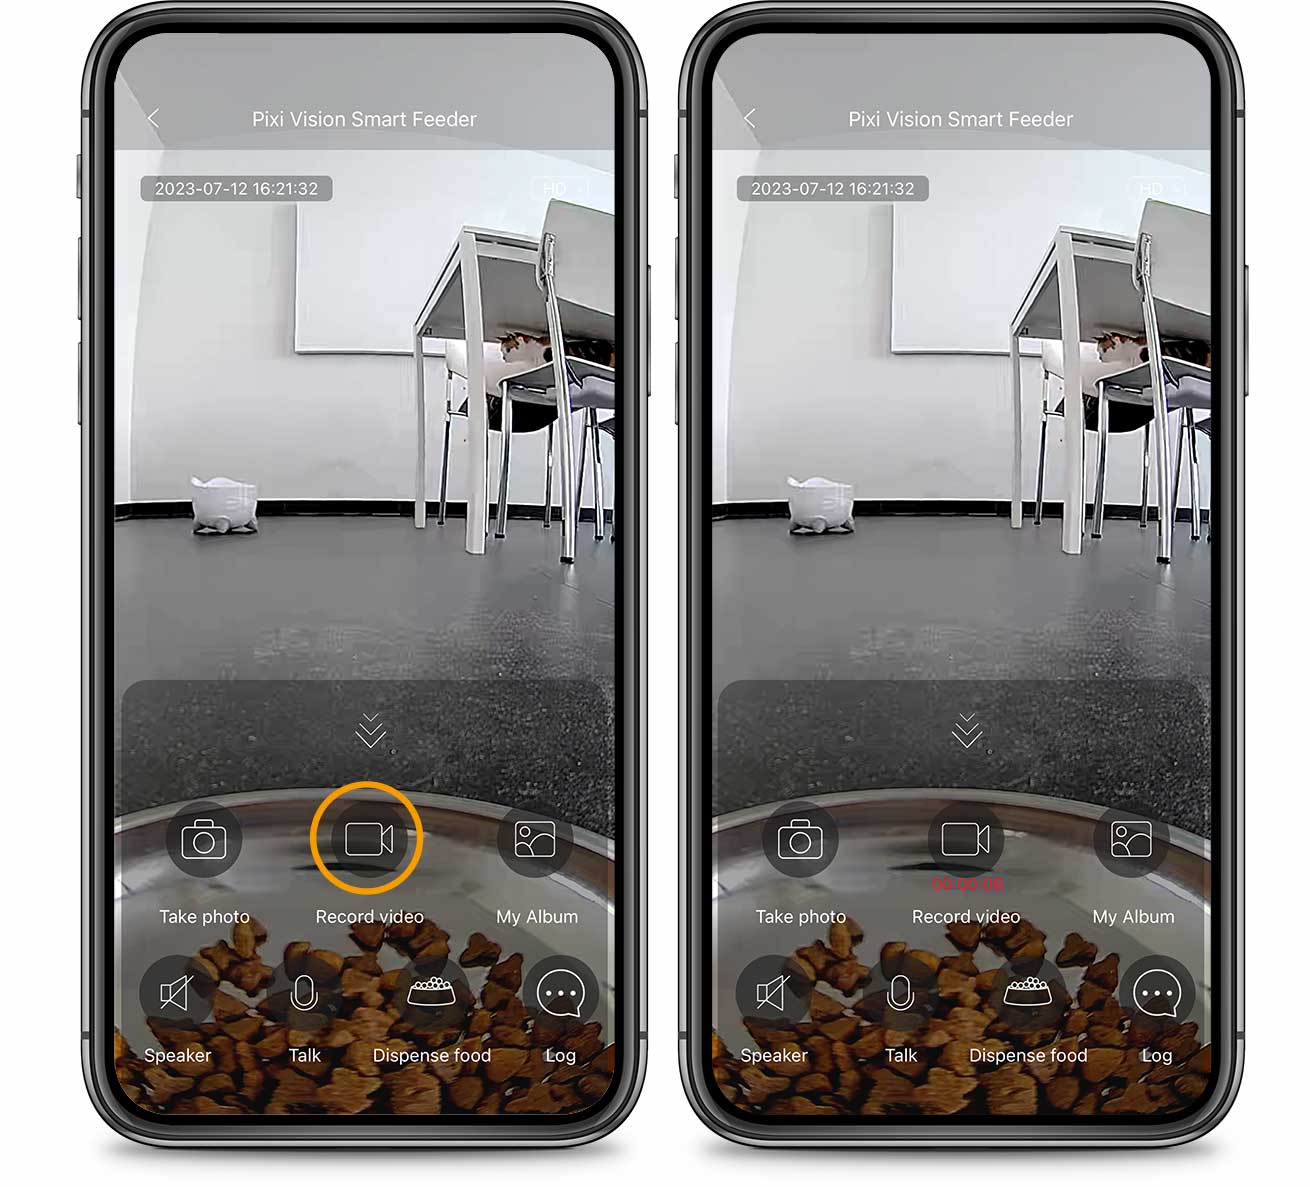
- My album; here you can see all the photo and video footage that have been taken. When you have a MicroSD card and click on this, you will see an overview of the recorded footage. If you press the small arrows you can skip between days and recordings that have been recorded by motion detection. If you select ‘My album’ you will see all the footage that you have recorded manually.
- Speaker; turn the speaker of the feeder on or off.
- Talk; press and hold this button to talk to your feline
- Dispense food; dispense food once you see your cat is waiting
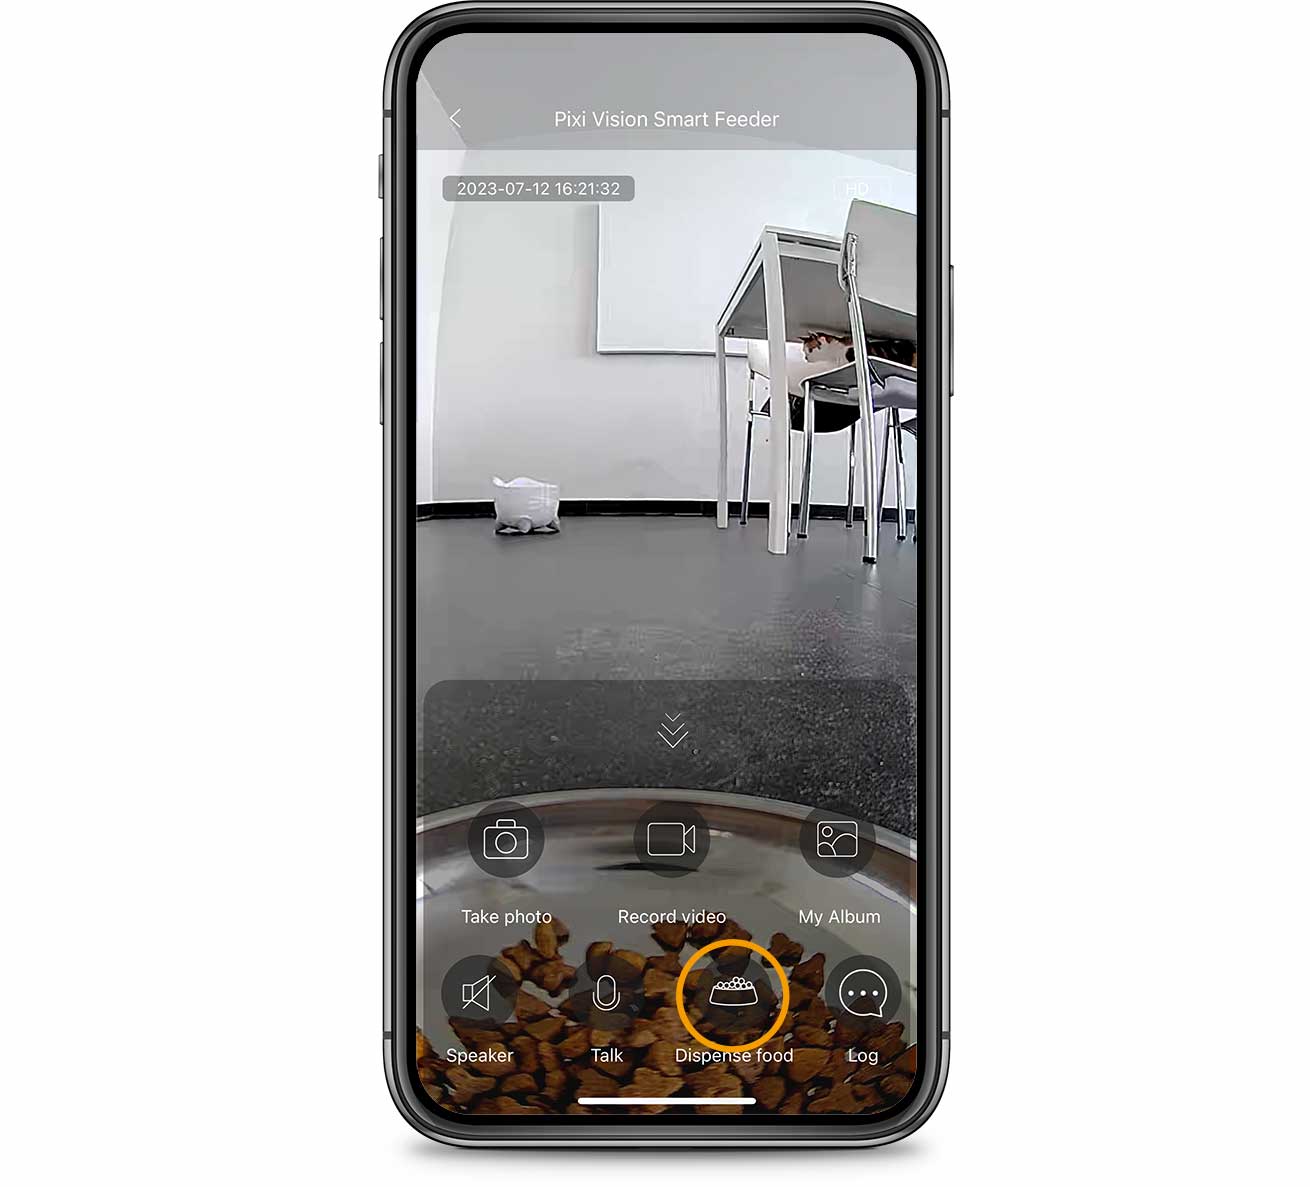
- Log; get an overview of the motion detected recordings
Step 5 completed – Mission accomplished
Now you know everything you need to know about the PIXI Vision Smart Feeder! Still have questions about your device? Return to the PIXI Vision Smart Feeder Help & Advice page to find all the information you need.
Go to the PIXI Vision Smart Feeder Q&A page or
